This is the second in a series of posts about the demo I presented during my “IoT and the FileMaker Data API” session.
Construct #1 – the original Billy Bass
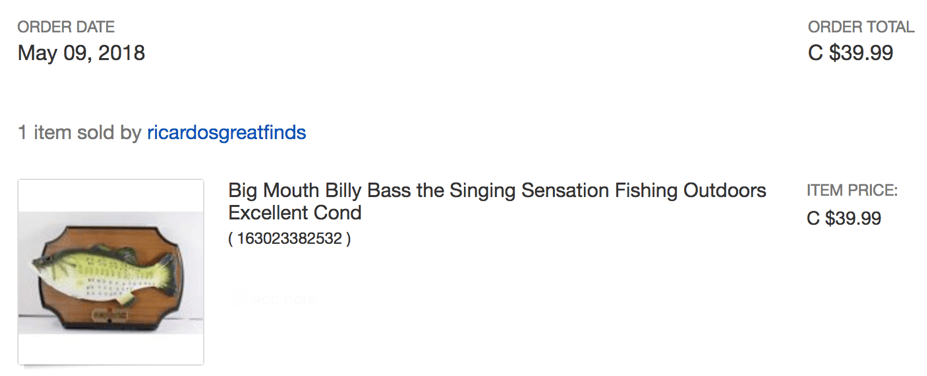
I wanted to find a Billy Bass that was as close to the original one used in the 2001 DevCon session, so I started digging around on eBay, and this is the one I ended up buying:
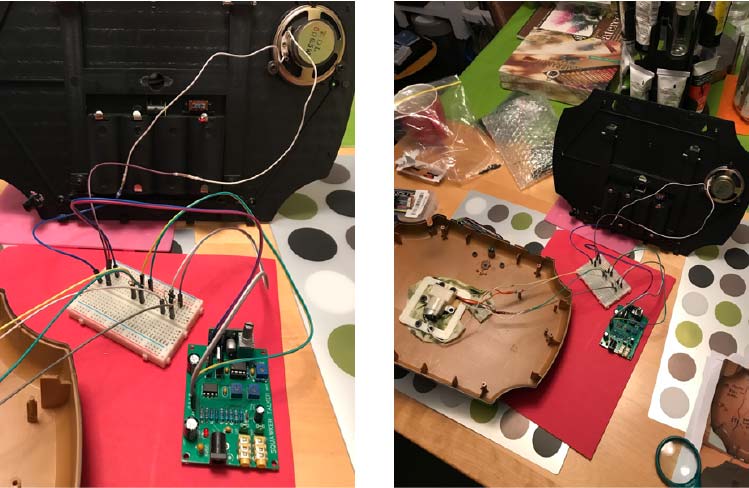
When it arrived, I unscrewed the back to see how I could get at the motors (see Figure 10). There’s a small controller unit in there with wires going to the motors, the speaker, the motion sensor, and the battery compartment.
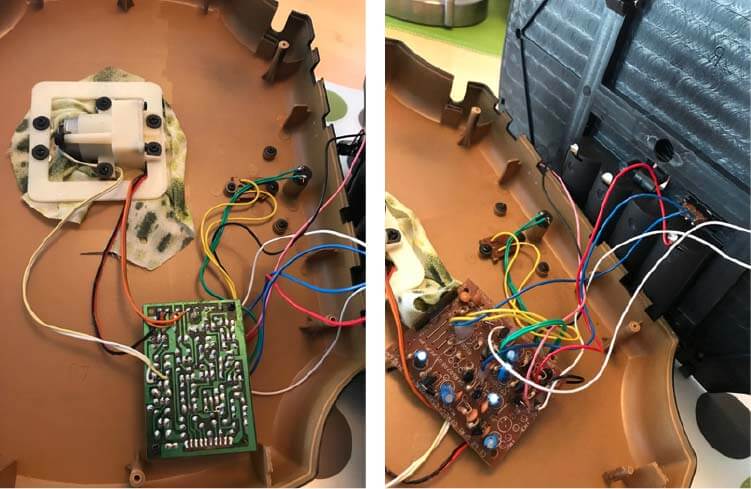
I cut all the wires as close to the controller unit as I could and then removed everything except the wires that go to the three motors and the wires that come down from the speaker.
This particular Billy has three motors: one for the head, one for the tail, and one for the mouth. Those are the wires that go off to the big white area in the center of the fish. When I was done with the demolition, I had just the three pairs of wires that each led to each of the motors.
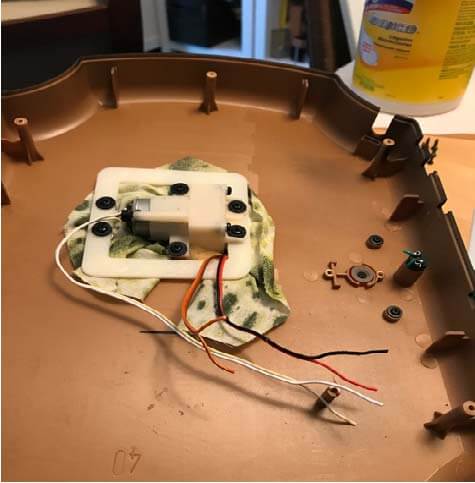
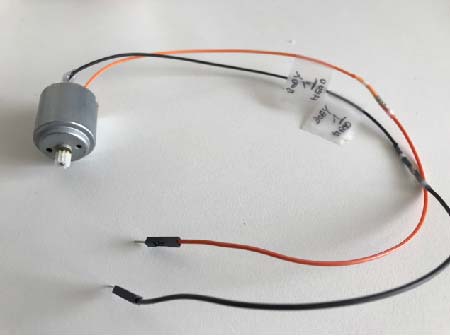
These motors are fairly basic 6V brushless DC items (as I would find out much later in the process – at this particular time in the process I saw no reason to take them out just to look at them, since I was not confident that I could put it all back together).
Linking the Raspberry Pi and the Motors
Now I had to find something to connect those motors to and make them run: a motor controller board that would bridge the gap between the Raspberry Pi and the motors.
As I was searching for existing Billy Bass projects (there are a few that use Alexa), I came across a small device named the Audio Servo Controller that seemed promising.
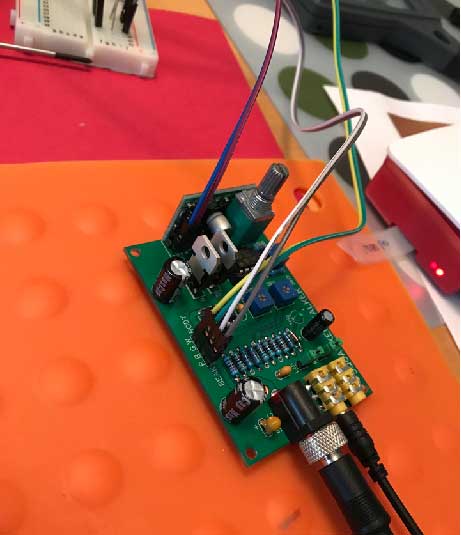
In talking to Jack – who created the board – he mentioned that he had another board that was better suited for the task: the Squawker Talker. You can see it an action in a demo video on page 2 of this thread.
Squawker Talker drives the motors and since it has a built-in 3-Watt amplifier that uses Line-In for its audio input, I could use a simple 3.5mm male-to-male audio cable from the Raspberry Pi to this unit to play the audio and connect the amplifier on the board to the Billy Bass speaker. And it comes with a power supply to drive it all. That looked perfect, so I ordered one the Squawker Talker units ($65)
At this point, I was not comfortable with soldering, so I settled on using heat shrink seals to connect the Billy wires to small jumper cables to plug into a breadboard. With the heat shrink seals, I can use a heat gun to ‘melt’ the wires together and avoid the soldering. You can see the result with the heat shrink seals in that picture above that shows the motor, about halfway on the wire.
When I had all the wires connected, it looked like Figure 13. The green unit is the Squawker Talker, the white unit is the breadboard where I plug in the cables.
How Does it Work?
The Squawker Talker controls the motors and the speaker. So where does the Raspberry Pi come into play then? The Raspberry Pi (RPI) is the ‘connected device’ in this IoT setup. In other words, it has to run on its own, and have a connection to the internet so that it can check whether we have flagged a record in FileMaker to be played by Billy Bass.
I was already using Raspberry Pis as IoT devices to collect sensor information and send it to FileMaker Server, and I was using Windows 10 IoT as the operating system for the RPIs, so I decided to use Windows 10 IoT here too.
My preferred language for this is C#, and I have an open source project on GitHub that is a .NET wrapper around the FMS Data API (https://github.com/wimdecorte/FMdotNet__DataAPI).
With that, it was a natural thing for me to turn to C# to write the code to run the Raspberry Pi.
You can download the code here: https://github.com/wimdecorte/BillyBassPolly.
In a nutshell, the code does this:
- There is a small config file to store the name of the FileMaker server, the name of the FileMaker file, the layout to use and the FileMaker account and password to access the file;
- The Raspberry Pi loops every half second and queries the FileMaker Server through the Data API (the interval is a config setting too), it looks for any records that have the “flag_ready” field set to 1 (the checkbox labeled “Speak It” on the BILLY layout);
- If it finds a record where that checkbox is checked, it downloads the mp3 from the container field;
- And then it uses the Operating System media player to play the mp3;
- At this point the Squawker Talker takes over and forwards the audio to the Billy Bass speaker and moves the body and mouth.
And here is the end result:
Based on the audio input, the mouth will move in sync, and you can adjust the threshold level on the Squawker Talker by adjusting screws on the board. The body and tail move randomly.
As you can see in the video, the head does not turn entirely in a 90-degree angle and I was a little unhappy about that. I wanted the head to turn all the way so that Billy Bass would look at you, as it is meant to.
I also felt that the whole construct was a little too… easy — it’s not driving the motors directly; the Squawker Talker board takes care of that.
I decided to have another go at it, and this time without the Squawker Talker board, I would do everything from the Raspberry Pi. And I wanted a fish whose head was working properly.
So, I looked around on eBay a little more to see if I can find one that is guaranteed to have a head that turns better and then find a way to interact with the motors.
In part two, I show how I used the Raspberry Pi to control the Billy Bass head.