This is the fourth in a series of posts about the demo I presented during my “IoT and the FileMaker Data API” session.
Making it Work in Python
The first half of my DevCon presentation would be about collecting sensor data from a Raspberry Pi and sending that data to FMS through the Data API, and I am using Windows 10 IoT and .NET code for that. If I could do the second half of the presentation using Python, then it would show off the versatility of both the Raspberry Pi device and the FileMaker Data API.
Raspberry Pis don’t have hard drives; they use Micro SD cards to run from so switching operating systems is as easy as switching SD cards. I got one with the latest Raspbian installed and then followed the Adafruit instructions to get their Python library installed and run the tests. The tests worked just fine, so I could move on to figuring out how to write the code in Python.
Finding the Right IDE
I was trying to figure out what IDE (Integrated Development Environment) I would need to write Python code but turns out that Visual Studio 2017 does that just fine, so I didn’t have to learn a new tool.
The fully working source code for what I ended up doing in my Devcon session is here on GitHub: https://github.com/wimdecorte/BillyPython
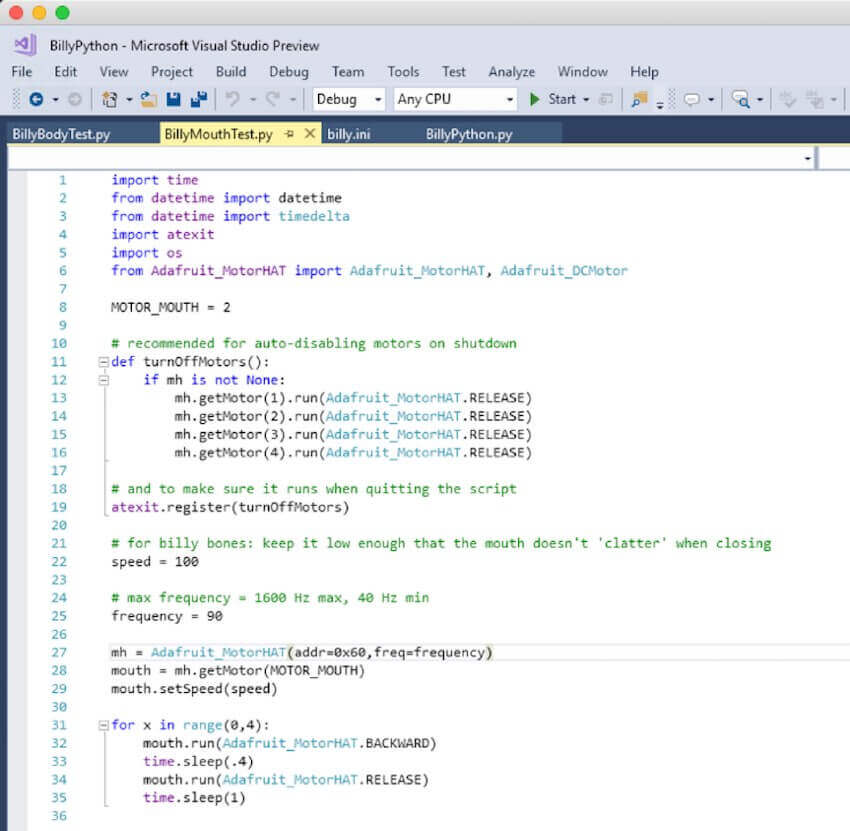
Figure 22 is from a Windows virtual instance, running Visual Studio 2017 and shows what files there are in my source code:
- billy.ini is the config file (my FileMaker Server address, name of the file, layout and login credentials, and so on)
- BillyPython.py is the working version of the whole thing: query the FileMaker Data API to see if we need to play audio and the code to make the mouth and head turn
- Before I got to writing the whole thing, I needed to figure out what the correct settings were to move the fish’s mouth and head. For that I started with two test files: BillyBodyTest.py and BillyMouthTest.py
The purpose of those test files was to figure out what the ideal settings were for the motor to deliver sufficient power for just long enough to make the head and mouth move, but not so much power that I would break the mechanism.
If you want to build your own Billy Bass setup, then I strongly suggest using these two files to find those ideal settings for your fish. I was working with two Billy Bass Bones since I wanted redundancy in case I broke one and found that they each required subtle differences in those values for maximum effect.
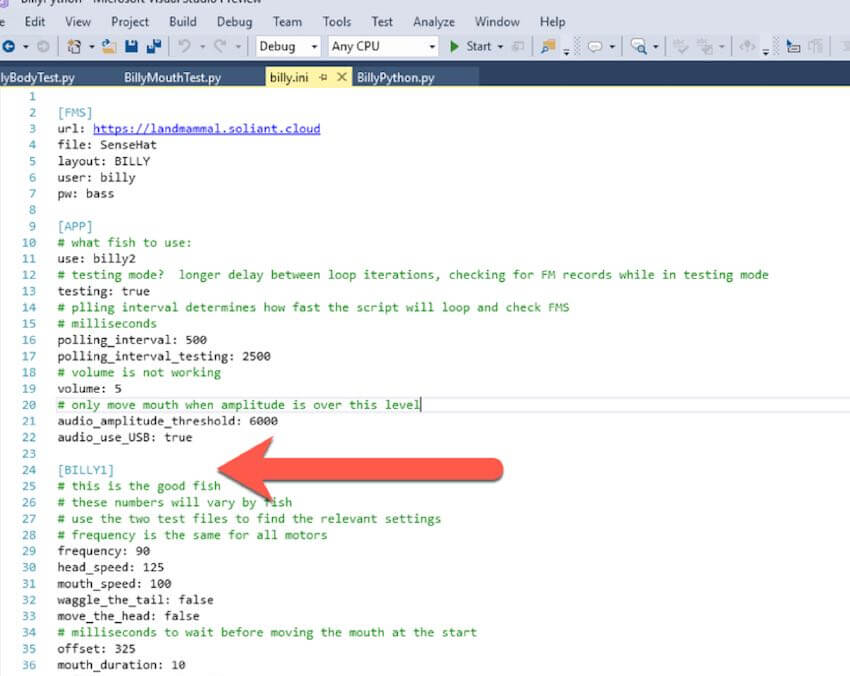
Since time was running out, I ended up storing these motor values in the billy.ini config file (see Figure 23) instead of storing them in the FileMaker file and reading them from there. It would not be a big change to add that since I had it working in .NET (see the MOTOR and MOTORHAT layouts in the FileMaker demo file).
Re-coding in Python
I already had most of the code developed in C# so the logic was clear to me. Figure 24 shows the workflow that I needed to re-code in Python. The Raspberry Pi would query FileMaker Server twice every second to see if any records were flagged there. If there was such a record, it would download the mp3 and play it back while moving the mouth and the head.
The first order of business was to find a good Python wrapper around the FileMaker Data API. I settled on David Hamann’s fmrest, on GitHub. As I had never written Python before, David was very gracious in answering my questions to keep me going.
One of the challenges was finding out how to do multiprocessing in Python because moving the head and mouth had to happen at the same time as playing the audio. That took a bit of Googling to get right. Fortunately, there is a ton of useful info around.
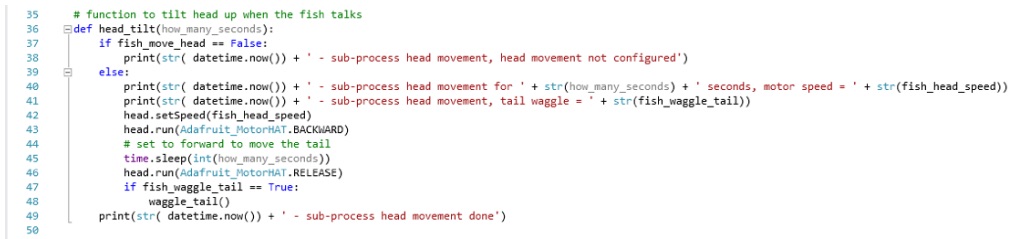
Moving the head was easy enough, once I have the audio I can figure out how long it is and then send a signal to the head motor to move in the right direction for that length of time.
That happens in this block of code as shown in Figure 25.

But there was the obvious big challenge: how do I make the mouth move in an approximation of what the audio was saying?
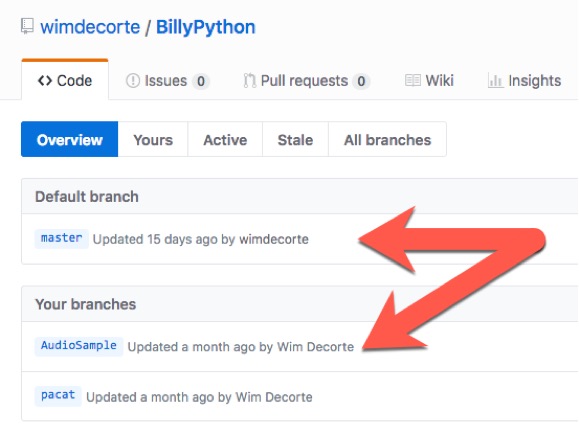
When you check the source code on GitHub, you’ll notice that there are three branches (see Figure 26).
“Pacat” can be ignored, that was an attempt to have the Raspberry Pi ‘listen back’ to the audio as it was playing to try and determine when to open and close the mouth based on volume or something else. I abandoned that branch as I was running out of time.
The “master” branch is where I am using the visemes as supplied by Amazon’s Polly to move the mouth and “AudioSample” is using the mp3 amplitude to determine when to mouth the mouth. This approach does not work with the visemes but just inspects the audio file itself.
Using Amplitude
“AudioSample” in essence uses the block of code shown below to chunk up the audio into segments of 200 millisecond and for each segment it determines the amplitude of that chunk (see Figure 27). If the amplitude is higher than the threshold it runs the motor to open the mouth for the preset duration and then closes it again.
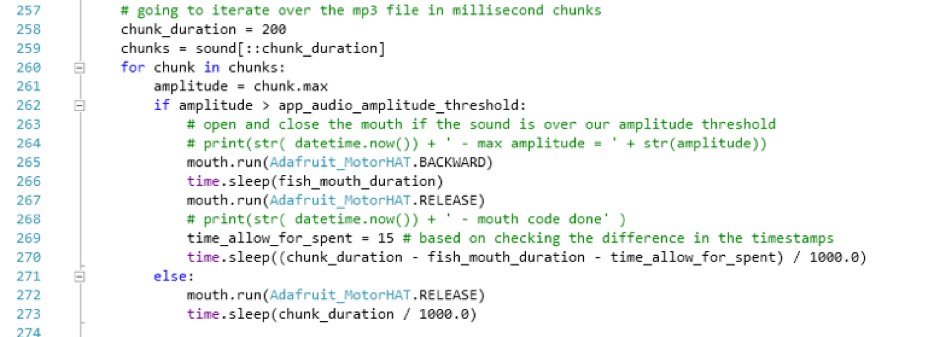
The variables involved here to make this look natural are:
- length of the audio segment
- amplitude threshold
- ‘fish_mouth_duration’: how long do you keep the mouth open?
- ‘time_allow_for_spent’ to account for the time it takes to mechanically open and close the mouth
With some careful testing, you can get them just right depending on your fish. The code depends on the pydub library for the audio-inspection.
In part five, I show how I used Visemes.