At this year’s DevCon in Dallas, TX, I presented a session on FileMaker and IoT (Internet of Things); in preparing for it I settled on this definition of IoT:
The Internet of Things is the integration of people, processes and technology with connectable devices and sensors to enable remote monitoring, status, manipulation, and evaluation of trends of such devices…”
Based on that definition and the highlighted core elements, I split up the DevCon session into two parts:
- Collecting sensor data and sending it to FileMaker Server through the Data API; and
- Manipulate the environment by driving motors based on data retrieved from FileMaker Server.
The first part was easy, using a couple of Raspberry Pi 3s, a SenseHat on one, and a GrovePi hat on the other and using various sensors to collect data. You can download the FileMaker demo file and find links to the source code here. I had been using those same Raspberry Pis to stress-test the beta versions of FileMaker 16 and 17’s Data API, and it has made me a big fan of the Data API: it is fast and robust.
But I had to find a good demo that showed that second aspect; to drive those motors. A robot or a car were apparent choices but probably too obvious. I toyed a bit with the idea of a “useless box” but couldn’t quite work in a good FileMaker angle.
Then I thought of Billy Bass. Back in 2001/2002, Rich Coulombre and his team at The Support Group used the Troi serial plugin to connect Billy Bass to their computer and make it talk.
A Gemmy Billy Bass toy has two or three motors to move the body, tail, and mouth, so it would be perfect. It’s a nice link to the past, so I went for it.
The following lists how it had to look like upon completing the work:
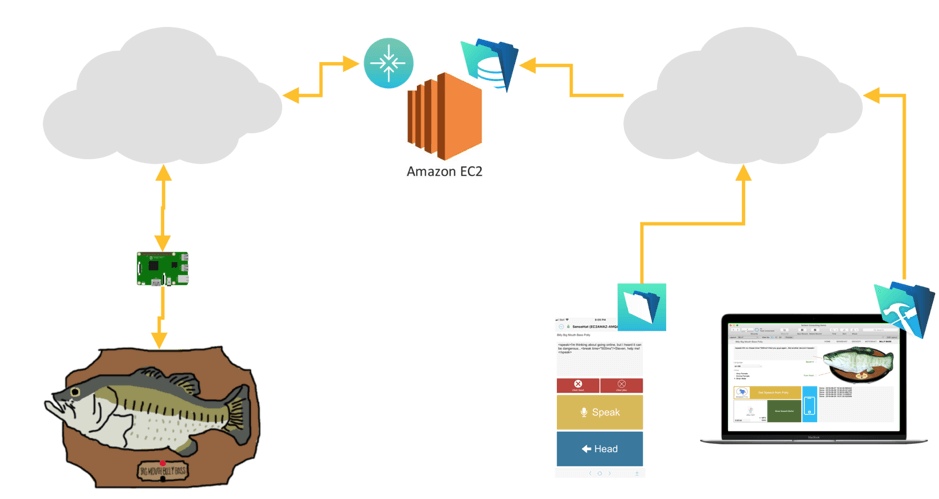
- a FileMaker file hosted on FileMaker Server and, to keep things in the ‘Cloud’ realm, specifically a FileMaker Server 17 running on an Amazon EC2 instance;
- the user should be able to type anything into a text field in that FileMaker file; and
- Billy Bass should then speak what is typed. The Billy Bass is connected to the internet through a Raspberry Pi, listening for instructions through the FileMaker Data API.
Off to work then.
FileMaker Server and the FileMaker file: text-to-speech
Putting the file on a FileMaker Server was easy, I chose my dev server which is part of our Soliant.cloud® infrastructure. It’s a Windows instance on Amazon Web Services (AWS) in the Amazon us-east-1 region, which comes down to North Virginia. The server is fully patched with FileMaker Server 17v2.
Now for the user typing text into that hosted file. We need to get audio for whatever was typed in. We need a text-to-speech service that we can send that text to and that will generate audio for the speech playback. There are several of those services around, but I am most familiar with the Amazon Polly service:
If you want to play around with the service, you can test it out here after signing in with your AWS account:
To interact with Polly from inside FileMaker we will be using the Polly REST API. I could have used the Raspberry Pi itself to interact with Polly through one the available SDKs. However, I wanted this demo to be about FileMaker’s capabilities, and FileMaker is extremely good at interacting with REST APIs.
So, FileMaker will send the text to Polly and receive the audio file in return.
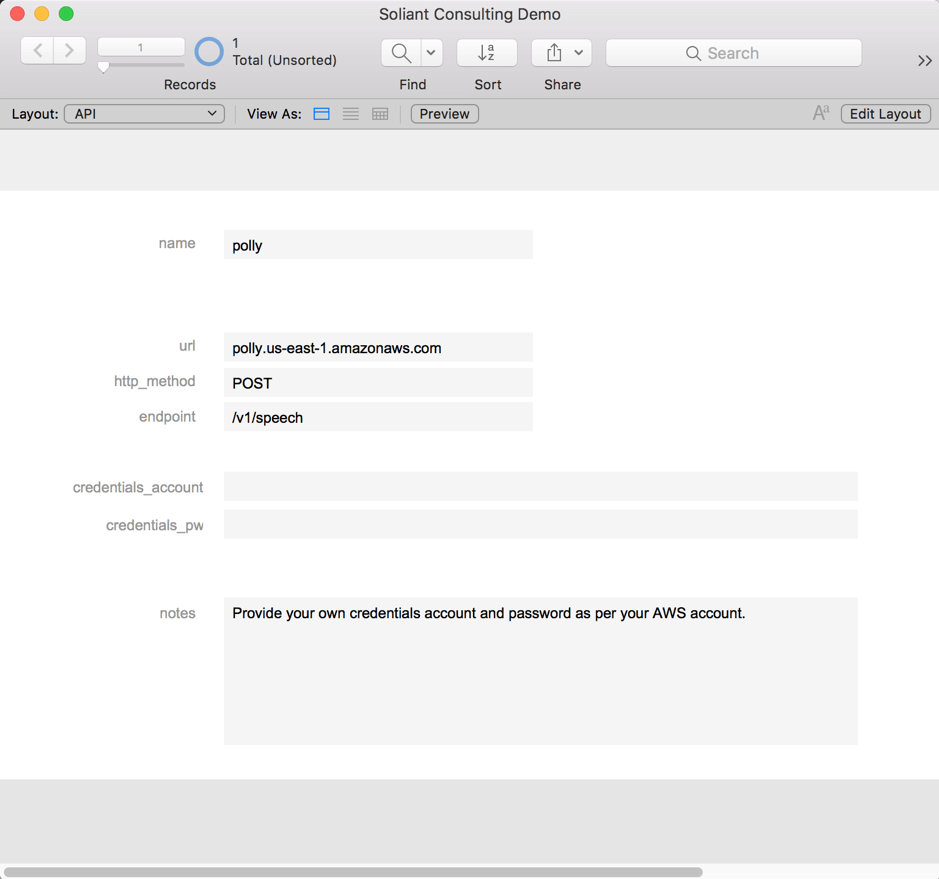
In the FileMaker file, the API settings are stored on the API layout. That’s where you’d enter your own AWS API key (see Figure 2):
The other thing we need to provide is somewhere to enter the text you want Billy Bass to speak. That’s the BILLY layout (see Figure 3).
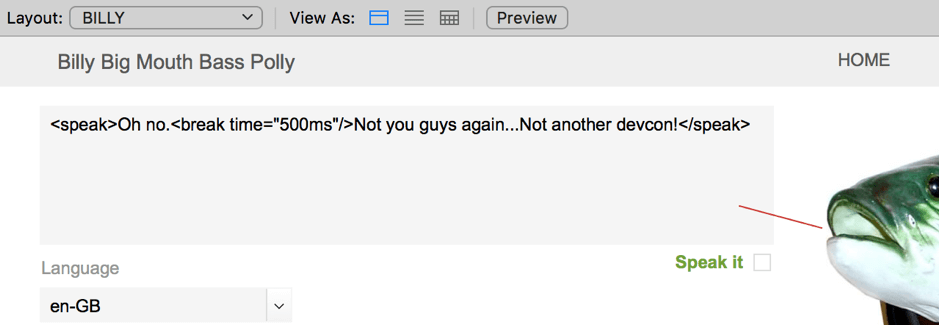
As you enter text, it’s automatically tagged with the and XML-like tags. That’s because we will take advantage of Polly’s ability to process text that is marked up with SSML (Speech Synthesis Markup Language). You will see why later. Polly itself can work with just pure text as well; you have to indicate your choice in the JSON instructions that you send over to Polly.
Besides the actual text that we want to synthesize, we also have to send some other information over to Polly. According to the API documentation, the call should look like this:
POST /v1/speech HTTP/1.1
Content-type: application/json
Body:
{
   "LanguageCode": "string",
   "LexiconNames": [ "string" ],
   "OutputFormat": "string",
   "SampleRate": "string",
   "SpeechMarkTypes": [ "string" ],
   "Text": "string",
   "TextType": "string",
   "VoiceId": "string"
}
That’s easy enough to do, FileMaker is excellent at creating JSON, and the “Insert from URL” cURL options will let us specify the POST method and set the Content-Type header.
To make sure that Polly will accept the request we are sending to it, we have to include authentication information in the header of the call. That is probably the biggest challenge in making this REST call.
The section quoted below comes from the Authentication and Access Control for Amazon Polly page and describes our options for authenticating.
The SDK and CLI tools use the access keys to cryptographically sign your request. If you don’t use AWS tools, you must sign the request yourself. Amazon Polly supports Signature Version 4, a protocol for authenticating inbound API requests. For more information about authenticating requests, see Signature Version 4 Signing Process in the AWS General Reference.
Since we are not using any of the AWS SDKs or the AWS CLIs, this means that we need to use that “Signature Version 4” protocol, which comes down to sending a special Authorization header as part of the cURL options.
As it so happens, Salvatore Colangelo from Goya (famous for their BaseElements analysis tool and BaseElements plugin) demoed this at the 2017 Devcon and described the process in this blog post: http://www.goya.com.au/blog/generate-aws-signature-version-4-in-filemaker/
So, I gratefully borrowed his script and supplemented it with the rest of the data that Polly needs: what language to use, what voice for that language, whether we are sending SSML text or pure text, and whether we want an MP3 file back and at what bitrate.
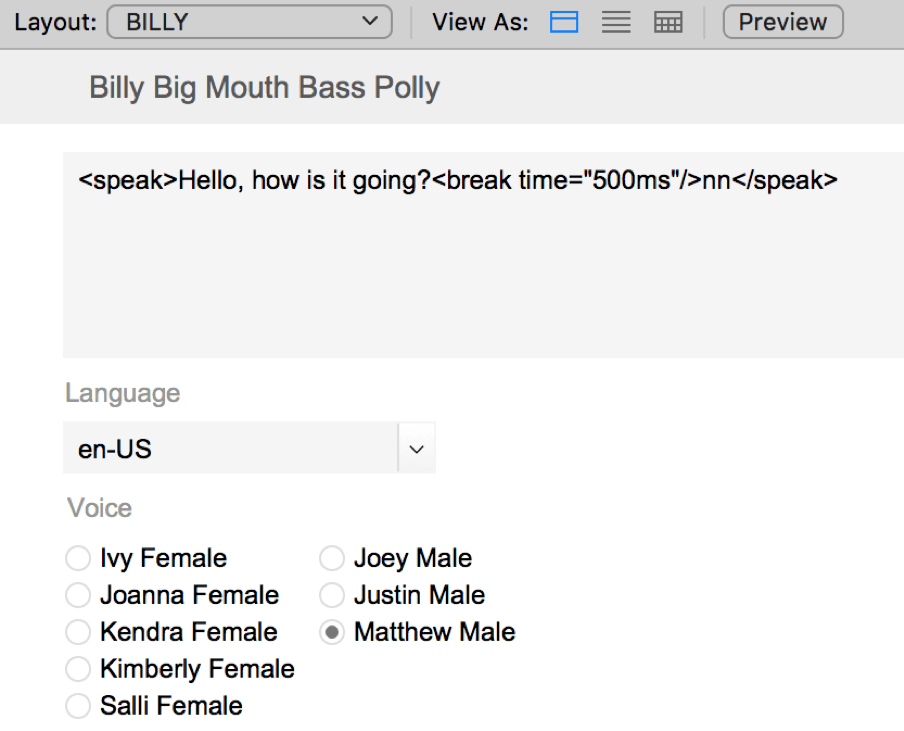
The language and voice are something we want to play with, so I made those choices available on the FileMaker layout (see Figure 4).
The other settings we leave pretty much to their default because they produce a nice small MP3 file that the Raspberry Pi will be able to download efficiently.
To synthesize the text shown above, the request that our script produces is this:
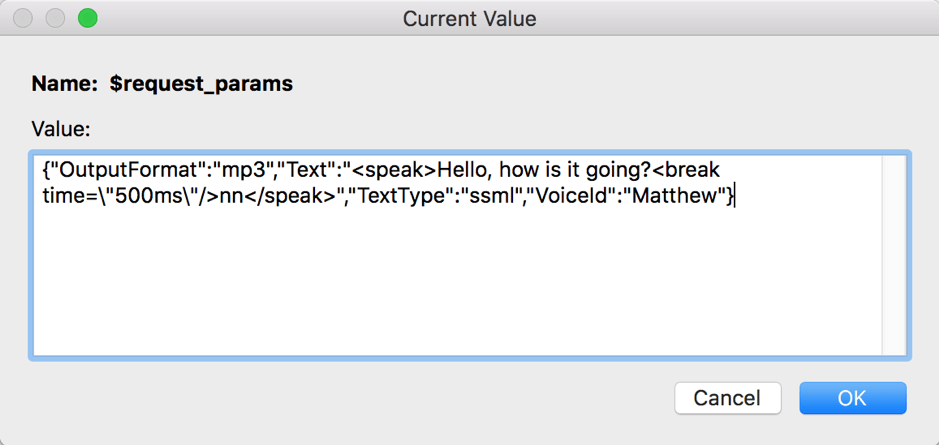
The JSON body of the request is stored in the variable $request_params and contains just the bare minimum that we must send (se.e Figure 5)
We use that variable as part of the cURL options in the variable named $options, so that together those cURL options that we will feed to the “insert from URL” script step look like (see Figure 6).
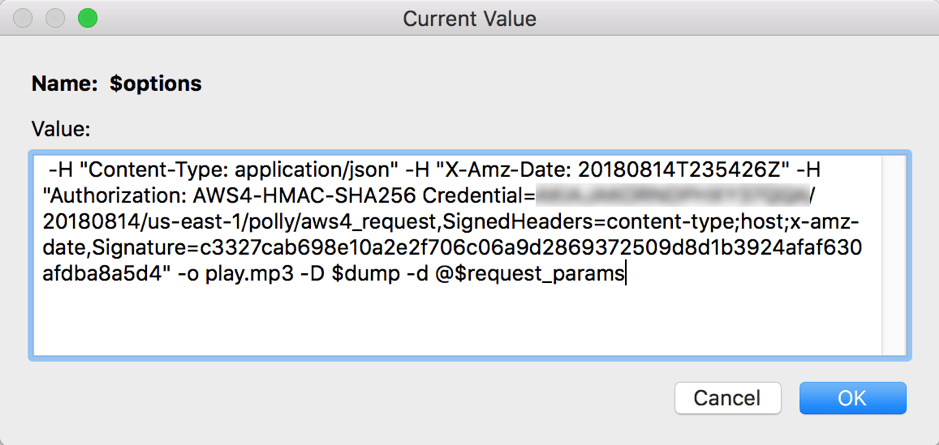
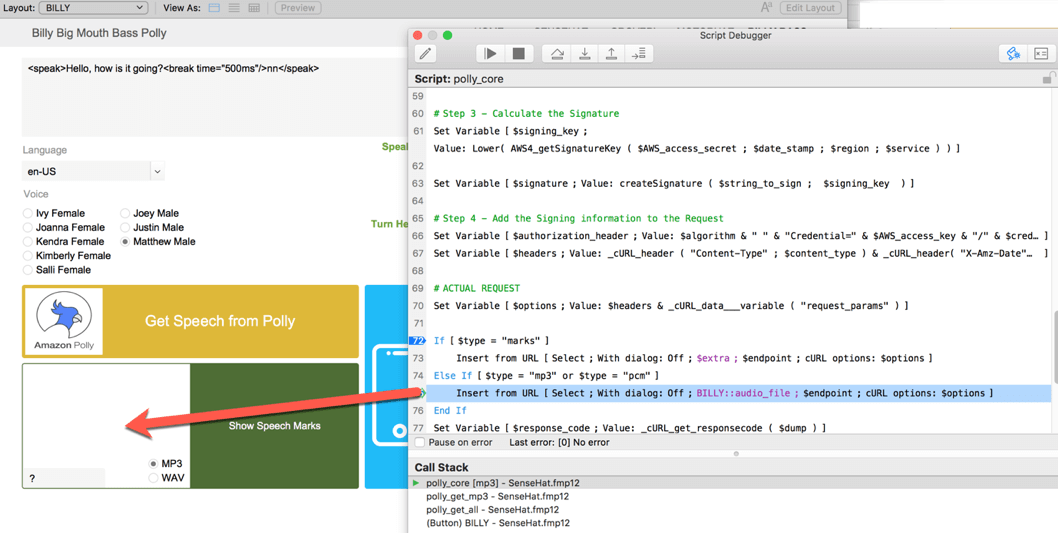
Figure 7 shows the script at the step where we call that “insert from URL” script step and point it to the container field that will store Polly’s mp3 audio file.
When we run the script, Polly sends us the audio file of our text:

So far so good. That’s #1 and #2 done.
Time to start on #3: how to make Billy Bass move.
- The Story of Billy Bass – Part One (setting it up)
- The Story of Billy Bass – Part Two (making Billy Bass move)
- The Story of Billy Bass – Part Three (using Raspberry Pi)
- The Story of Billy Bass – Part Four (switching to Python)
- The Story of Billy Bass – Part Five (using Visemes)
- The Story of Billy Bass – Part Six (Microservices)