This is the final post in my series about the demo I presented during my “IoT and the FileMaker Data API” session.
Using Visemes
The ‘master’ branch is the more interesting one as it uses the viseme information that Amazon Polly provides. For this to work I needed some linguistics help to interpret what those visemes mean.
In my DevCon session I jokingly stated that the session happened because of the help of both my daughters, one is in university studying Biology (fish, get it?) and the other is in university studying Linguistics. So I was all set Thanks, Girls!
Back to those visemes, Figure 28 shows what Amazon sends you:
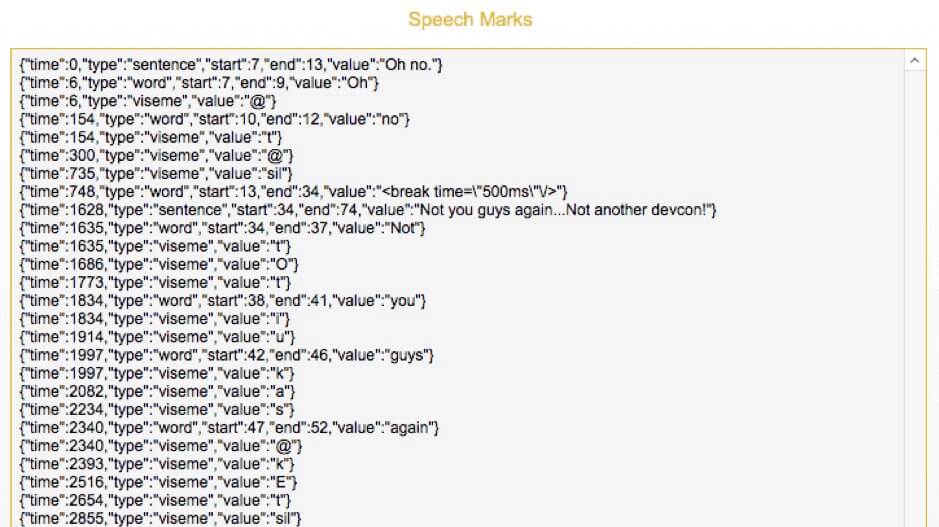
It tells you the mouth position at any time as it changes during the audio. And we can determine the duration from the time elapsed between two entries.
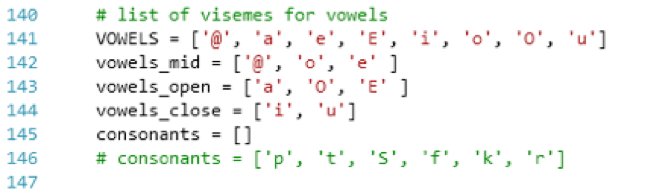
But which of those weird-looking viseme characters indicate whether the mouth is open or closed? Obviously, the plastic fish doesn’t have the full mouth range as we have, it can’t purse its lips for instance. So, I just had to find the ones that mean that the mouth is open, half open, or closed. Figure 29 shows the visemes in master branch code.
Query the FileMaker Data API
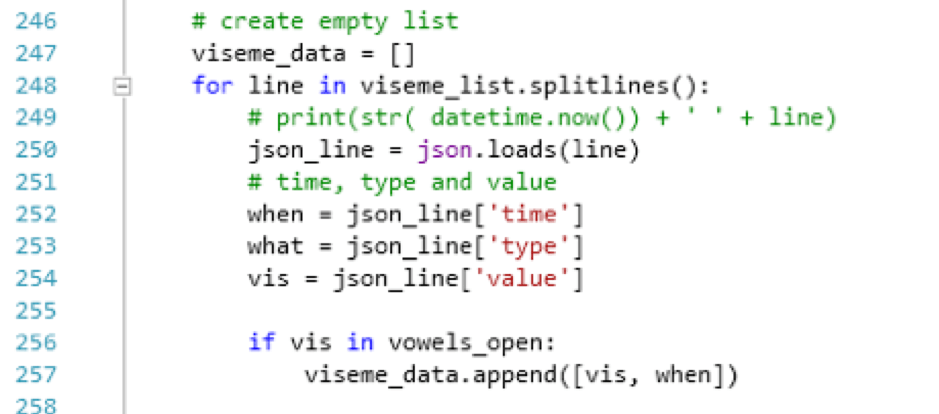
As we query the FileMaker Data API and we retrieve the viseme data we received from Amazon Polly, we process it and build a smaller list of those events that have to do with the vowels that open the mouth:
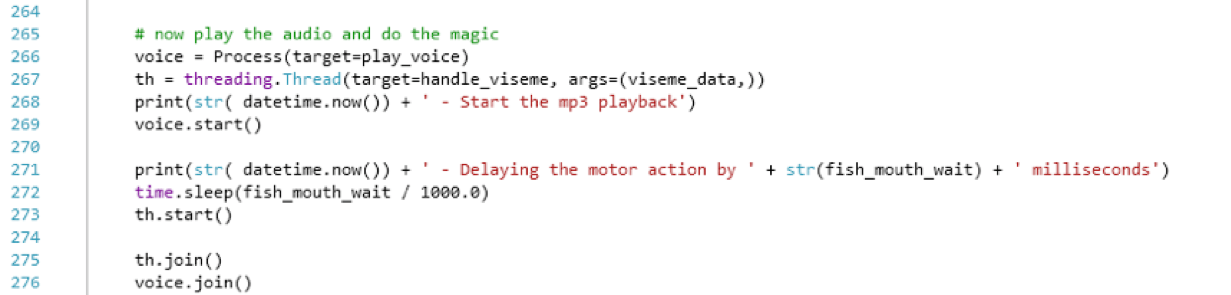
Later in the code when it is time to play the audio and move the head and mouth we spawn a separate thread (lines 267 and 273) to process the data we retained (see Figure 31).
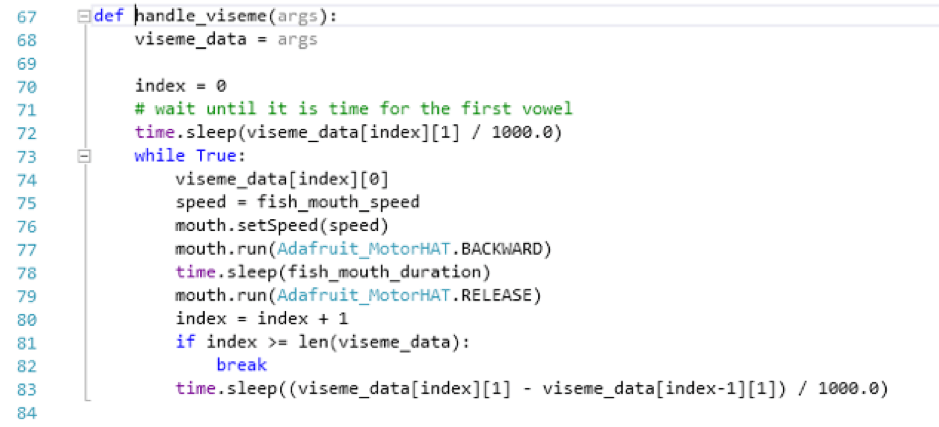
Line 267 invokes this function that loops through that viseme data array and move the mouth at the appropriate time.
In Figure 32, Line 78 opens the mouth for a pre-determined length of time (set in billy.ini) and line 83 puts the subroutine in waiting mode until it is time for the next line in the viseme data, based on the time stamps in the Polly data.
You will note that line 272 in Figure 31 introduces a delay between starting the voice (the audio playback) and starting the thread for the mouth, that’s a value set in billy.ini and set to what I found to be necessary to make sure the mouth action did not start earlier than the audio playback.
And with that I was pretty much done. Everything was working as I wanted. The new pinion gears arrived, and I replaced the old gears on all three of my Billy Basses (the original one and my two Billy Bass Bones), and now the heads turned the proper 90 degrees, making Billy look straight at you as it begins talking.
Mission Accomplished!
My last worry was whether or not I would be able to access my virtual instance of Windows 10 where my Visual Studio 2017 lives (it’s on a VMware server here in the office, behind a VPN) given how flaky hotel networks can be.
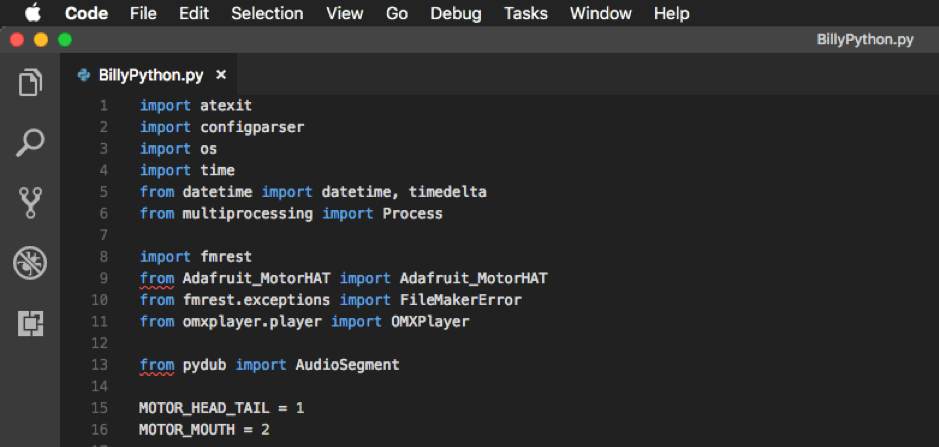
It turns out that the excellent (and free) Visual Studio Code editor on macOS also supports Python as shown in Figure 33.
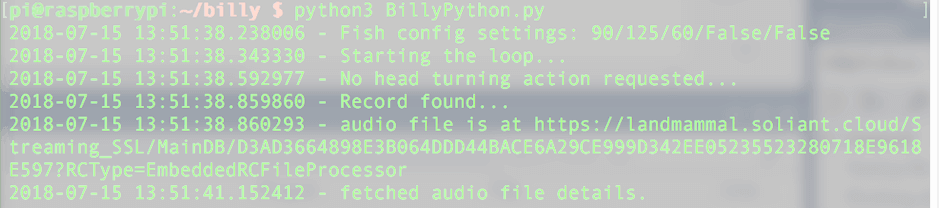
All I had to do was clone my GitHub repository to my Mac, and away I went. From my Mac, I can SCP (Secure Copy Protocol) to copy the modified Python scripts over to the Raspberry Pi and use SSH in Terminal to run the main Python script to put the Raspberry Pi in its wait-and-read loop. Figure 34 shows the Python script running on the Raspberry Pi, logging every step of its actions.
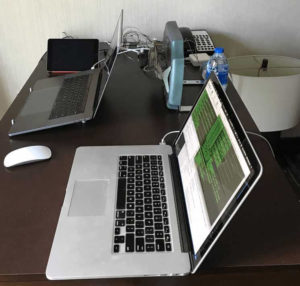
And here is a final picture of my hotel room with the whole thing set up for last-minute testing:
Time for a little fun then. Early on I mentioned that the text we are sending to Amazon Polly uses SSML markup. Using SSML allows us to specify things like accents. Or tell Polly to speed up the text narration, like so:
<speak>Hi, my name is Andrew Lecates, when I get going, <prosody rate=”x-fast”>you really have to fasten your seatbelts, because there is a lot to cover and you are standing between me and my coffee, or red bull, or whatever the heck it is that makes me talk like this.</prosody><amazon:breath duration=”x-long” volume=”x-loud”/><break time=”500ms”/>b</speak>
FileMaker Go
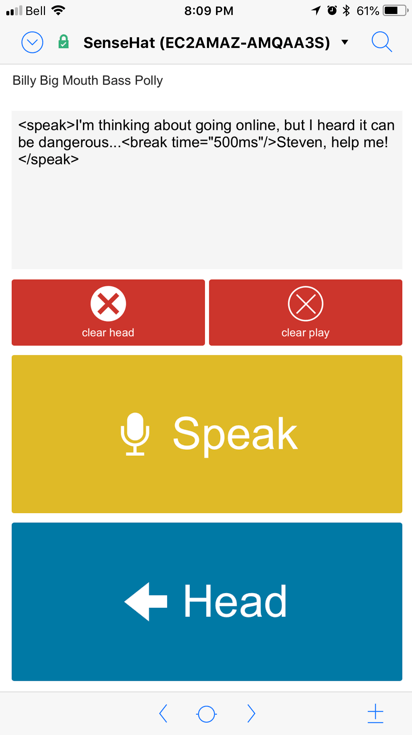
If you open the demo file on your iPhone or iPad, you’ll go straight to a device-specific layout where you can flip between the records and use the big buttons to flag the record you want Billy to speak. You can also use the “Head” button to make Billy only turn his head without saying anything.
Conclusion
I had a lot of fun putting this particular DevCon presentation together, and there is something immensely satisfying to seeing devices collect sensor data and being able to things move from a FileMaker solution.
If nothing else I hope I have demonstrated that the FileMaker platform fits in very well in this IoT environment.
Writing the code to run on the Raspberry Pi was fairly straightforward, in both C# and Python. None of the demos that I used in my session are more than 300 lines of code, with plenty of whitespace, comments and logging. Don’t let unfamiliarity with those languages deter you. It’s easier than you think.
Questions about anything in this series; leave a comment here or find me on community.filemaker.com