Earlier this month, I spoke at the CQDF conference on The Monolith vs. Distributed Architecture, making the case why you should consider using an API-driven approach to make your Claris-based solutions better, faster, more scalable, and more resilient.
Why Microservices?
As Claris/FileMaker developers, we tend to limit ourselves to trying to solve problems with the tools in the platform. Fortunately, the platform is wide and deep, so usually, that is exactly the way to go. For functionality that the platform does not natively have, we generally tend to think about finding a suitable plugin. And more recently, we can consider using JavaScript functions inside a web viewer. We can also consider using custom API, which I believe we do not do enough.
Very often, we already use API integrations from inside our solutions to talk to other systems. Consider QuickBooks or email and calendaring platforms such as Office 365 and Gmail or document management systems like Box.com, OneDrive, and Google Docs. In the last five years, we have seen a definite shift away from making the FileMaker solution do everything to let the FileMaker solution do what is special and unique to the client’s workflow. We use ‘solved problem’ integrations to connect with other systems with specialized functionality.
The result is that more developers are very familiar with hooking up their FileMaker solutions to an external API.
We can take that a step further. What if you can build your own API for some of the bespoke functionality that you cannot find in these other systems and do not want to bog down your FileMaker systems by asking it to do things that it is not good at? Anything that would take long in FM or consumes a lot of resources is a good candidate for this. Plus, you get the benefit of doing things asynchronously: you can hand off a task to your microservice and move on; the microservice can talk back to your solution through the Data API or OData API when it is done.
API ≠ Cloud
First off, considering building and deploying your own small APIs does not automatically mean you need to involve the cloud. Cloud is not a requirement for any of this. Any API you build in this fashion can be deployed on-prem or in the cloud.
What is it really?
A microservice is a tiny web server. It listens for incoming requests through the HTTP protocol and will send back a response after processing the request.
That processing happens in the code stack of your (or your client’s) choice. We currently favor JavaScript, but it could just as easily be PHP, .NET, Ruby, Python, etc.
Calling a microservice is the same as calling any other API you may have worked with; it’s just a URL that breaks down into these elements:
https://domain.com/route/endpoint
As developers, we want to be able to focus on just writing the functional code and not have to worry about the web serving part. Using a framework solves that problem for you. Each endpoint in your API will take the shape of a function with the request as its input (including headers, body, URL parameters, etc.). It will process what needs to be done and send back a response to the caller.
How to Build a Microservice
Ideally, you want to be able to build and test your microservice on your machine without a lot of practical things getting in your way.
When using JavaScript as the chosen tech stack, you will need to make sure your machine is set up with some one-time prerequisites. Node.js is the runtime engine that can execute JS files. To get going, you will need to have node.js installed on your machine. Consider using nvm (node version manager) if you want the ability to use different versions of node.
Together with node, you will automatically get npm (node package manager) which you will use a lot to install JS libraries that can deliver pre-built functionality for your microservice.
Also, consider installing Git so that you can use version control management for your app. Using Git is a whole topic in its own right, so we will not expand on that aspect here.
A solid and popular framework that pre-builds the web server part for you is Express. To make sure the framework does the most possible work for us, right of the box, you can install the express generator. From a Terminal / command line window, run:
npm install -g express-generatorThis is something you only need to do once.
With the prerequisites in place, you can now start building your microservice.
From this point forward, you can create a fully functioning microservice by issuing the command below. Note that this will create a subfolder for your app in whatever folder you are in when you execute this command.
express microservice01 --no-viewwhere microservice01 is the name you want for your app.
The –no-view option tells express to not include any framework for rendering web pages. Our APIs have no need to render fancy or complex HTML. When you run the command, the express generator creates all the necessary files and folders for your microservice:
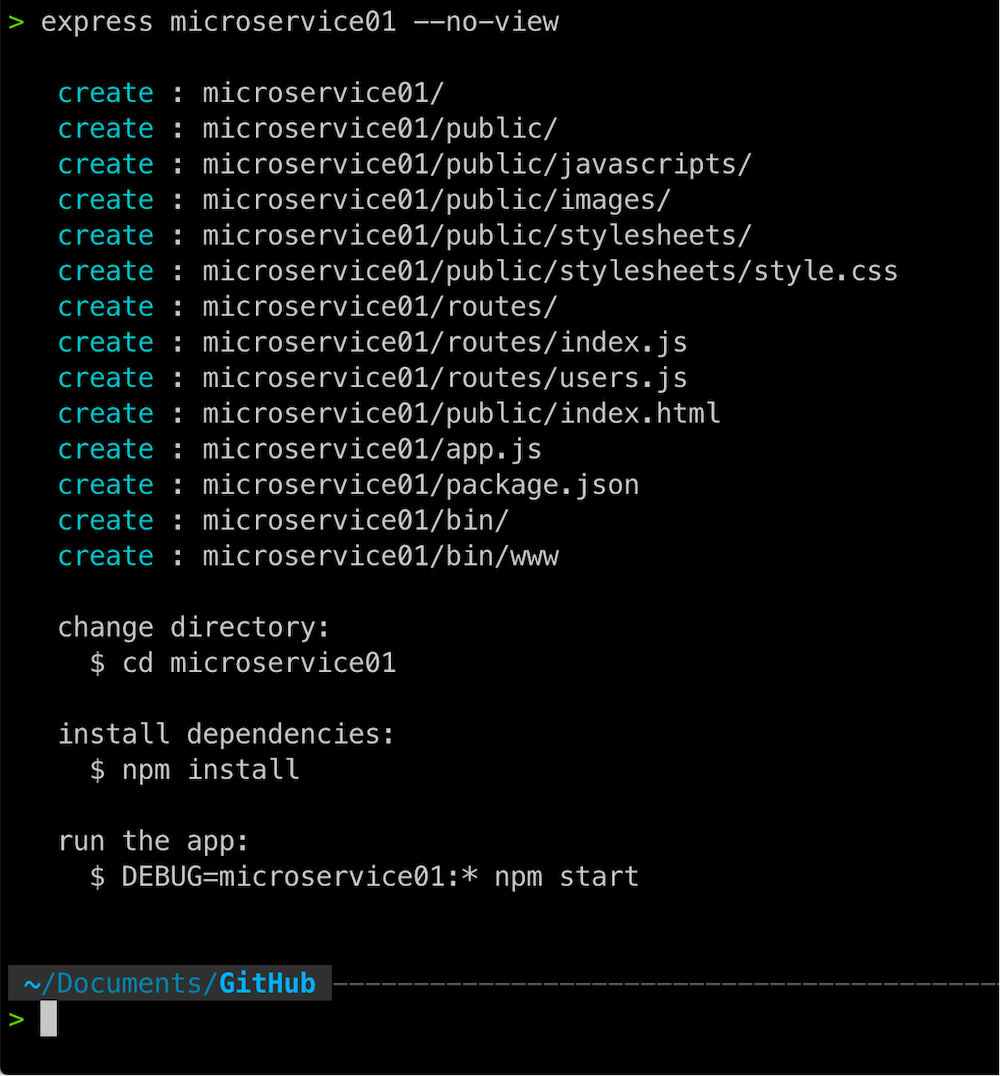
Mind the extra steps that are outlined at the bottom: change into your new subfolder and run npm install to grab all the JS libraries that are required by express.
If you do not run npm install first, your microservice will fail to run. To run your microservice, you can simply use npm start instead of the more complex command in the screenshot.
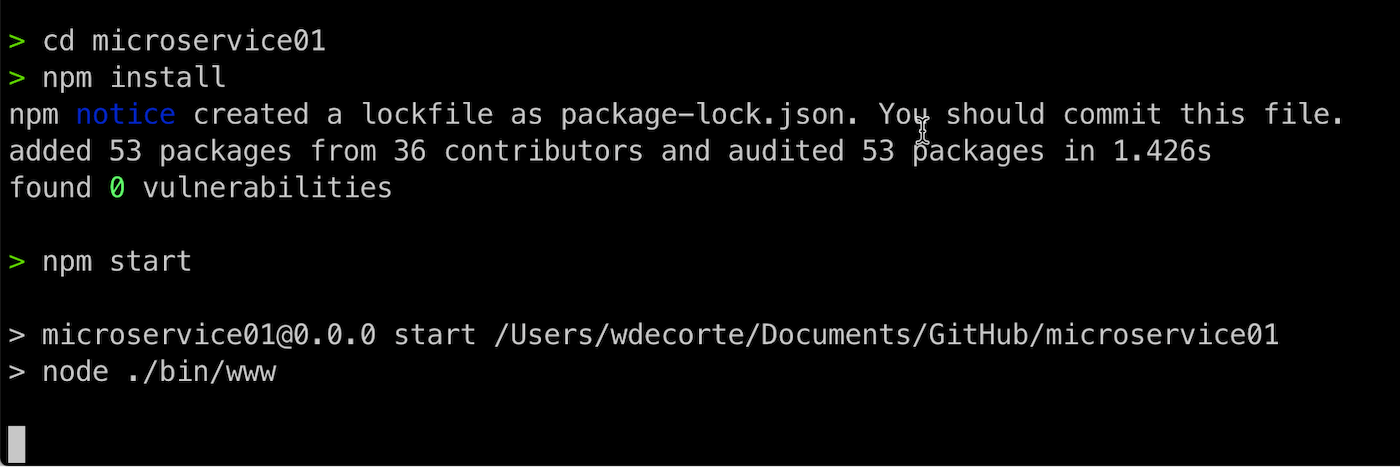
Launching the microservice does not produce a dramatic output in your command line, but you will notice that your cursor is no longer available. That is because your terminal session is now occupied by running your microservice.
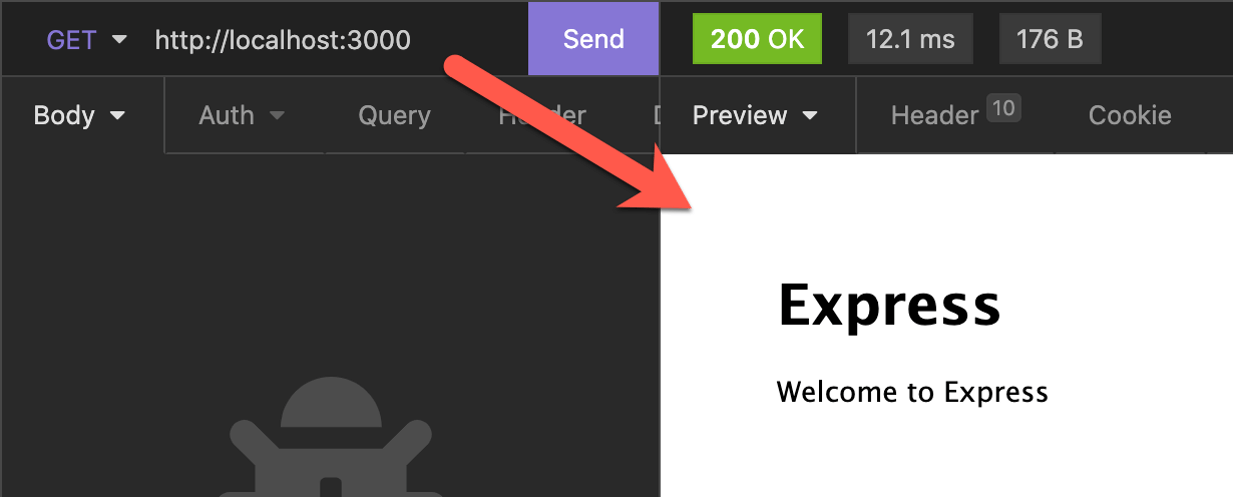
Use your favorite API testing tool (Postman, Insomnia, Paw, etc.) to do a GET call using the address shown in the screenshot below, and you should see the same output.
Where does that come from?
Go back to your terminal window and hit ctrl-c to stop your microservice.
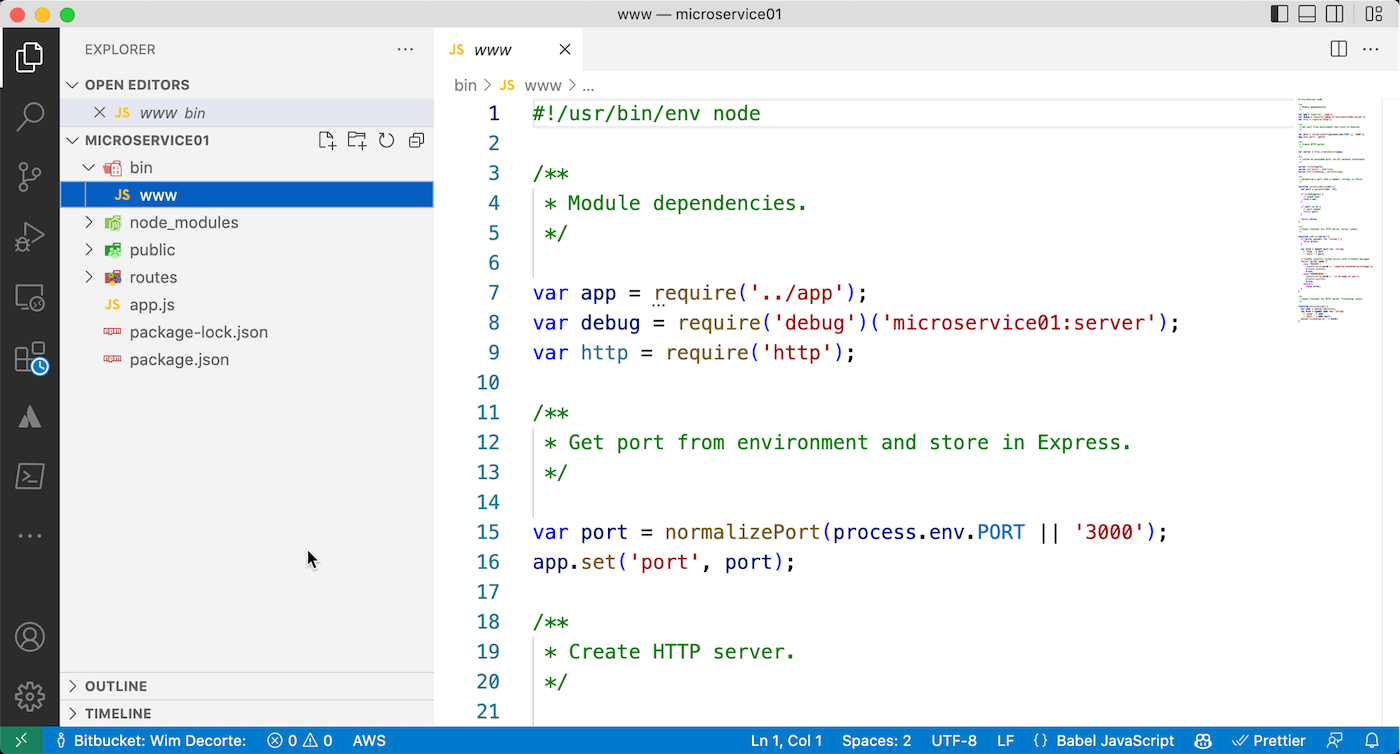
Open Visual Studio Code (or your favorite similarly capable editor) and open the folder that express created.
Expand the bin folder and select the www file, which is just a JS file. It is the main file that express created for you, and that is responsible for spinning up a web server.
Note line 15: that line will try to read the port number to listen on from an environment variable or will use port 3000 by default if there is no such variable. You can change the default port there or choose to incorporate a .env file in your app (which we recommend) to keep more settings and secrets.
Next, select the package.json file and note lines 5 and 6. That’s where the magic from npm start comes from. That command tells npm to look in the package.json file for a script named start. As you can see, the script is a command that instructs node to run that www file from the bin folder.
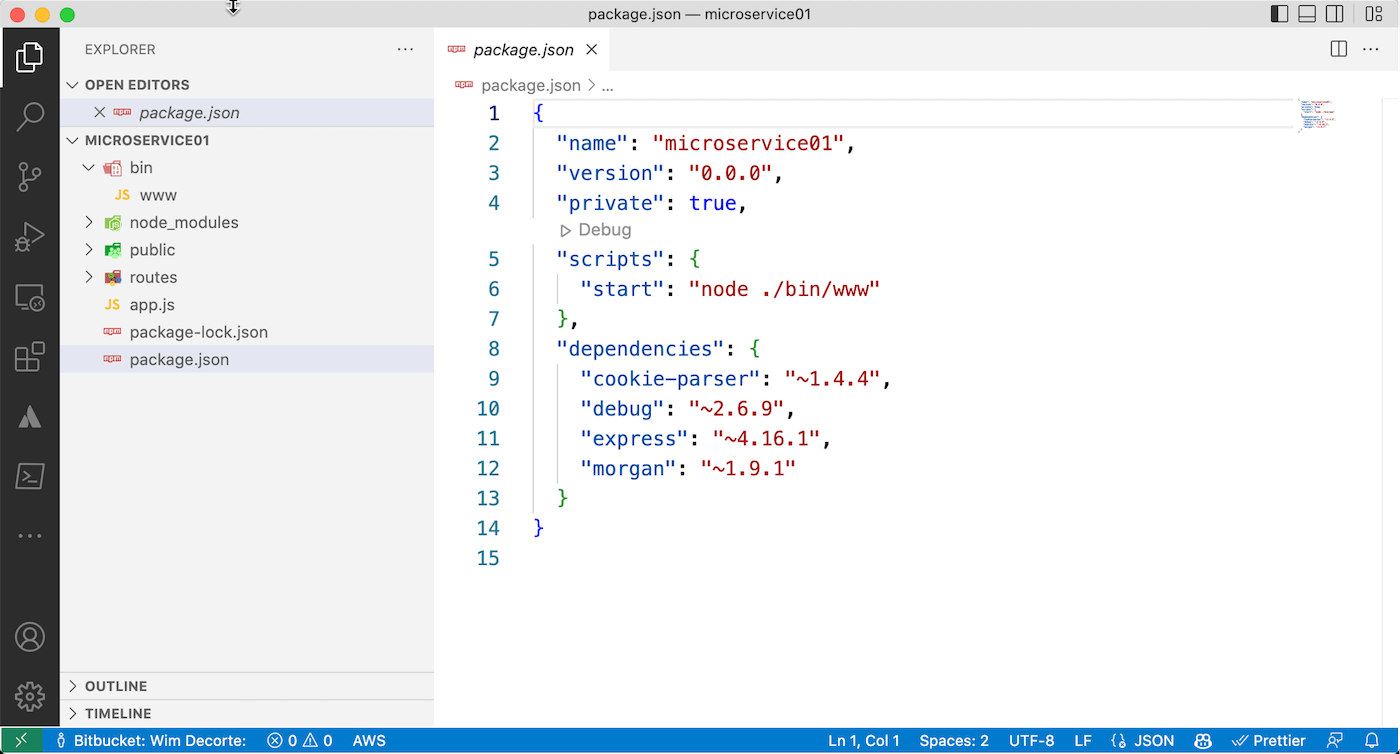
In short, then, using npm start will execute that www file and spin up a web server on your machine that listens on port 3000. And that explains the structure of the URL you used for testing:
http://localhost:3000
Note that there is no route nor endpoint specified in that URL, and yet it does something. In VS Code, select the app.js file. Lines 17 and 18 specify the routes that the microservice will respond to when it inspects the URL.
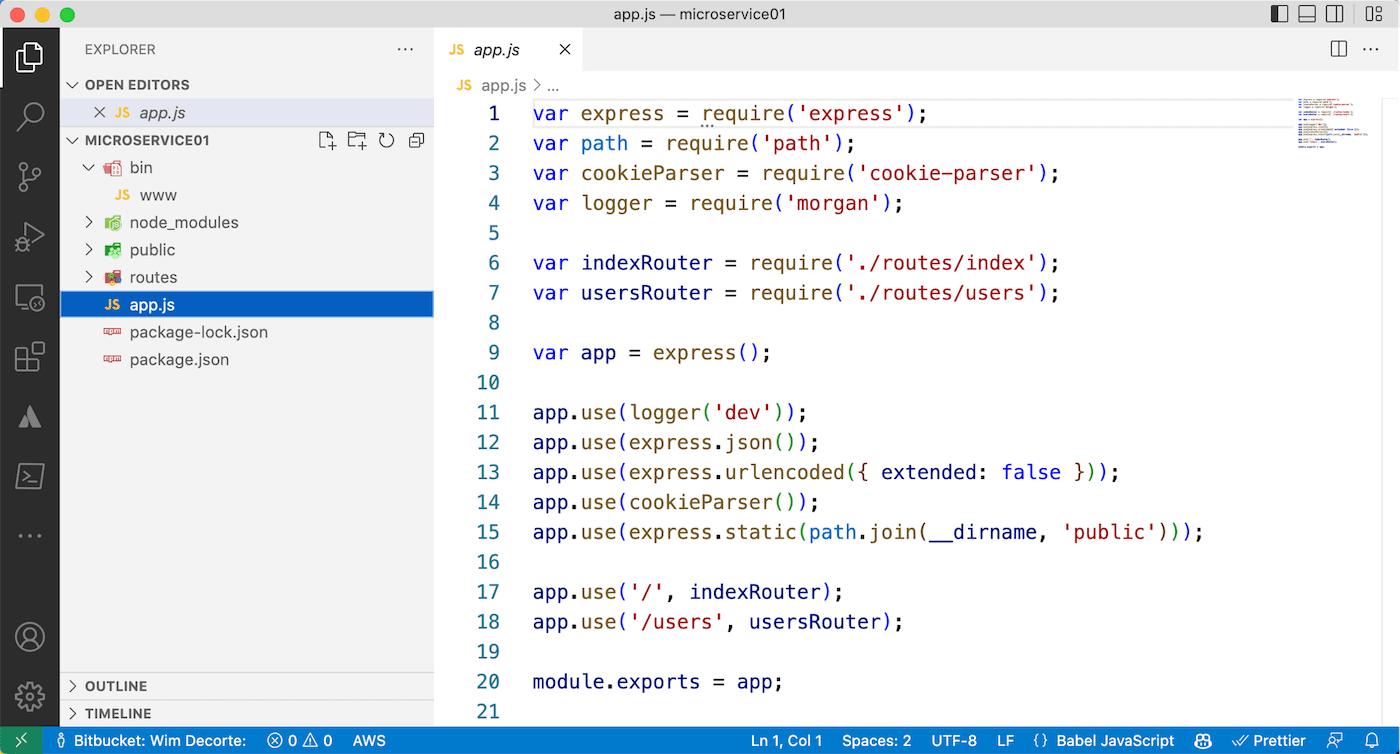
Line 17 uses “/” to indicate that if no route is in the URL, it will use the index route, which, as per line 6, points to the index file in the routes folder.
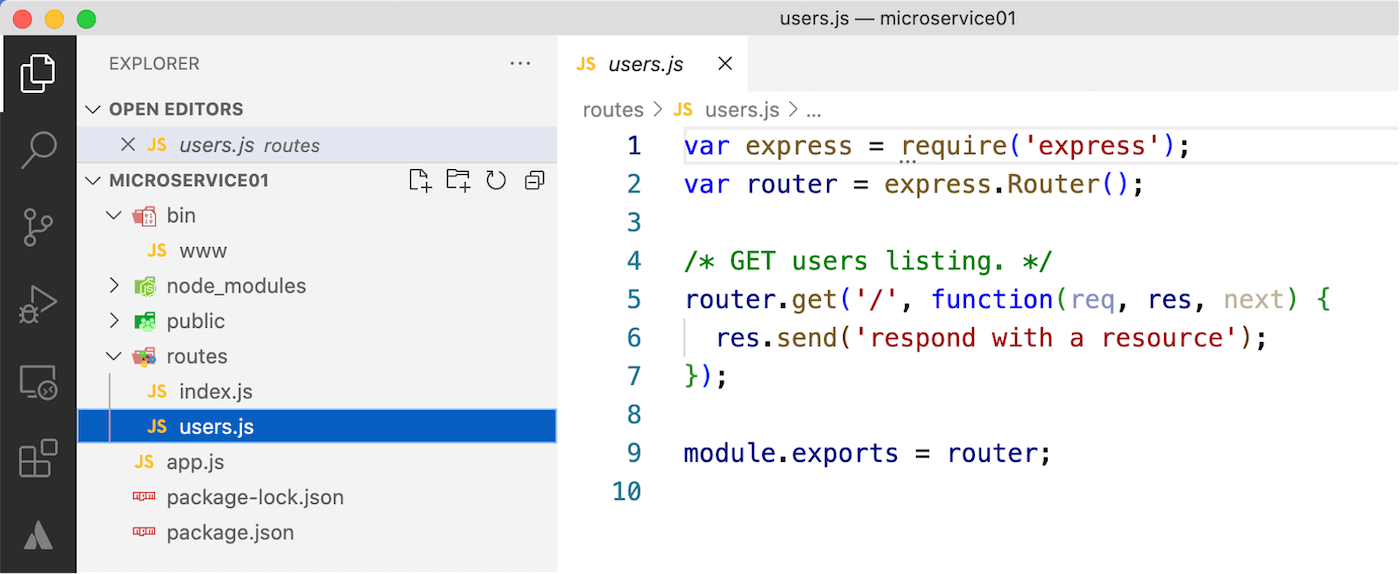
Expand the routes folder. It contains an index file and a users file. Each file there represents a route to match what is in the app.js file.
Select the index.js file.
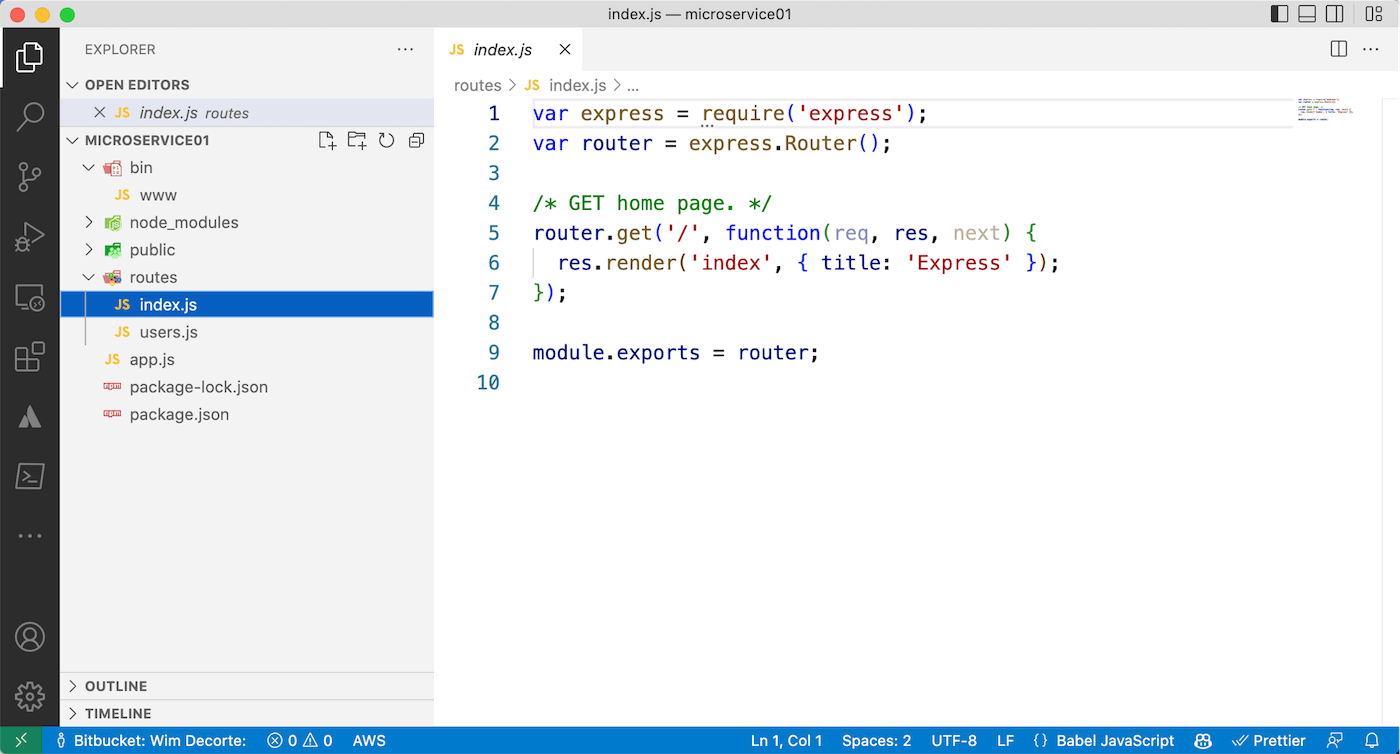
Lines 5 through 7 is the function that is executed when the “/” endpoint is used. It’s a very simple function that just renders a simple page.
And that explains the result we saw with our URL. There is no route specified which tells the microservice to use the index route. There is no endpoint specified which executes the handler for “/.”
Start the microservice again and change the URL in your test to:
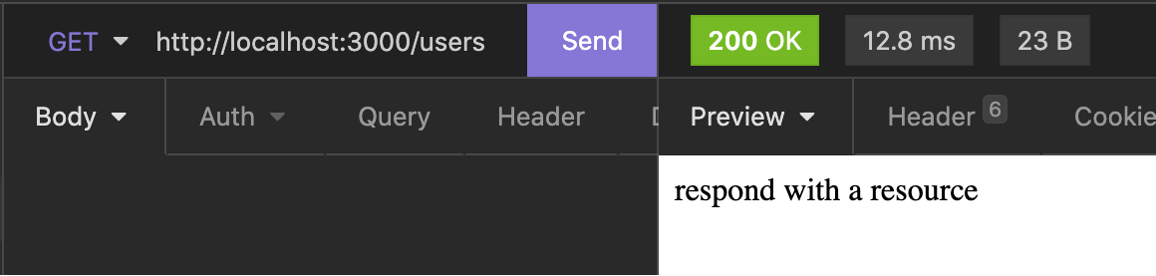
You will now see a different response, and you now know where to go look for where that is generated from: the users.js file and the “/” endpoint:
You are now ready to start adding your own routes and endpoints. Think of routes as a collection of endpoints that deal with similar functionality. Each endpoint will provide a specific piece of functionality.
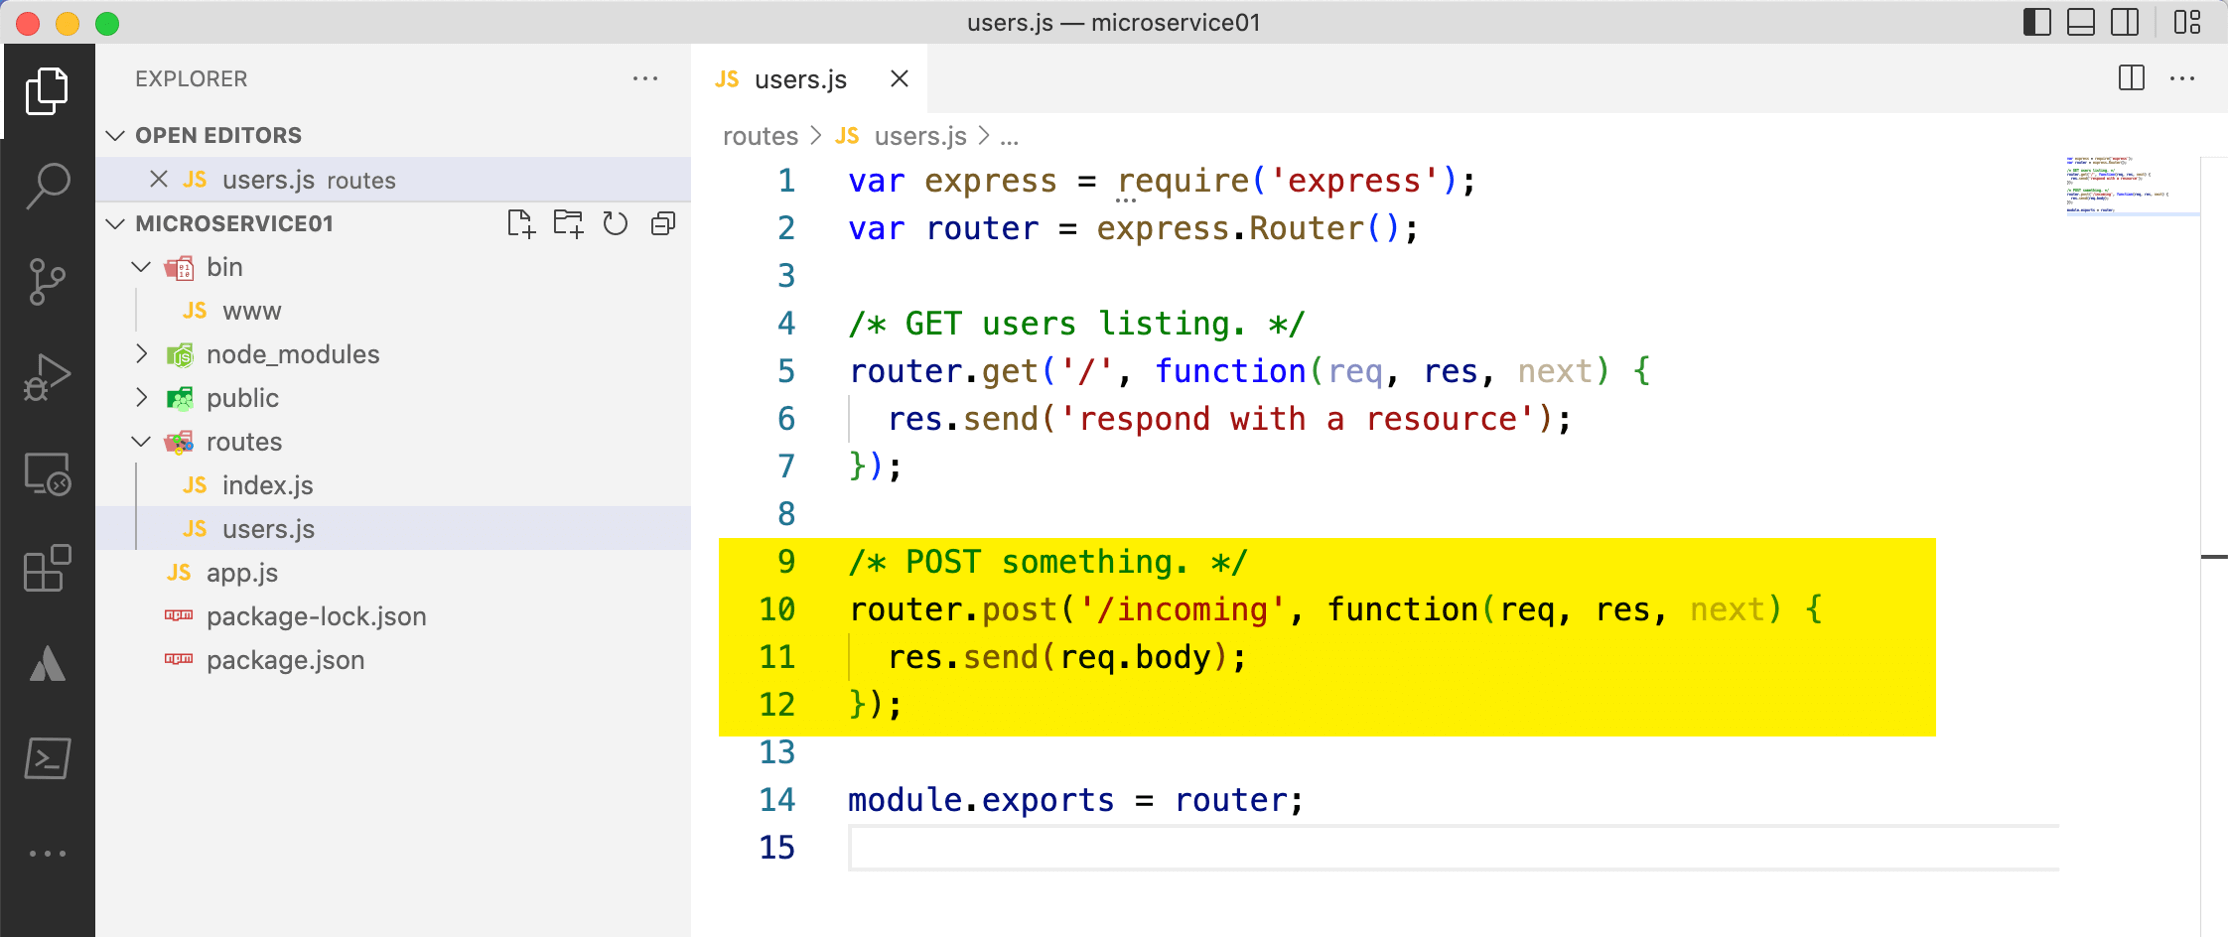
Stop the microservice (ctrl-c) and in VS Code, add an endpoint to the users.js file: and endpoint named /incoming that will respond to a POST request and will respond with a copy of the body that it received in the request.
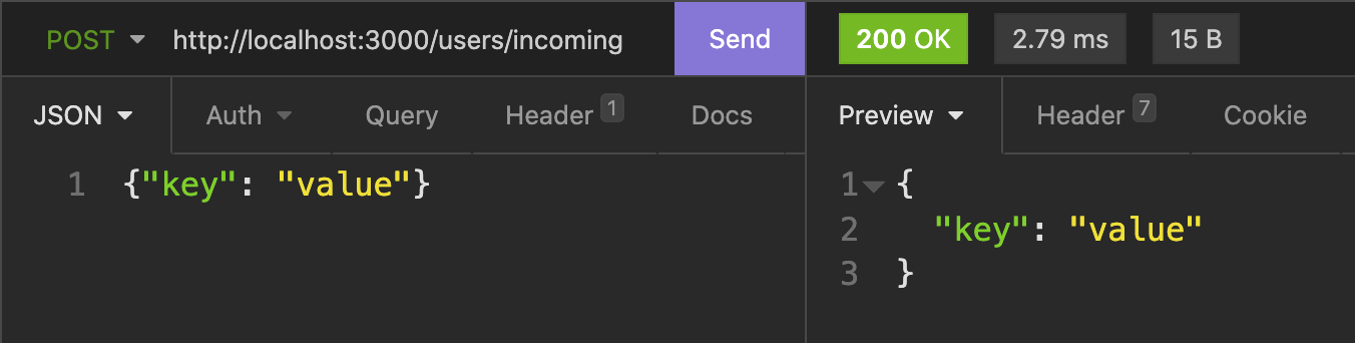
In your testing tool, change the request to POST and adjust the full URL to include the new endpoint. Then, add some JSON to the body. Start your microservice again (npm start) and send the request. The response will be what you sent. Also, note that your API automatically uses the correct HTTP response code (200); it is entirely conforming to the REST standards.
Congratulations! You have now added your first custom API endpoint. The rest of your work can now focus on adding routes and endpoints.
Deploy Your Microservice
When you are ready to deploy your microservice, read the follow-up blog post. 
There are many options for deploying your API in such a way that you get automatic load balancing, redundancy, and best possible performance. Contact us if you need further assistance in constructing your own custom APIs.
Thank you for continuing to provide such informative blog posts for the FM community.
A great public service!
Thanks wim for such an interesting article.