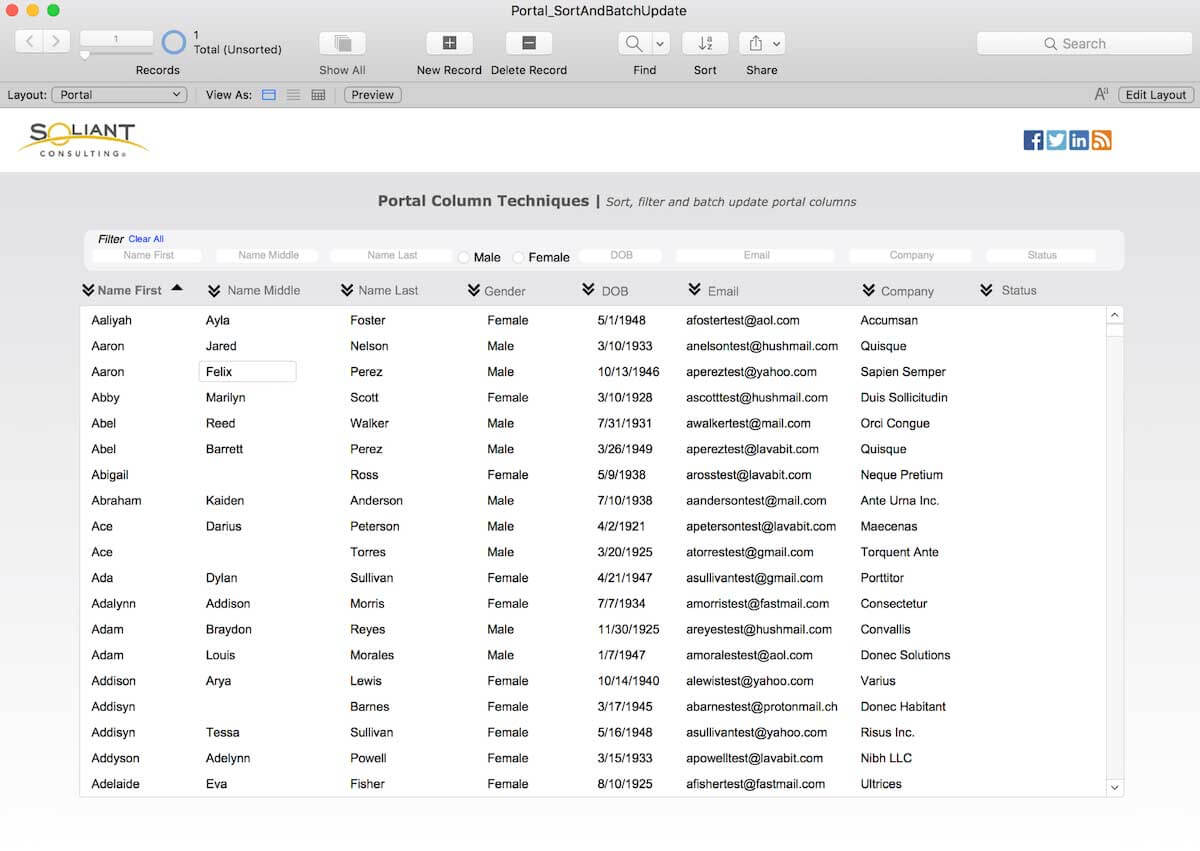
FileMaker Portal Columns
I was recently asked to sort portal columns for a client, and I figured there has to be a newer and cooler technique out there to accomplish portal sort than when I did it last. I reached out to the other FileMaker developers at Soliant, and I got a great sample file from Ross Johnson. He shared a really cool technique with me, crediting mr_vodka (sounds like a fun guy!). Read mr_vodka’s original post.
For my client, I was also asked to filter the portal and batch update columns. The end product came out pretty cool, so I decided to create a sample file with all these techniques put together in one file to share with the FileMaker community. The data in my sample file is from Mislav Kos’ post: Test Data Generator
Get the Demo File
Download the demo file to follow along with the instructions outlined below.
Sort
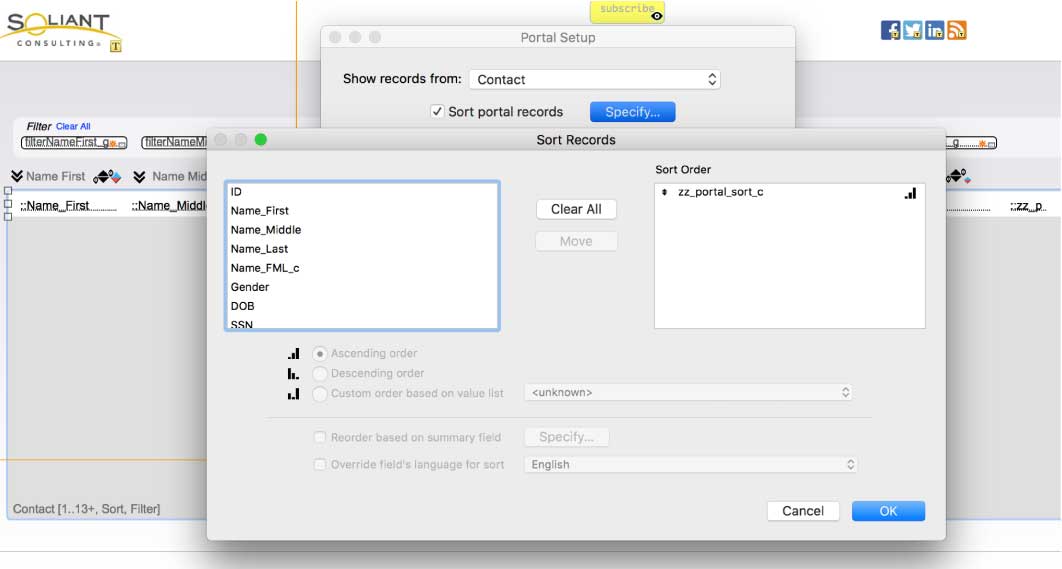
Here’s the step to complete the portal sort. You’ll need to use the sample file to copy and paste some components.
- Copy the field “zz_portal_sort_c” into your solution. You’ll need to copy it into the table on which your portal is based on. Open the field definition for zz_portal_sort_c. The only update you’ll need to make to this calculation is set the let variable “id” to the primary key of your table. For example, if your primary key is something like “_kp__ContactID” you’ll need to have “id = ¶ & _kp__ContactID & ¶ ;” (see Figure 2)
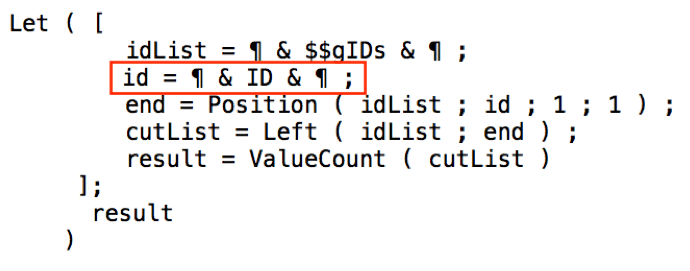
NOTE: Be sure this calculation returns a number (see Figure 3), that’s very important!

- Next, copy script “sortRecords ( field { ; object } )” into your app.
- You’ll need to update line 51 and change “ID” in the executeSQL statement to use your primary key field for the table on which your portal is based (see Figure 4)
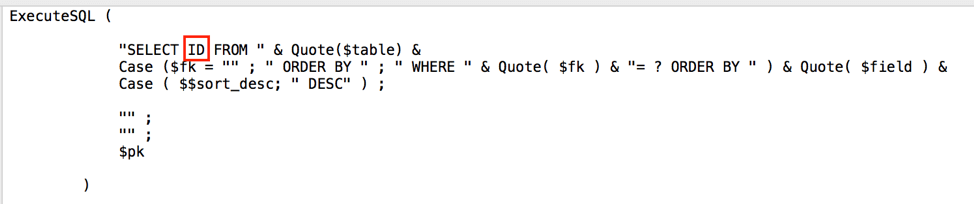
- You should also update line 6 (the header information) to reflect that you added this script to the file, and the date you did.
- Name the portal object “portal”. If you prefer a different object name, it can be anything you’d like, but you’ll need to update almost all the scripts for this demo to reflect the new portal object name.

- You can now assign the script to your labels with a parameter of: “List ( GetFieldName ( <table>::<field> ) ; “portal” )”. I also added some conditional formatting to the label to turn the label bold when the column is sorted. Additionally, as a visual cue that the sort is bidirectional, I added an up and down arrow for each column and assigned a conditional hide to it. You can copy and paste the buttons to use in your solution, and then update the hide calculation to use your fields.
And that’s it! Once it’s all set up, sorting for each column should work. One thing I want to note: this method assumes that the relationship is one-to-many. I tried it using a Cartesean join, and it broke the sort. I haven’t tried anything more complicated than a one to many.
Filter Columns
Filtering each column allows the user to do an “AND” search in the portal, which means that your user can filter on multiple criteria. If you used a single search bar to filter, then it is considered an “OR” search. To be honest, I haven’t researched if there’s a better technique out there. This method made logical sense to me when I wrote it, and lucky for me it worked. If you know of a better approach to use, I’d love to hear it; please leave a comment below. Here are the steps to complete this filter technique:
- Create global fields for every column you’d like to filter.
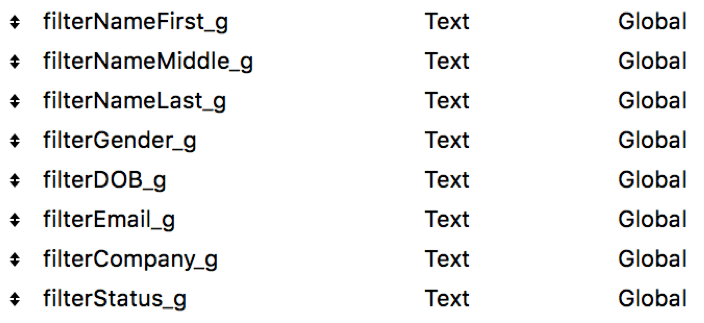
- Place those fields on the layout

NOTE: You’ll notice the gender result is a little different, see item V below. below which explains why.
- Add the script “Trigg_CommitRefresh” to your script workspace and then assign that script as a trigger to the filter fields with a trigger type of OnObjectExit. This script trigger will only commit the record and refresh the portal every time a user exits a filter field. In this case, gender is a little different; it uses an OnObjectModify. You’ll learn why gender is different a little further down in this post.
- Now we update filter calculation for the portal. You can copy the code from the filter calculation into your portal calculation and then update it in your file to match your fields.
- The filter calculation is a single let statement that has four parts:
- Define “AllClear”, which is a flag that checks if all the globals are empty
- Define which filters have any text in them. In other words, which filters are being enacted by the user
- Define each filter result at the record level. If the user entered text to filter, does the current record pass that filter, and therefore returns 1, or that record getting filtered out and returns null?
- Finally, we compare our results. If AllClear is true, then always show the record (return 1). Otherwise, let’s count up how many filters the user is trying to complete, and count up how many columns pass the filter for the given record. If these two sums match, then the record passes the filter check. If not, then the current record has been filtered out.
- You’ll need to update the following for this calculation to work in your file:
- The globals you’d like to filter within the “All Clear” definition
- The filter check section: Filter<FieldName> = not IsEmpty (<Table>::<FilterGlobal> )
- The filter result section: Filter<FieldName>_R = If( Filter<FieldName>; PatternCount ((<Table>:: <FieldName>; <Table>:: <FilterGlobal>)> 0)
- The filter calculation is a single let statement that has four parts:
- The results comparison will need to be updated: If( AllClear; 1; Filter<FieldName1> + Filter<FieldName2>….. = Filter<FieldName1_R > + Filter<FieldName2_R>….. )
- Gender Difference: For most of these filters, I’m using the patterncount() function because I want to include partial matches. However, with gender, if I searched for “male,” I would always get male and female results since the string “male” is inside the string “female.” Since in this case there are only two options, I turned the filter into a radio button so that I don’t have to worry about partial word entries and now I can make a complete word comparison in the calculation. That’s why gender does not use patterncount() and instead uses “=” to see if the filter and the value are identical.
Batch Update
The batch update feature goes hand in hand with filtering – the user will filter the data and then perform a batch update. When completing this feature, I figured there are two ways to accomplish it: go to related records in a new window and perform a replace field contents, or loop through the portal itself. I decided to loop through the portal because I liked that you don’t have to leave the current window. However, both methods would accomplish the same goal, and if you have a lot of related records to be updated, the replace field contents might be a little faster. But for a typical use case, looping through the portal works well.
To complete the batch column update, you’ll need to copy over the script “BatchUpdate (field)” into your file. If you haven’t already, you’ll need to name your portal object “portal” for this script to work. You should also update the history in the script header to communicate that you added this script to your file and when you added it. I recommend duplicating line 3 and then adding your name/email, the current date, and a note about how you copied this script into the file. The rest of the script is ready for use. If you’d like, you can customize the dialog in step 9.
Now you’ll need to add the batch buttons to the layout. Your button will call the BatchUpdate script you just copied over and will pass the parameter of the field you’d like to update, in quotes.
That’s the summary of how these three features are set up in the sample file. I hope you find it useful.

Questions? Leave a comment below or if you need help with your FileMaker solution, please contact our team.
Pingback: FileMaker Talk Episode 144: Women Innovating Together and more! - Beyond the Chaos
I randomly came across your post while trying to help someone with a development question. Glad to see that people are still looking at my old samples, even though I never went back and polished them. 🙂
– John ( mr_vodka )
Sorry cant edit my comment haha. I meant, glad to see that people can still make use of my old sample file even though I never went back and polished them. Your post is great and will help a bunch of people hopefully. 🙂
Hi John,
Thanks so much for taking the time to leave a comment 🙂 And of course thank your for your original technique that was so helpful for me.
Cheers (with vodka!),
Makah
Nice writeup, Makah. For history nerds, this method of portal sorting originated here:
http://www.fitchandfitch.com/2011/05/filemaker-portal-sorting/
I’d encourage folks to check it out, there’s some interesting comments there as well as sample files and a followup article. Kind of crazy that 8 years later this is still the best method I know to sort a portal.
John’s innovation was using ExecuteSQL to gather the ID list, which wasn’t an option at the time I wrote that article. And even though we now have the Summary field ‘List Of’ option which is super fast, ExecuteSQL has the ability to bake the sort order into the query so most of the time is going to be the best option.
Lastly, here is an elegant version of the sort calc:
https://www.briandunning.com/cf/1300
Indeed Tom. Your technique still one of the best and widely used. Hopefully people will read your original post and also through the comments on the original forum thread ( which has a link to your website as well ), as both have some interesting followup posts
Working in a multi-user environment and on a layout with sufficient calculations, I found portal column sorting solutions that relied on a calculating field to be problematic. Sort requests resorted / recalculated for all users, which provided very noticeable refresh delays and confusion for me.
The fastest solution I could find was to:
1. have a table relationship pre-sorted as a default field
2. have column header buttons that set a global $$Sort variable
3. have pre-sorted duplicate portals that hide based on $$Sort variable (e.g. $$Sort≠”Column1″). Each portal has a different “Sort” option set, which over-rides the default table relationship sort.
4. refresh window if necessary
I found this “Portal Swapping” method to be instant and functional,. Even though having multiple portals is likely to slow down a layout, it’s much faster than the alternative in my tests.
Hi,
It seems to me that it only works if there’s only one matching key in the portal relationship, as the SQL query only manage one key
Hi Vincent,
Can you elaborate a bit? When the portal is based on a multi-predicate relationship, all the sorting and filtering still works as-is without any modifications needed.
Also, it does not work if the table of teh portal is in another file, because $$global variables are not cross file, therefore I had to use a global field and in the zz calc
True. Demos are by nature made as simple as possible.
These days we probably wouldn’t use this technique anymore and favor a JS/webviewer approach based on a library like DataTables. Since that has all the sorting, filtering, column re-arranging already built-in.
YOU Don’t Let me download the demo file!
WHY ??
If you have an ad blocker you may not see the form on the download page (https://www.soliantconsulting.com/labs/filemaker-portals-sort-filter-batch/) for the demo file. You can deactivate the ad blocker on the page to complete the form to get the file.