When Claris launched Cloud 2.1, its “FileMaker Server in the Cloud” product introduced the capability to let users sign in with accounts other than their FileMaker ID, specifically using either Okta or ADFS authentication. In my blog post from February 24, you will find a walkthrough of how to set up Okta as the Identity Provider (IdP) for client authentication in FileMaker.
Using Active Directory Federation Services (ADFS)
Besides Okta, you can also use Active Directory accounts through Active Directory Federation Services (ADFS). To be clear, ADFS is not Azure AD (Microsoft’s Active Directory in the cloud); rather, ADFS allows you to use your on-premise Active Directory. FileMaker Cloud 2.1 does not currently work with Azure AD. This is different than the on-premise regular version of FileMaker Server, which can work with both on-premise AD and Azure AD.
ADFS is a component you install on Windows Server, a role that you add to the server. For this walkthrough, you must already have a working on-premise Active Directory and have ADFS installed.
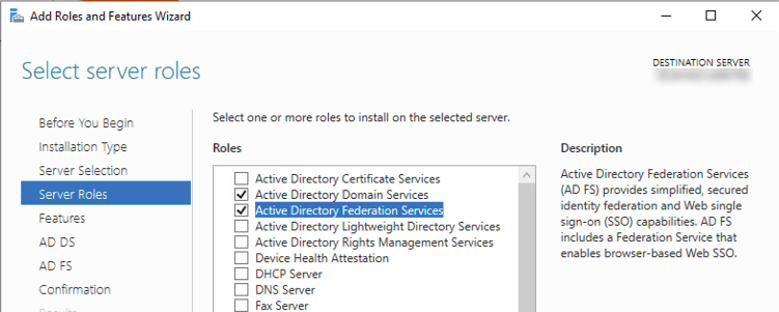
Note: because ADFS requires the Windows IIS web server and access on port 443, it is not a good idea to install the ADFS role on a machine running FileMaker Server.
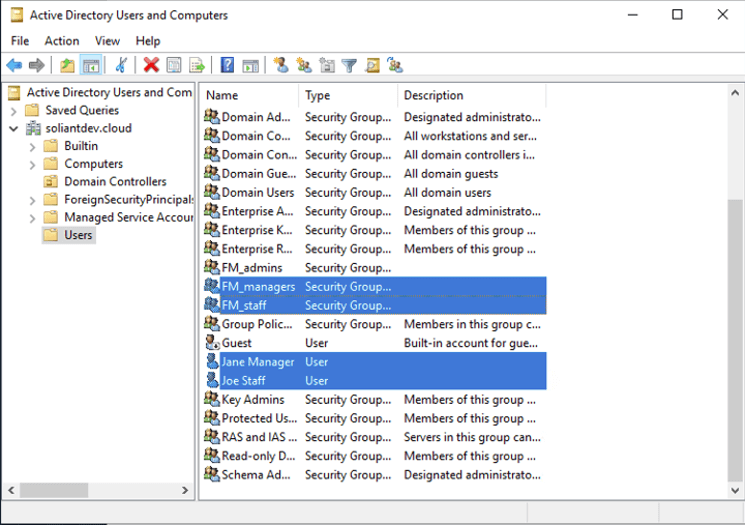
For this example, the AD domain is named soliantdev.cloud, and we have two groups: FM_managers and FM_staff. And two users: Jane Manager, who belongs to both groups, and Joe Staff, who only belongs to the FM_staff group.
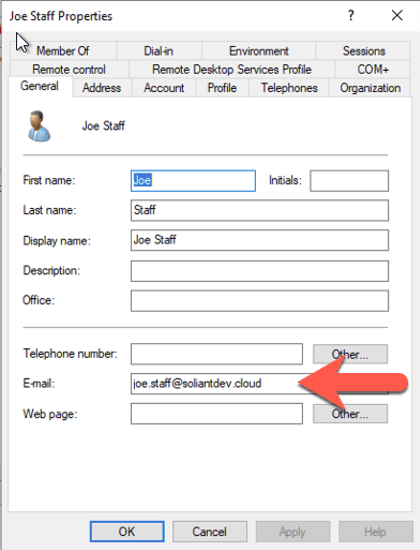
Make sure that each user has their email set since that property will be used to identify the user as set up in the FileMaker Cloud subscription.
Most of the setup is done in ADFS, which you will then follow up by configuring the ADFS service in your FileMaker Cloud subscription to make the two connect. The official documentation is in the FileMaker Knowledge Base.
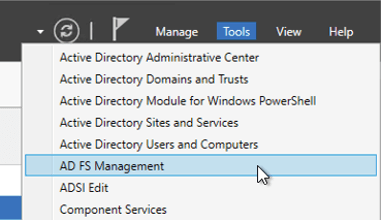
On the server where you installed the ADFS role (which may or may not be your AD server), open the ADFS management console from the Server Manager utility.
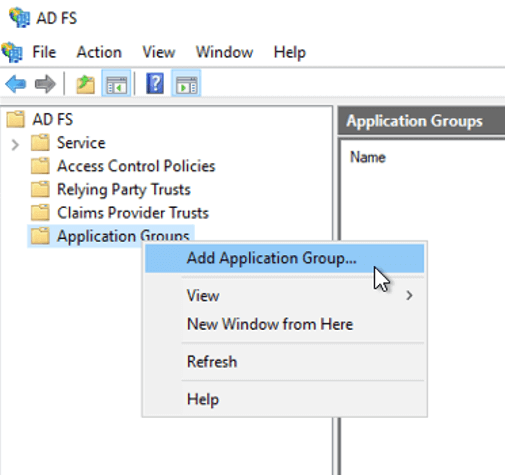
Right-click Application Groups to add a new one.
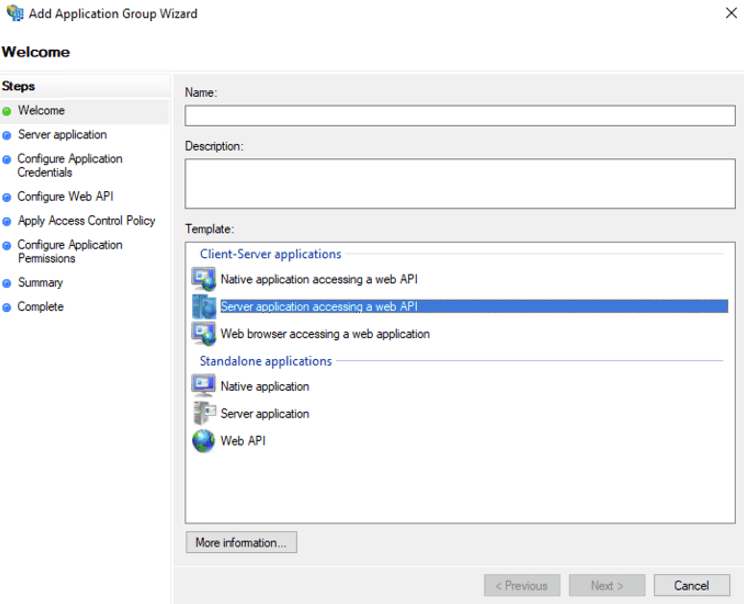
From the available options, choose Server application accessing a Web API and give the setup a meaningful name.
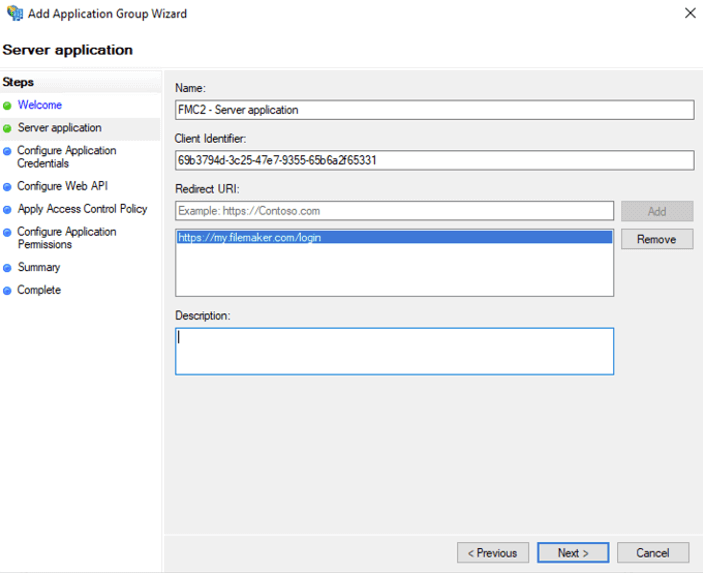
On the next screen, make a note of the client id that is generated for you (you will need it later), and add the standard FileMaker Cloud redirect URL (https://my.filemaker.com/login).
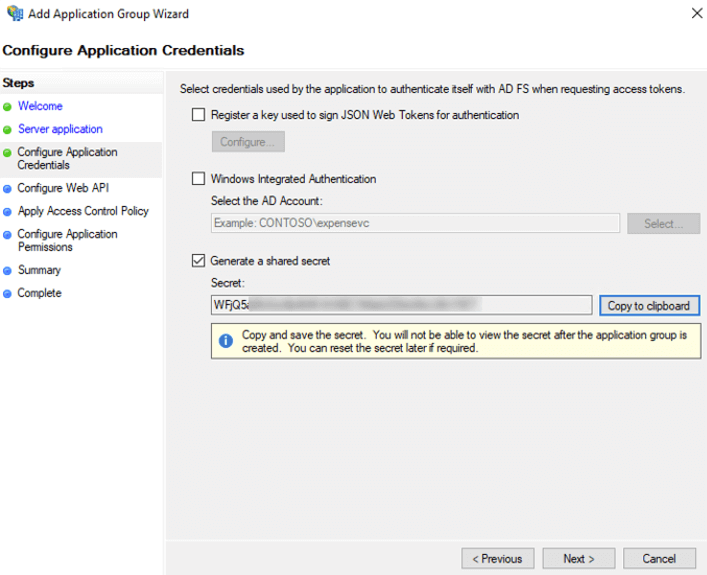
On the next screen, let the wizard generate a new client secret and also save that for later; you will need it when configuring FileMaker Cloud.
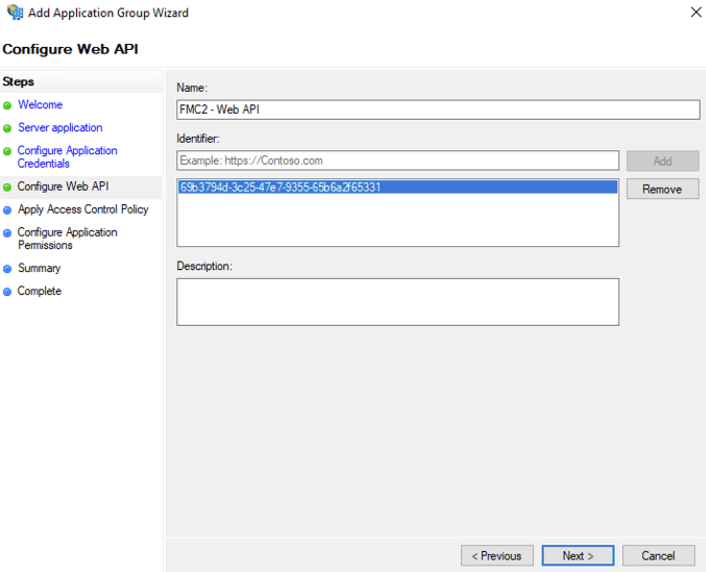
Enter the client ID that you had saved earlier for the identifier on the Configure Web API screen:
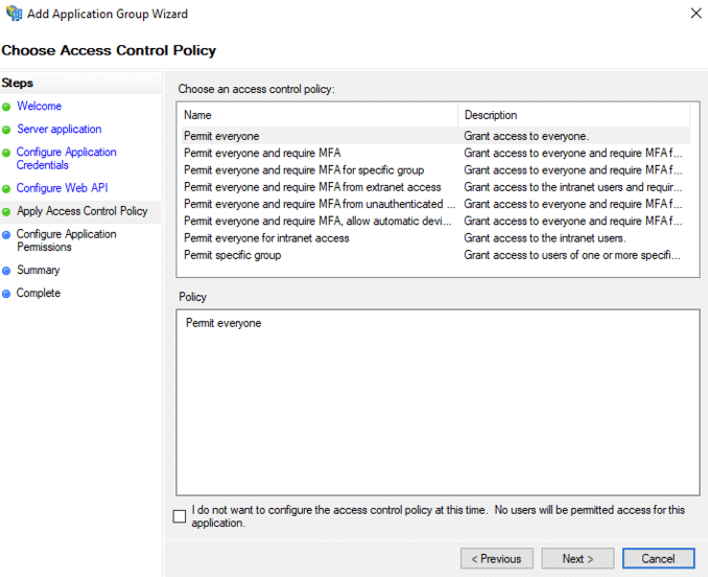
You can accept all the defaults for the Access Control Policy.
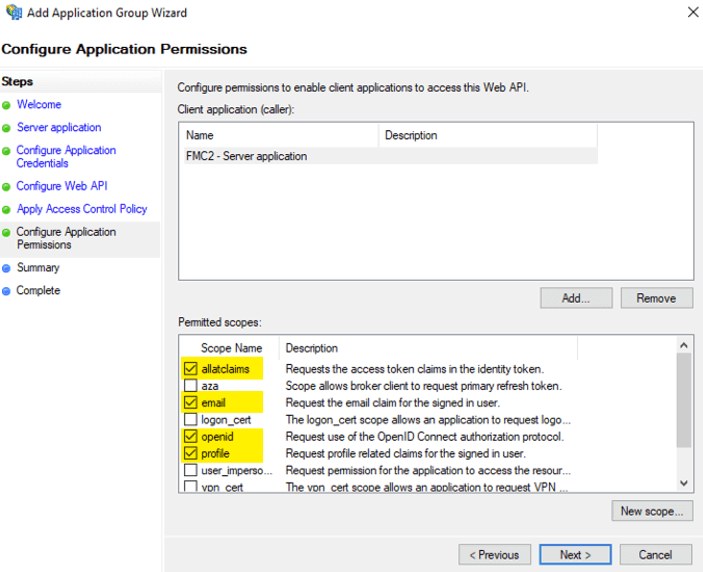
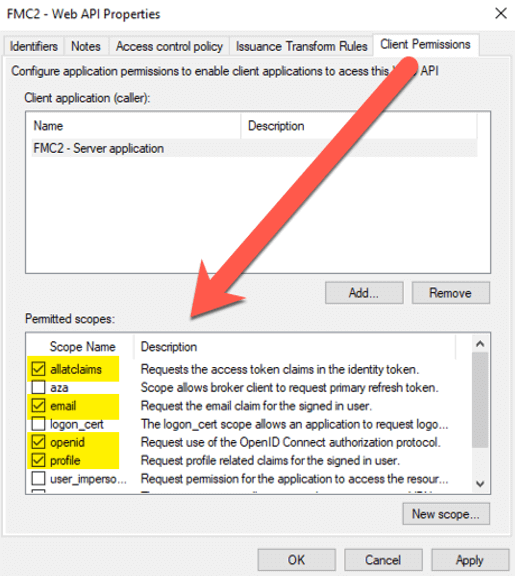
In the Configure Application Permissions section, we select what data from the user’s account will flow to FileMaker Cloud once the user is authenticated. If you have set up any other OAuth provider, you will recognize this as what is typically referred to as ‘scope.’ Make sure to select allclaims, email, openid, and profile.
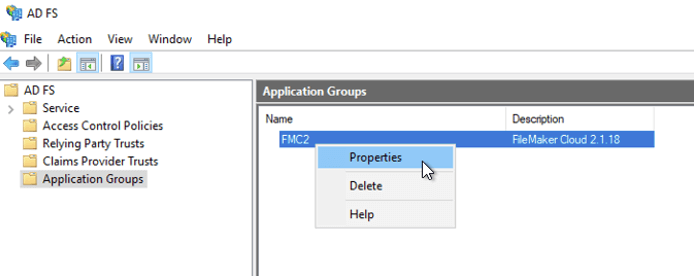
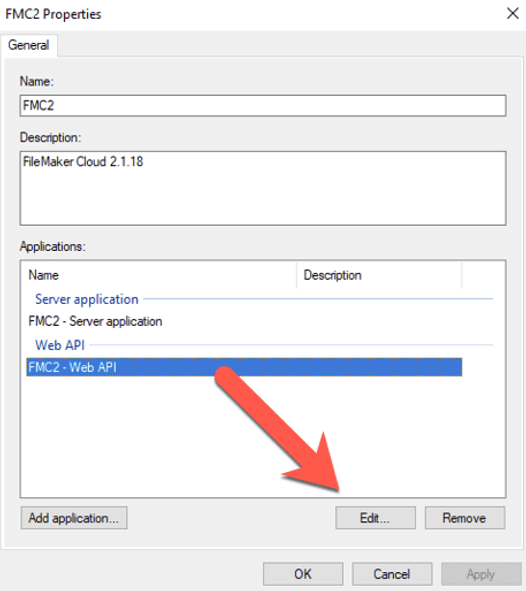
Step through the rest of the wizard to complete the settings, and then right-click the application group and choose Properties:
Pick the Web API entry and click Edit.
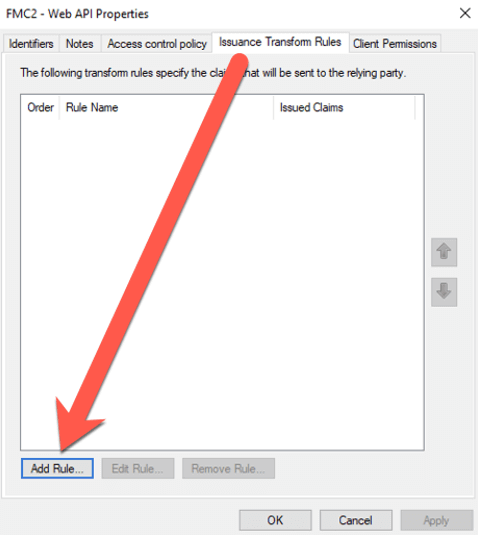
On the Issuance Transform Rules, add a rule; this is where the user’s AD account properties will be translated into OAuth OpenID Connect properties so that FileMaker Cloud will receive an id_token in the correct format.
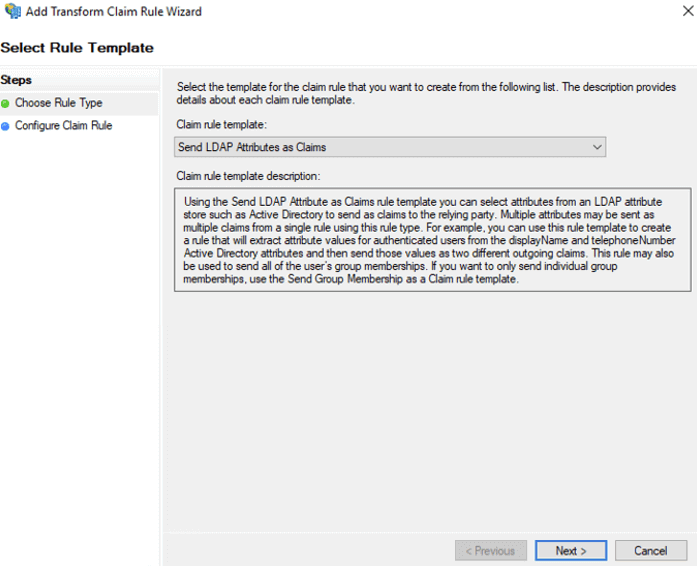
Select Send LDAP Attributes as Claims.
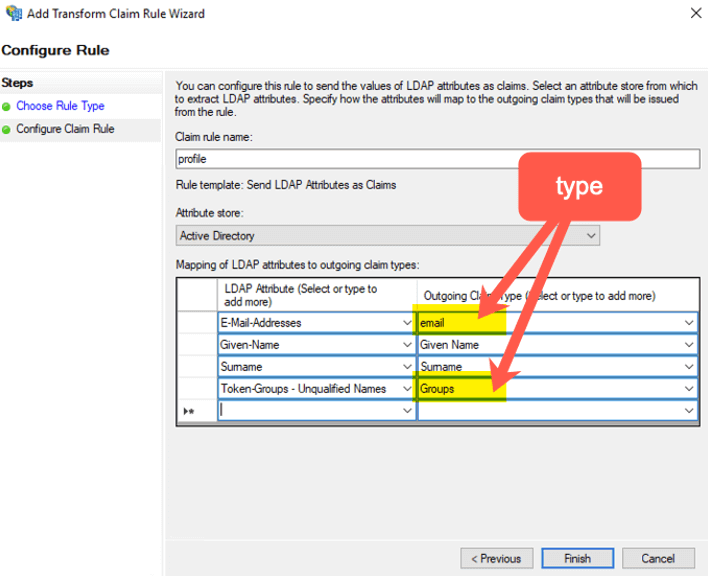
On the next screen, name the rule profile, make sure Active Directory is set as the Attribute store, and set the mapping as in the screenshot below. Note that for the right-hand side, you can pick from the value list provided, but for the right-hand side, you have to manually type the two entries indicated (and they are case sensitive).
Click Finish to save the settings and verify that on the Client Permissions tab, the indicated selections are active.
Click Apply to save and OK to dismiss the Properties dialog. Still in the ADFS Manager tool, select Edit Federation Service Properties from the right-hand pane:
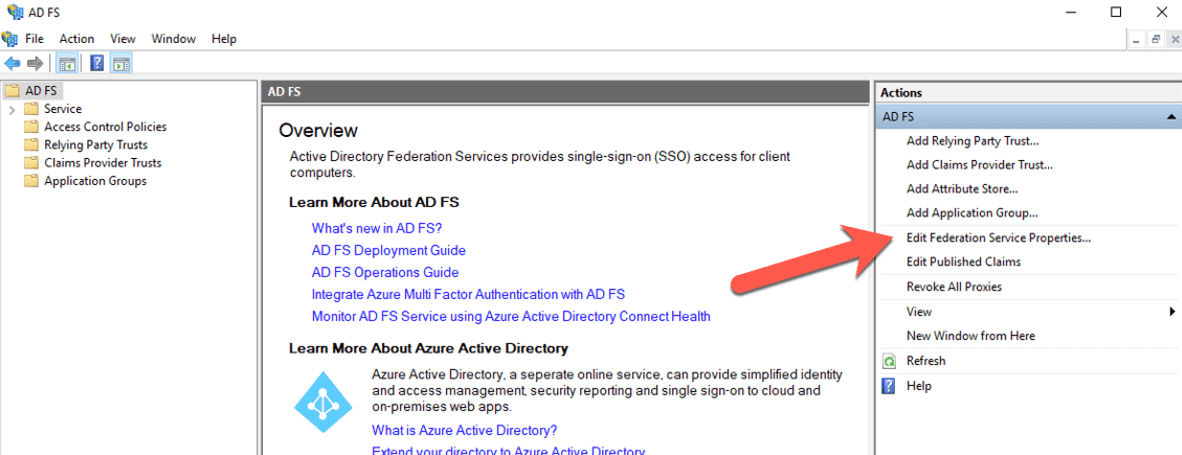
Make sure that the Federation Service Identifier has the proper HTTPS prefix.

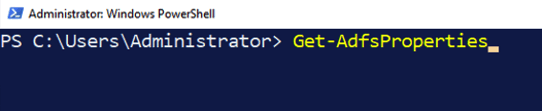
At this point, you are done with the ADFS configuration on your server. But before you log out of your server, there is one more piece of information to collect. Open a PowerShell command line window and type in the following command:
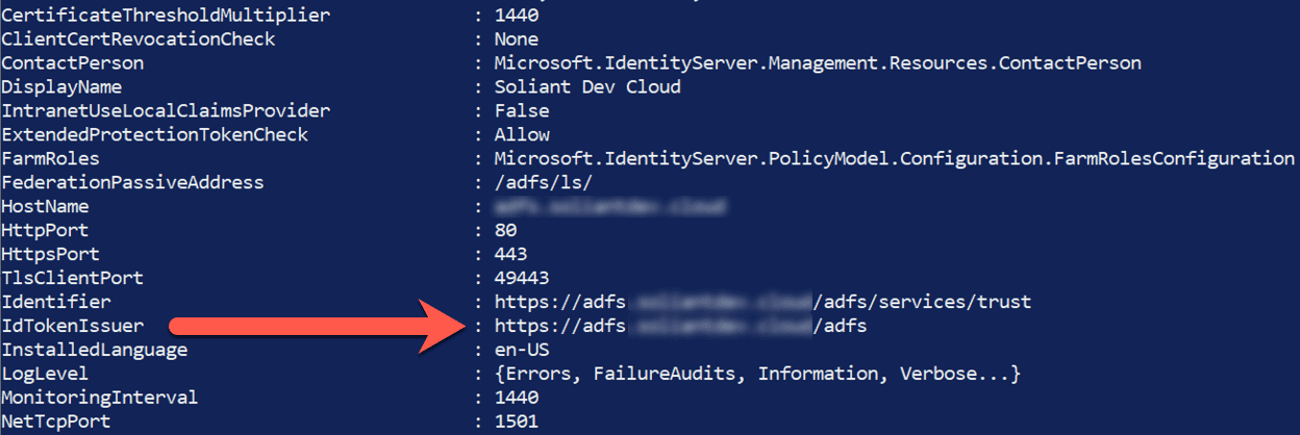
And scroll down the list until you see IdTokenIssuer and make a note of that URL. You will need it for the FileMaker Cloud configuration.
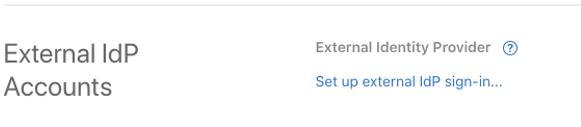
Log into your FileMaker Cloud subscription and click on the Settings header. At the bottom you will find the section to set up an external IdP:
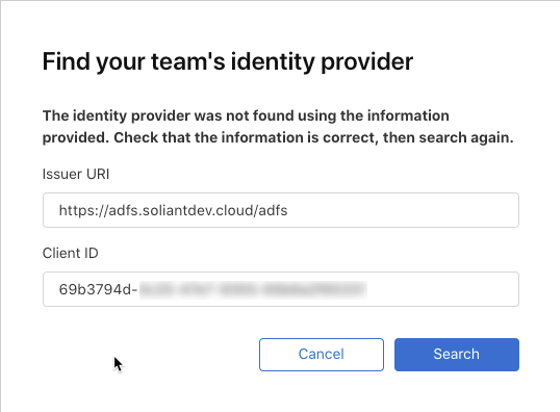
On the very first dialog, enter the URL for the IdTokenIssuer that you collected from the ADFS properties and the Client ID from setting up the Application Group in the ADFS Manager.
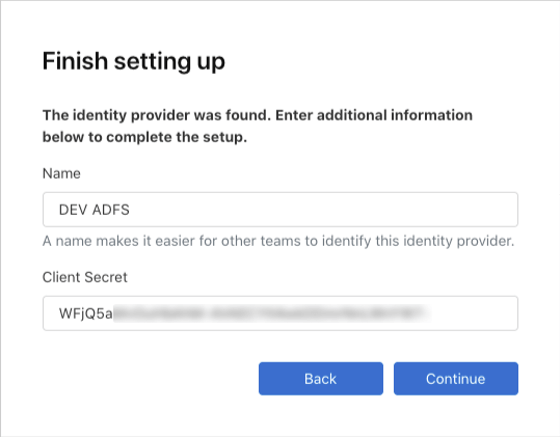
If your ADFS server is reachable through the internet on that URL, you will be prompted to name this IdP setup for the Client Secret that was generated earlier.
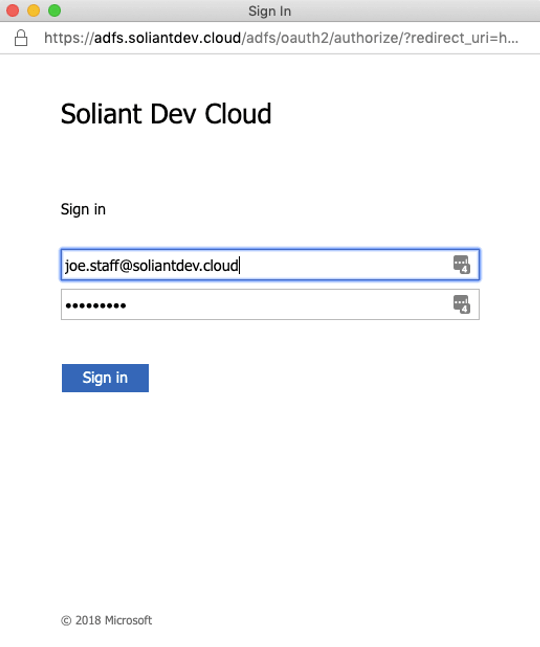
The next step is to confirm that the authentication setup works correctly.
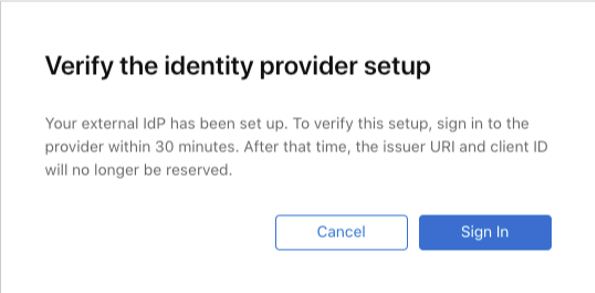
When you click the Sign In button, you should log in with any of your AD accounts:
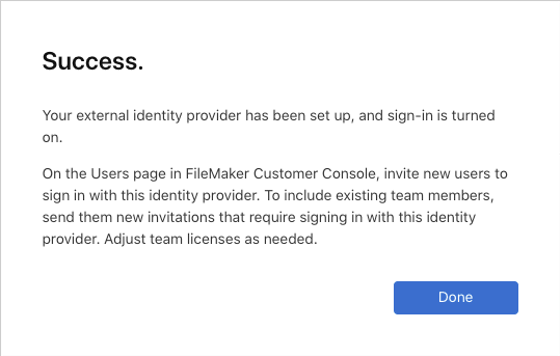
And if everything is configured properly, FileMaker Cloud will show you the success status:
There are two more steps to take to make sure your AD users can access your FileMaker solution hosted on FileMaker Cloud:
- Invite your users to your FileMaker Cloud subscription as licensed users.
- Add them to your existing FileMaker Cloud user groups if you are using group-based authentication or add them individually to your FileMaker security schema in your FileMaker file.
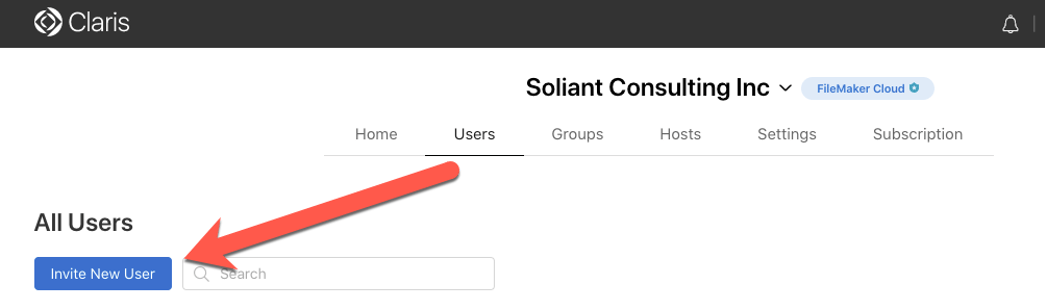
To invite users, click on Users in your FileMaker Cloud Customer Console and click the blue Invite Users button.
Invite the user by their email address and make sure to toggle the Licensed User setting and the bottom selection that will flag them as a user from the external IdP.

While you wait for the users to respond to the invitation, you can add them to the relevant groups in the Groups section of your FileMaker Cloud subscription. Or add them individually to the security schema in your FileMaker files. (We highly recommend group authentication though.)
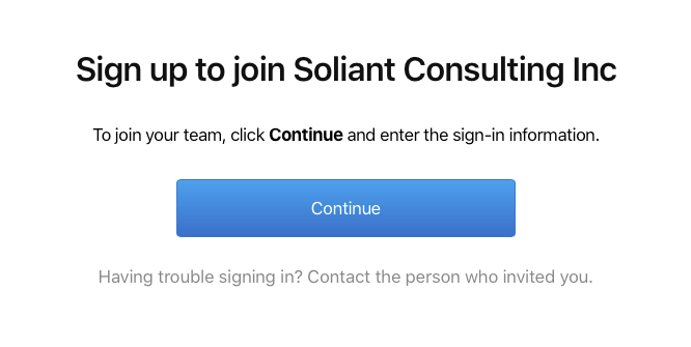
That user will receive an invitation in their email box where they can initiate their join-up:
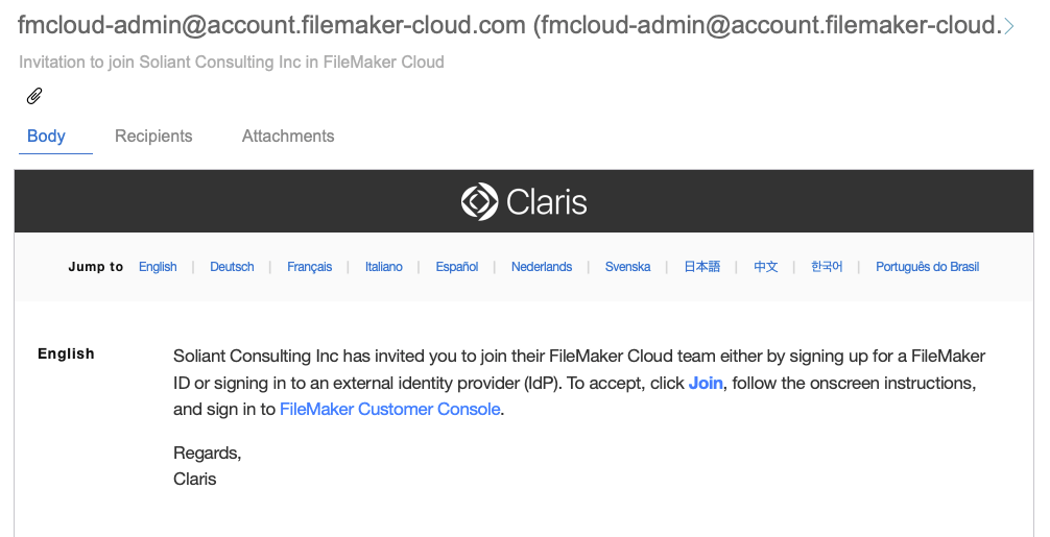
When they click the Join link, their browser will guide them through the process
At the end of this, they will be logged into their own customer console and will see the files listed in which have an active account.
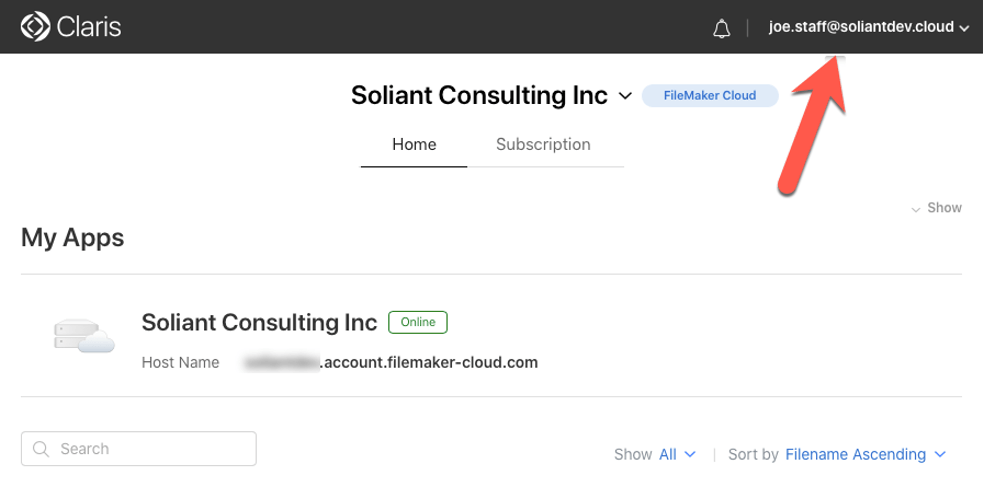
Just like any other FileMaker Cloud user, they can download FileMaker Pro from here if they do not already have it.
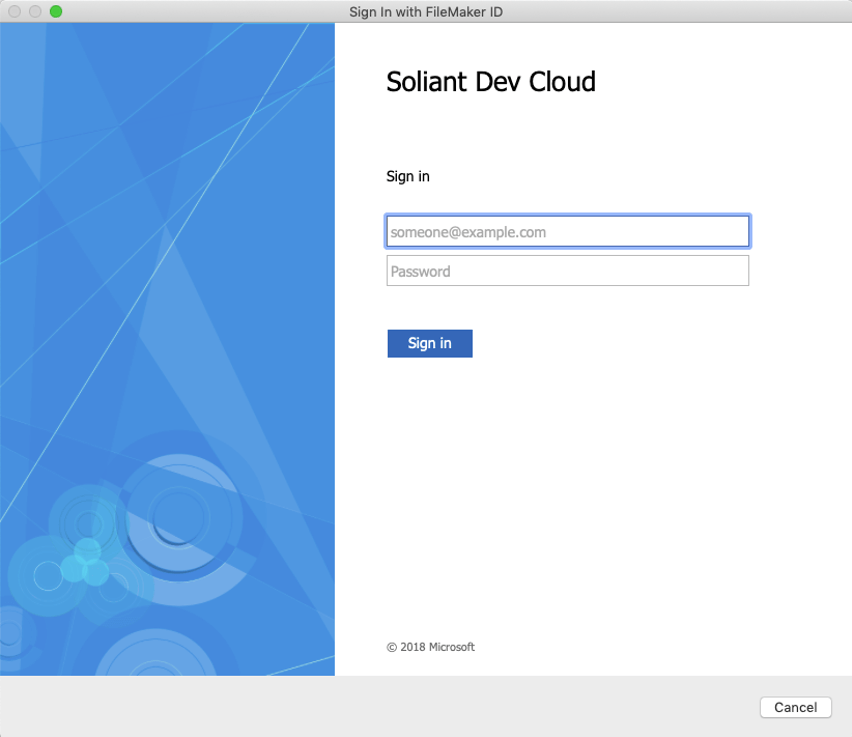
In FileMaker Pro they can log in through the normal FileMaker ID mechanism, which will transfer them to the ADFS login page for authentication:
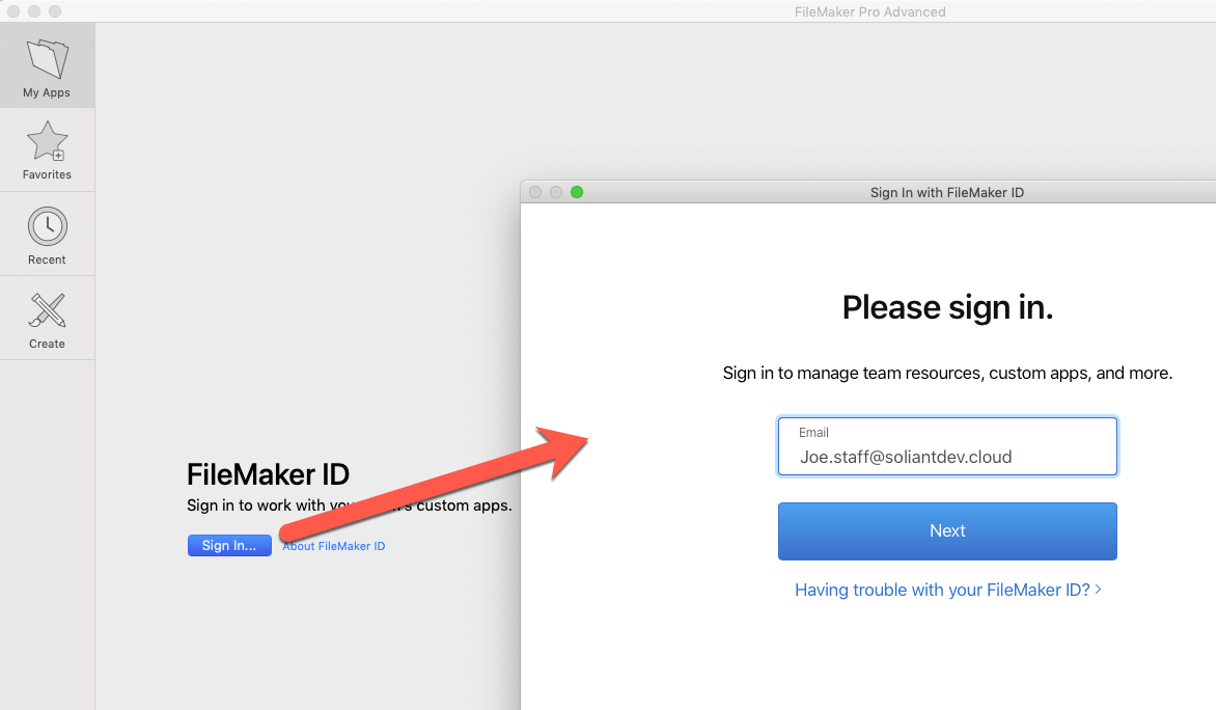
FileMaker Cloud recognizes that the user belongs to the external IdP (see Figure 34) and redirects to the ADFS login page (see Figure 35).
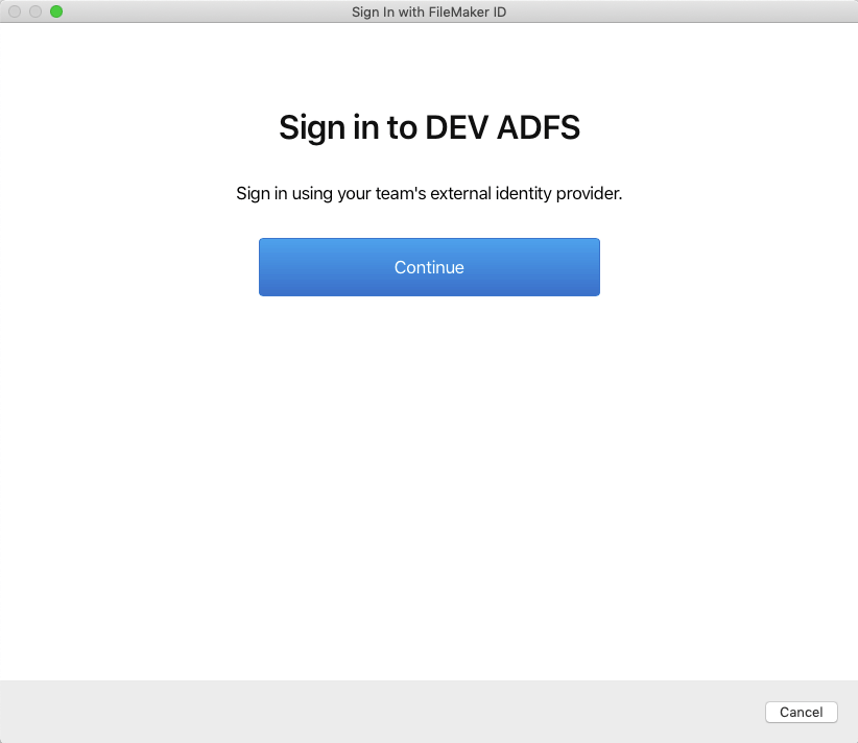
After a successful login there, the user is granted access to Soliant Consulting Inc subscription:

Next Steps
If you have any questions about this process or need assistance with your own FileMaker solution, please contact our team. We are happy to help.
Wim, thanks so much for this series of posts. After some trial and error, we found that Microsoft Azure AD can be configured for use as an external identify provider for Claris ID accounts. The “trick” was finding the correct Issuer URI. For Azure AD, use the endpoint named “OAuth 2.0 authorization endpoint (v2)” and strip off the last part of the URI, “/oauth2/v2.0/authorize”, leaving something like:
https://login.microsoftonline.com/########-####-####-####-############
The remaining steps are similar to configuring Azure AD for OAuth in FileMaker Server.
I’m probably not the first to discover this, but I wanted to add this comment here since your excellent article is near the top of the search results for this topic.
Thanks, Greg!