This is the third post in a four-post series on leveraging the Salesforce Marketing Cloud to effectively engage more audiences with less effort through automation of email personalization.
- Part One: More Connections, Less Effort: An Introduction to Marketing Cloud Automation
- Part Two: More Connections, Less Effort: Audience Segmentation Automation in Salesforce Marketing Cloud
As my two previous posts in this four-part series have highlighted, marketing professionals are busy. There are so many channels to tap, campaigns to launch, and people to reach. And so little time! Small marketing teams, especially, struggle.
Email marketing is an area, in particular, requiring quite a bit of effort to get it right. It’s too valuable of a channel to skimp resources on personalizing as many messages as possible, as well as possible. Unfortunately, the manual processes involved slow things down, making it nearly impossible to reach every audience segment with authentic, relevant, and personalized content. Automation in Marketing Cloud directly addresses this issue.
My first two posts focused on how to automate list segmentation by connecting the power of Salesforce to Marketing Cloud. In this post, I’ll cover how to build automated emails with personalization details.
Creating Your Email Content
I’m going to kick off this step assuming you have experience building a typical marketing email with personalization details in Content Builder. If you need some help, I suggest checking out this great material from Marketing Cloud.
My example follows the theme of my previous two posts – a birthday email from a specific Salesforce contact owner that includes other personalization details (Figure 17).
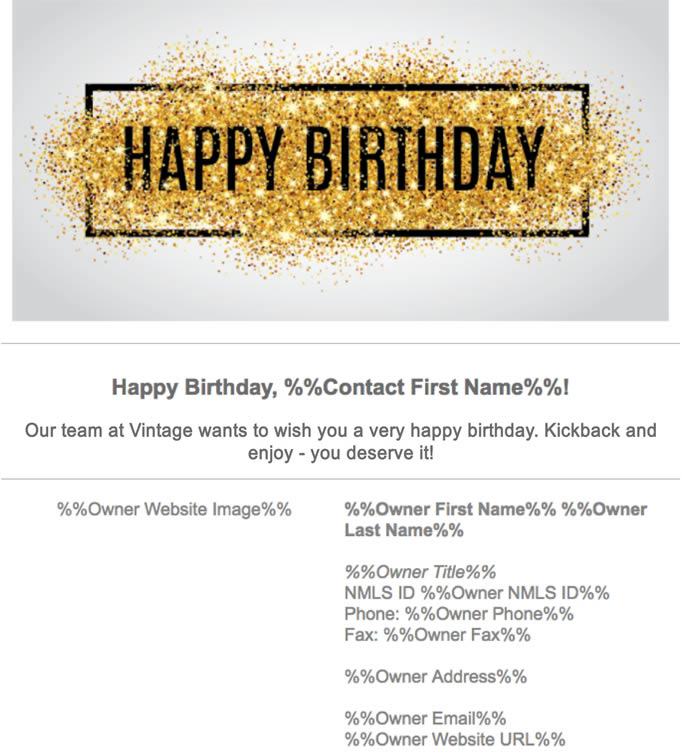
All email personalization in the content is enclosed between %% symbols. Each of these can be very easily configured using a content block and the use of personalization strings such as %%field-name-of-the-field-of-interest-in-the-data-extension%%.
At email send time, Marketing Cloud replaces these personalization strings with data for a given field from the target data extension. We’ll get to that in a little bit.
Once you have created your content, make sure to preview it in content builder using your target data extension. Click the Preview and Test button (Figure 18) to attach the target data extension that you want to preview (Figure 19).
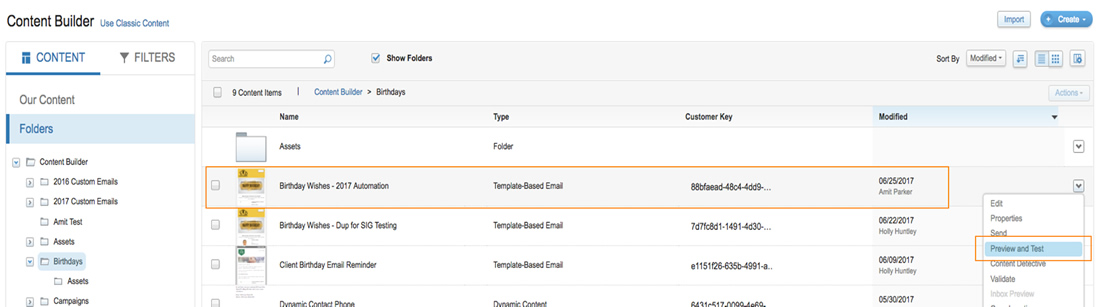
- Edit Email – Indicates that you are editing the said email.
- Preview and Test – Indicates you are in Preview and Test mode for the email.
- Folder icon – Click to display a list of data extension folders in the left pane that allows you to select a target
data extension for the preview.- You will need to locate the target data extension in the folder structure and click on it to select it.
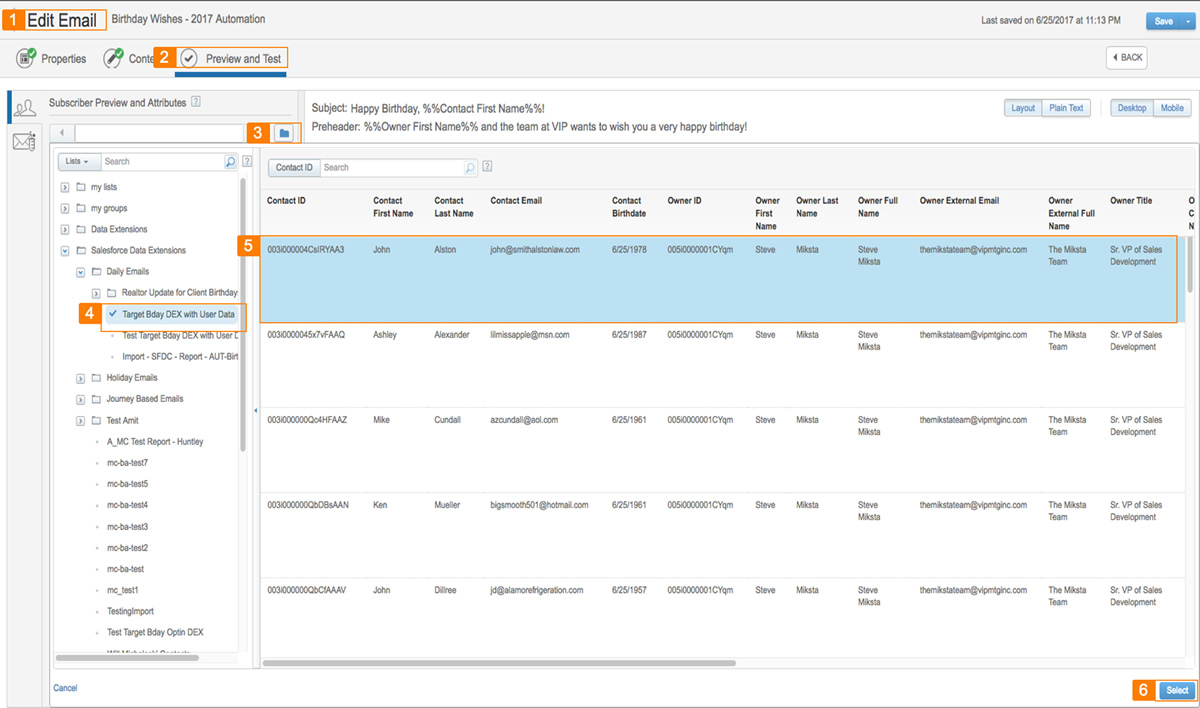
- Selected Target Data Extension – The target data extension you selected in step #3A above.
- Active row in the table – Selecting a data extension displays the records in that data extension in the right hand pane. Click on the first record.
- Select – Click to preview the email with the data for the selected record.
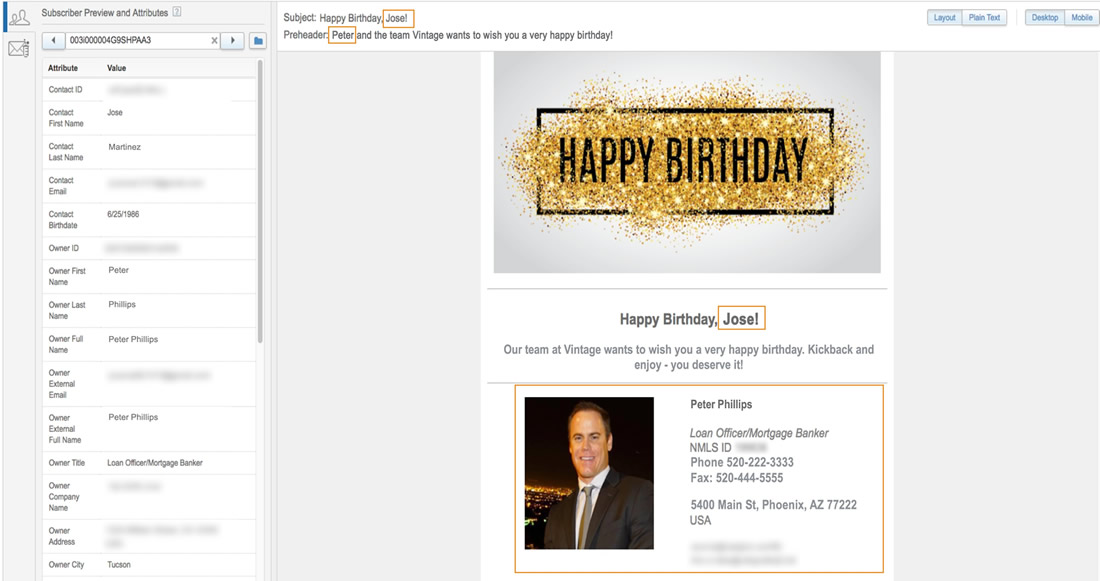
To further test your email personalization efforts, scroll through a few subscribers in your data extension. You will see the content preview changes to show the personalization strings replaced by relevant data (Figure 20). This is a great way to ensure your content is up to snuff!
Configuring Your Email Send
You need to configure your email send to package things together. When executed, email content gets sent to subscribers in a target data extension from a sender as configured in the Send Classification.
Send Classification defines the name and email of the sender in the email that a contact receives. In short, it is the magic that makes it appear to the contact that his/her point of contact at your company sent the email! It also makes sure emails stay CAN-SPAM compliant.
Before we configure an email send, we’ll need to create a Send Classification. I’ll cover this briefly, but you can read more about how to do that here.
First, let’s create a Sender Profile to package up in a Send Classification. Make sure to use the data extensions fields that represent the name and email of the sender as it appears to your customer. In my example, my target data extension has “FromName” and “FromEmail” fields, which were imported in the import activity described earlier. These fields contain the user name and user email of the user that owns a given contact (Figure 21).
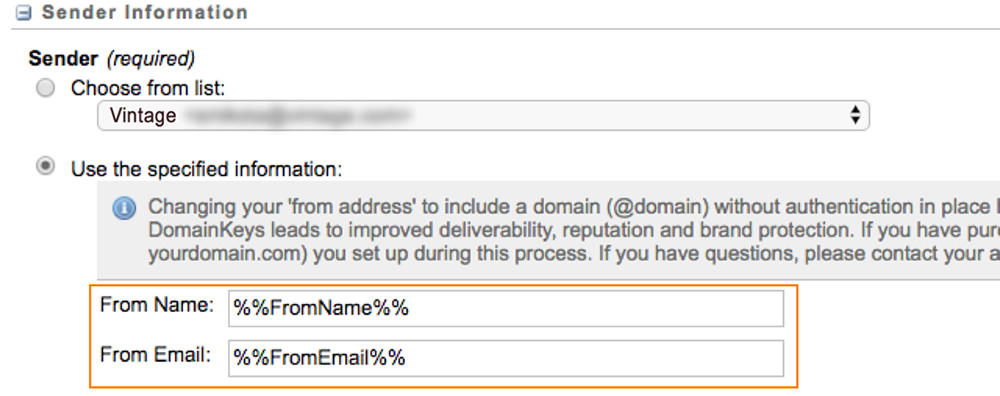
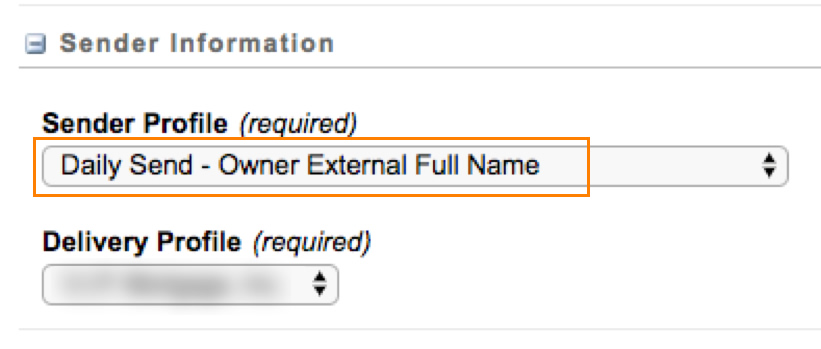
Now simply use this Sender Profile in the Sender Information section of your new Send Classification (Figure 22).
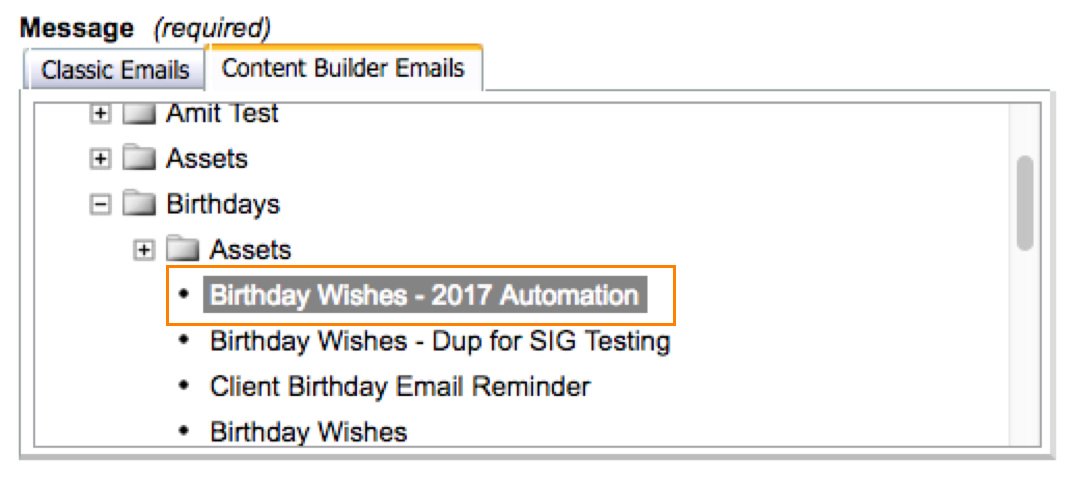
Its time now to put your content and audience together using a User Initiated Email Interaction. I won’t cover this short step, but you can find some documentation here. I’ll highlight the relevant bits to create the email send.
Start by selecting the email you created in an earlier step (Figure 23).
Add some personalization to the subject and pre-header (Figure 24).
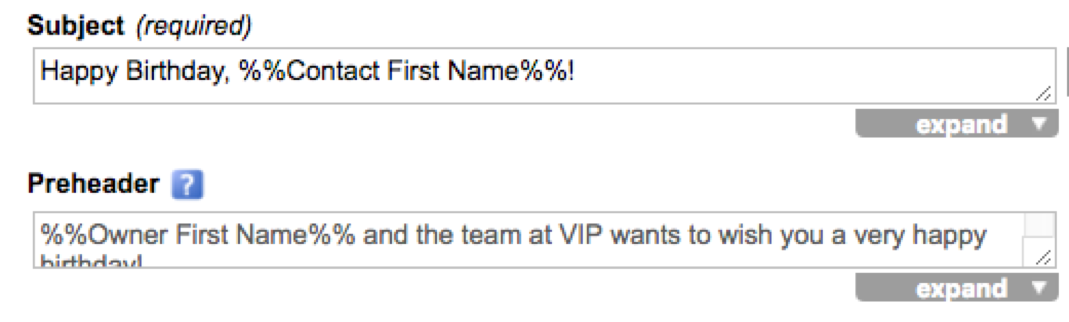
Note: The strings enclosed within %% symbols should existing as fields in the target data extension. These will get replaced with the data in the said field at send time (Figure 25).

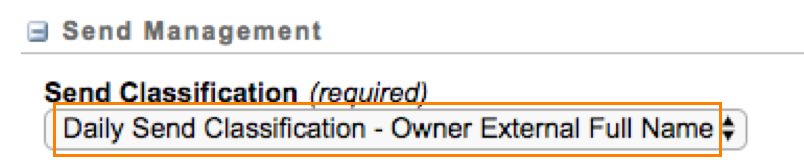
In the Send Management section, make sure to select the Send Classification you created earlier (Figure 26).
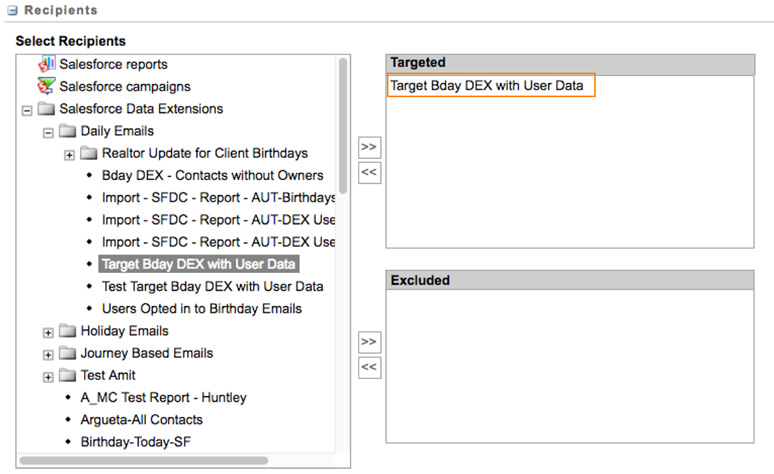
In the recipients, select the target data extension you created and populated earlier (Figure 27).
Final Steps in Automated Email Personalization
Congratulations! You’ve built and configured your personalized content! Automated email personalization and success tracking are just a few short steps away. I’ll be sharing best practices for those in my next post in the series, so make sure to stop by next week to read it!
Or, if you don’t want to wait that long, I’ve compiled the entire four-post series into a downloadable white paper. You can download it today here:
Nice post! Can this be done in any marketing automation tool? I’ve started using GetResponse not so long ago, so I’m wondering…
I’m afraid not. This post was specific to the Salesforce Marketing Cloud and the power it brings especially when integrated with the Salesforce Sales Cloud. Good luck with GetResponse. And give us a holler if you ever choose to switch to Salesforce!
Thanks for this post!
Have one question. What is the data type to be used for storing profile photos in Data Extension in SFMC?
Not sure about the data type for images. I’ve never done it that way. I actually store images outside such as say aws and store the url in a data extension. That seems to work better. That way you can even use it in content builder for an image in a content block. Hope that helps.