New, But Not New
Sign in with Apple (SIWA) is marketed as a new feature in FileMaker Server 19.6, but in reality, you have been able to use it for a while now since SIWA is just another OAuth-compliant identity provider. Steven Blackwell and I wrote a white paper a few years ago that outlines how you can configure SIWA and configure your FileMaker Server to use it.
That means that if you are on an older version of FileMaker Server, you can also use Apple ID as a means to authenticate your users.
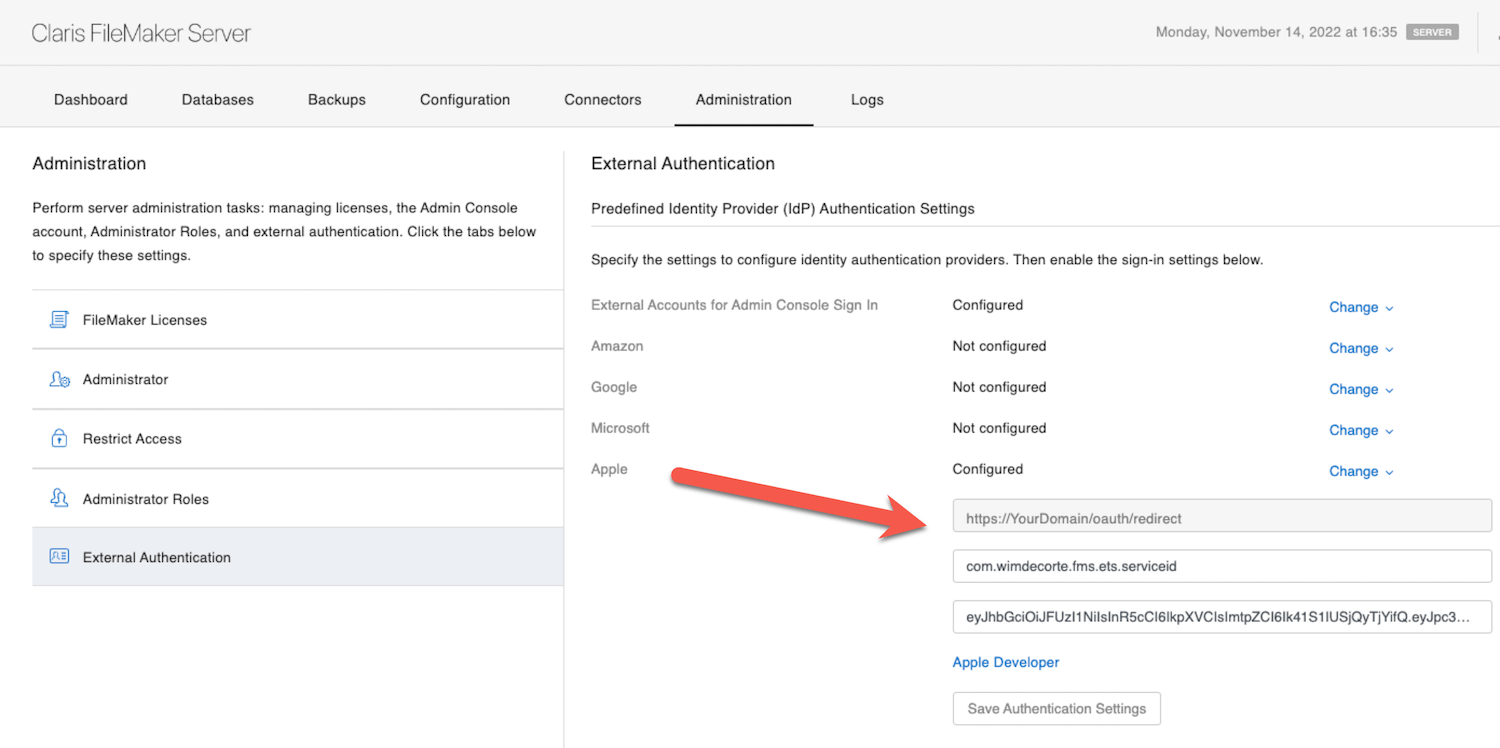
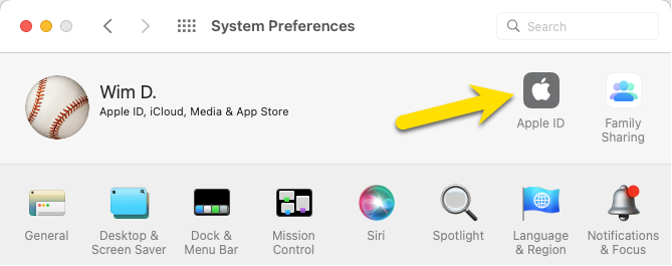
19.6 certainly makes it easier to configure FileMaker Server since you have a dedicated area in the Admin Console to input your settings:
The other benefit of using FileMaker Server is that you can let the users use Apple’s Hide My Email. At least to some extent.
Normally a user can make that choice at the moment they sign up for a service. That part does not work with FileMaker solutions. The user will need to generate a randomized email address ahead of time; that email address needs to be added as an active account in the FileMaker solution before the user can log into your solution.
You will see how that works later in this blog post.
Configuring Sign in with Apple
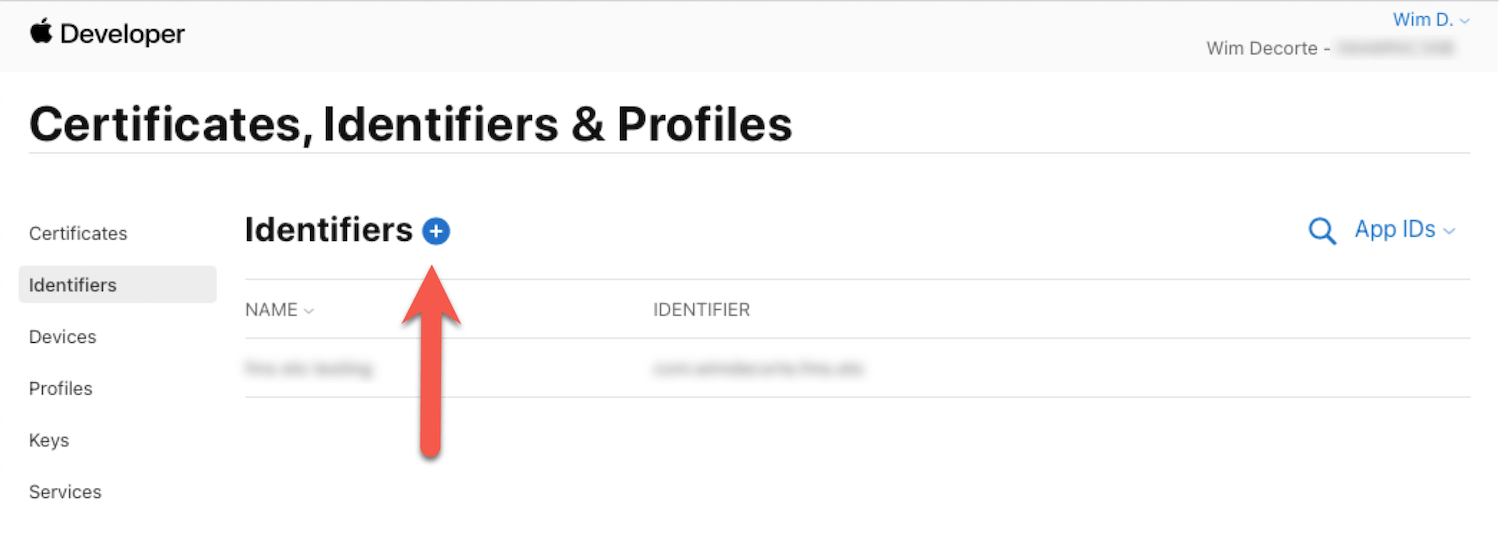
First, let’s set things up on the Apple side. You will need an Apple Developer subscription for this.
Log in at Apple’s Developer website:
https://developer.apple.com/account/resources/identifiers/list
While there, first make a note of your Team ID; you will need that later.

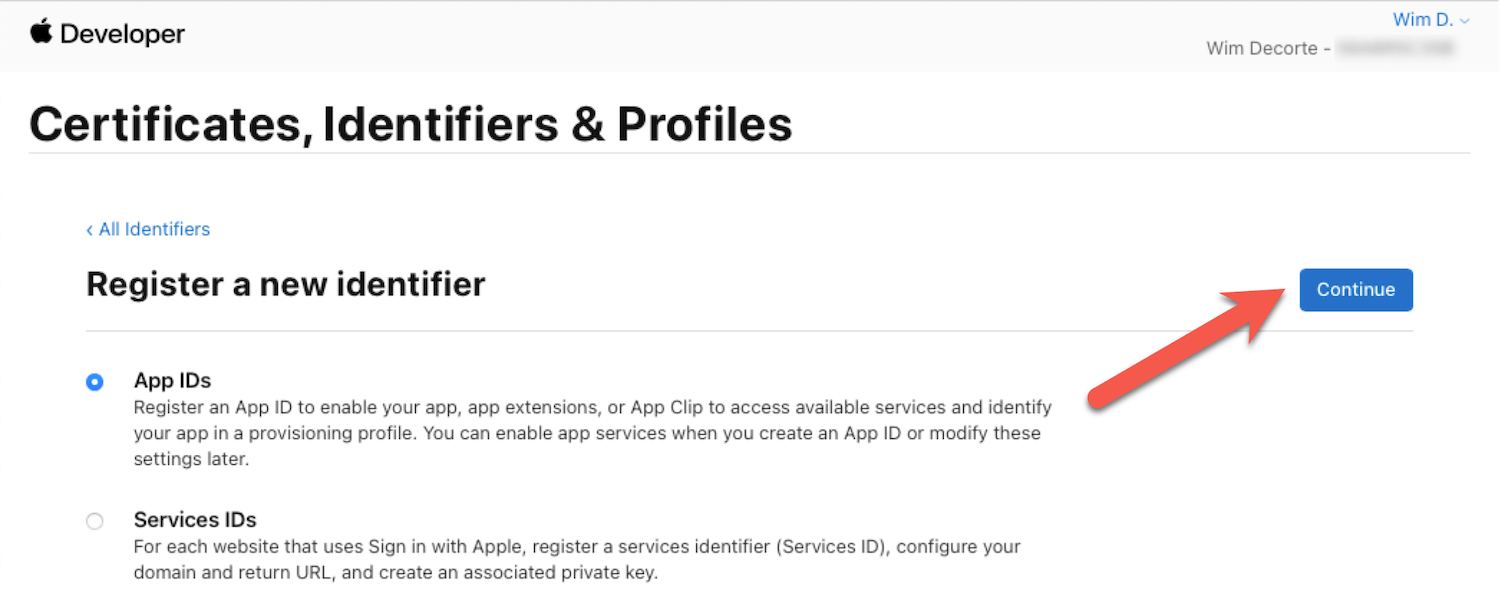
Pick App IDs and continue:
Pick App IDs and continue:
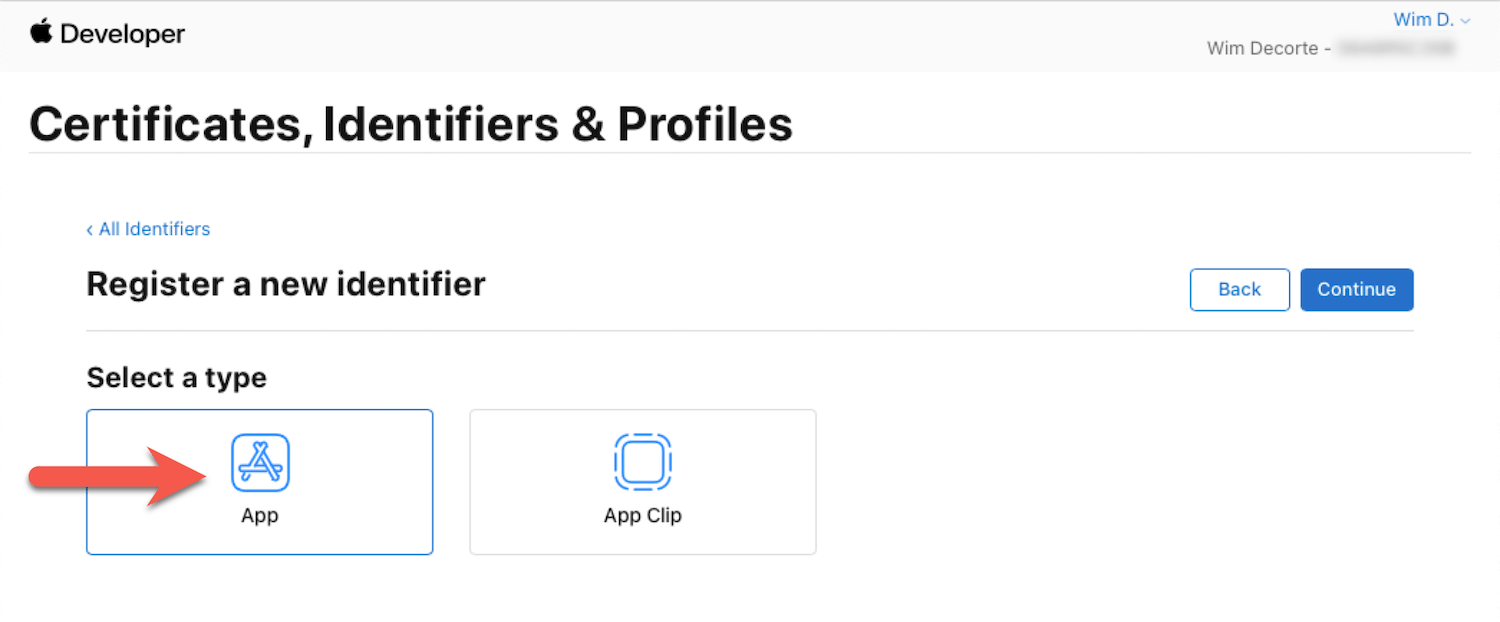
Pick App:
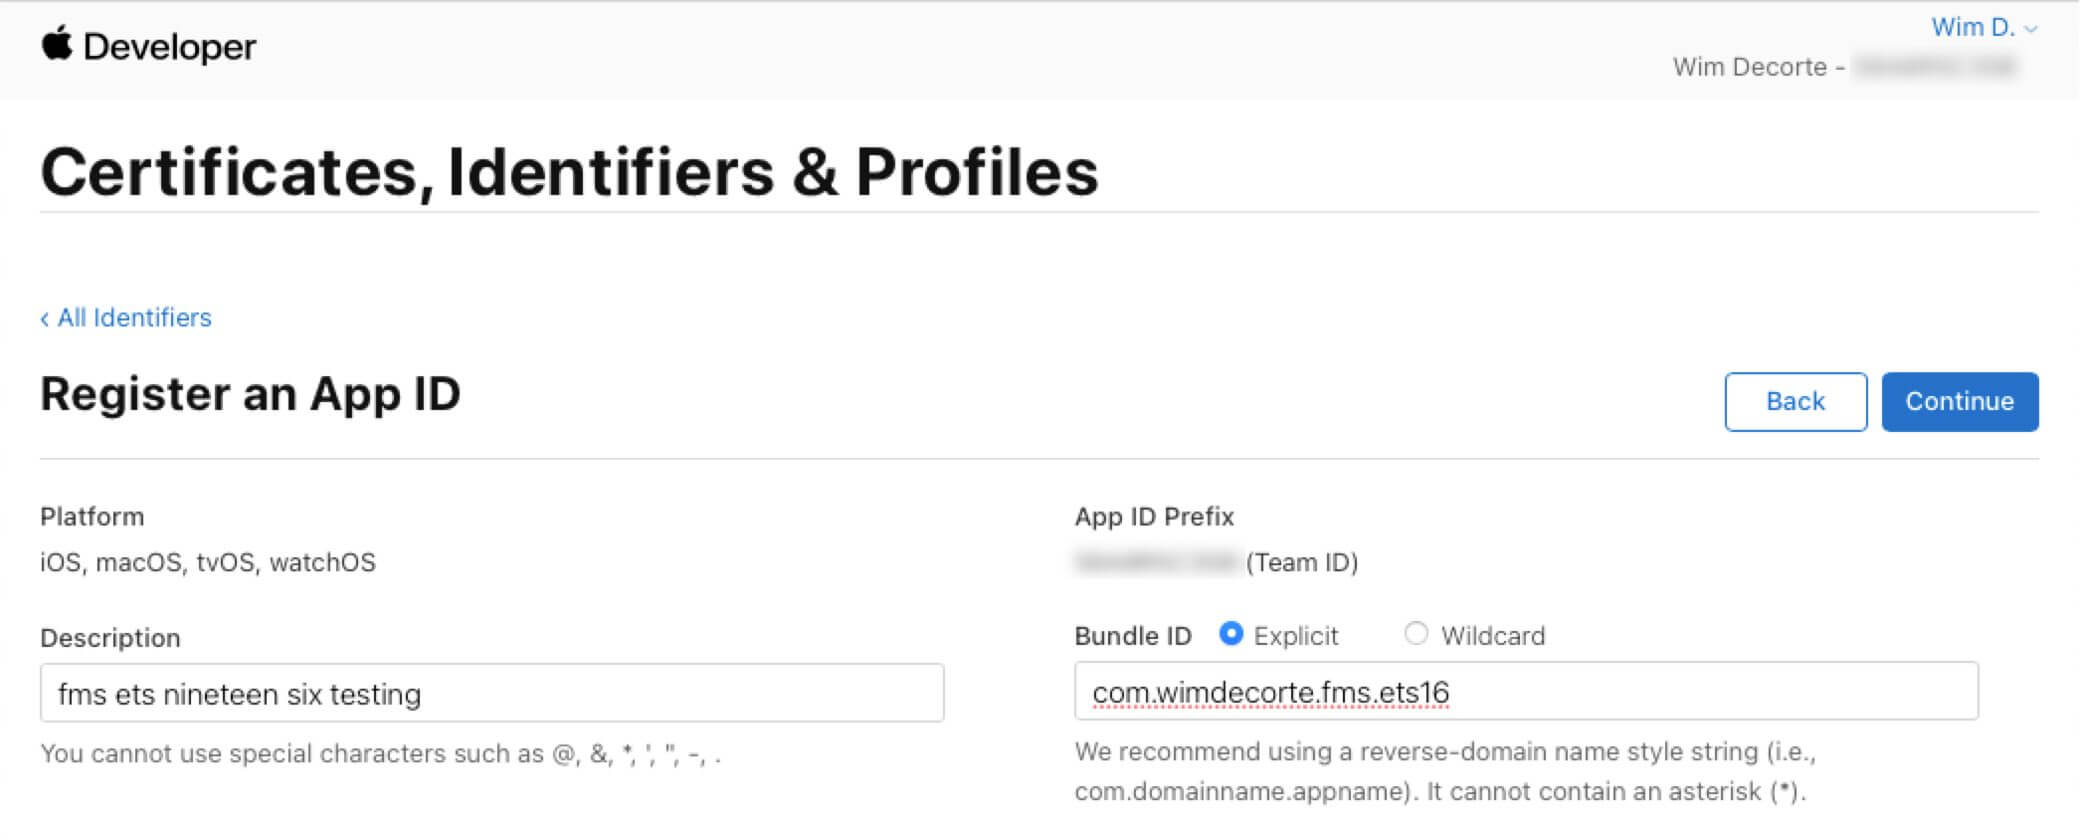
Add a description and a Bundle ID in the recommended reverse domain syntax:
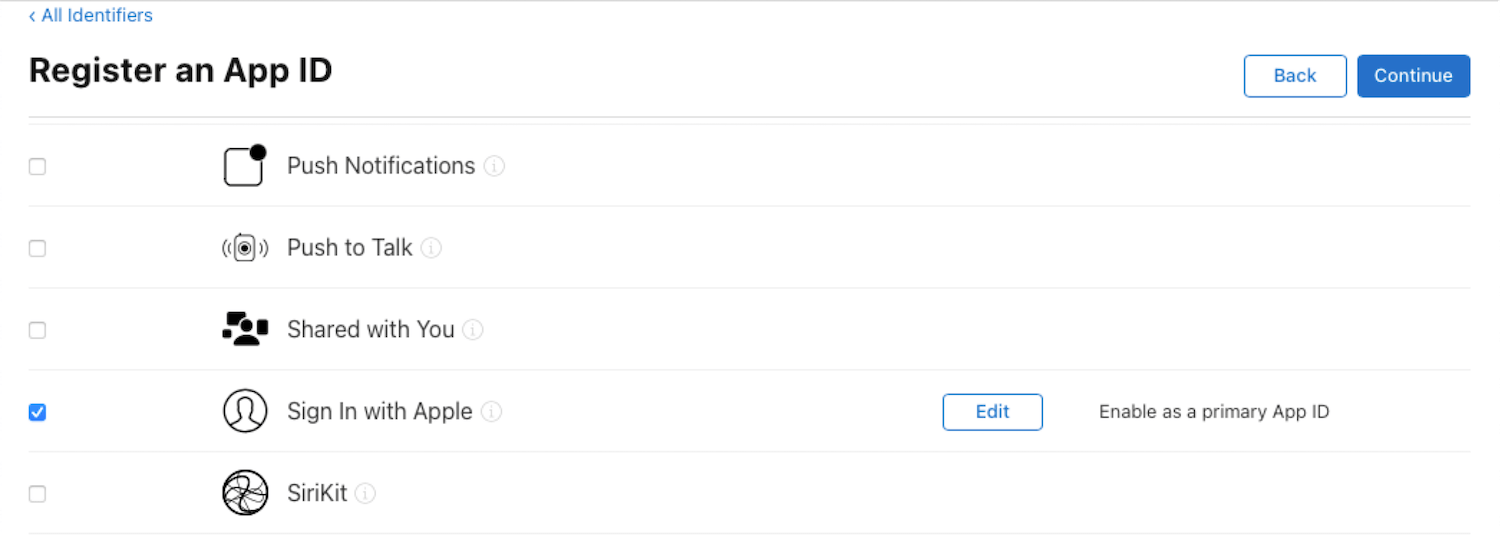
And scroll down to select Sign In With Apple and choose Continue
On the final screen, review your settings and choose Register:

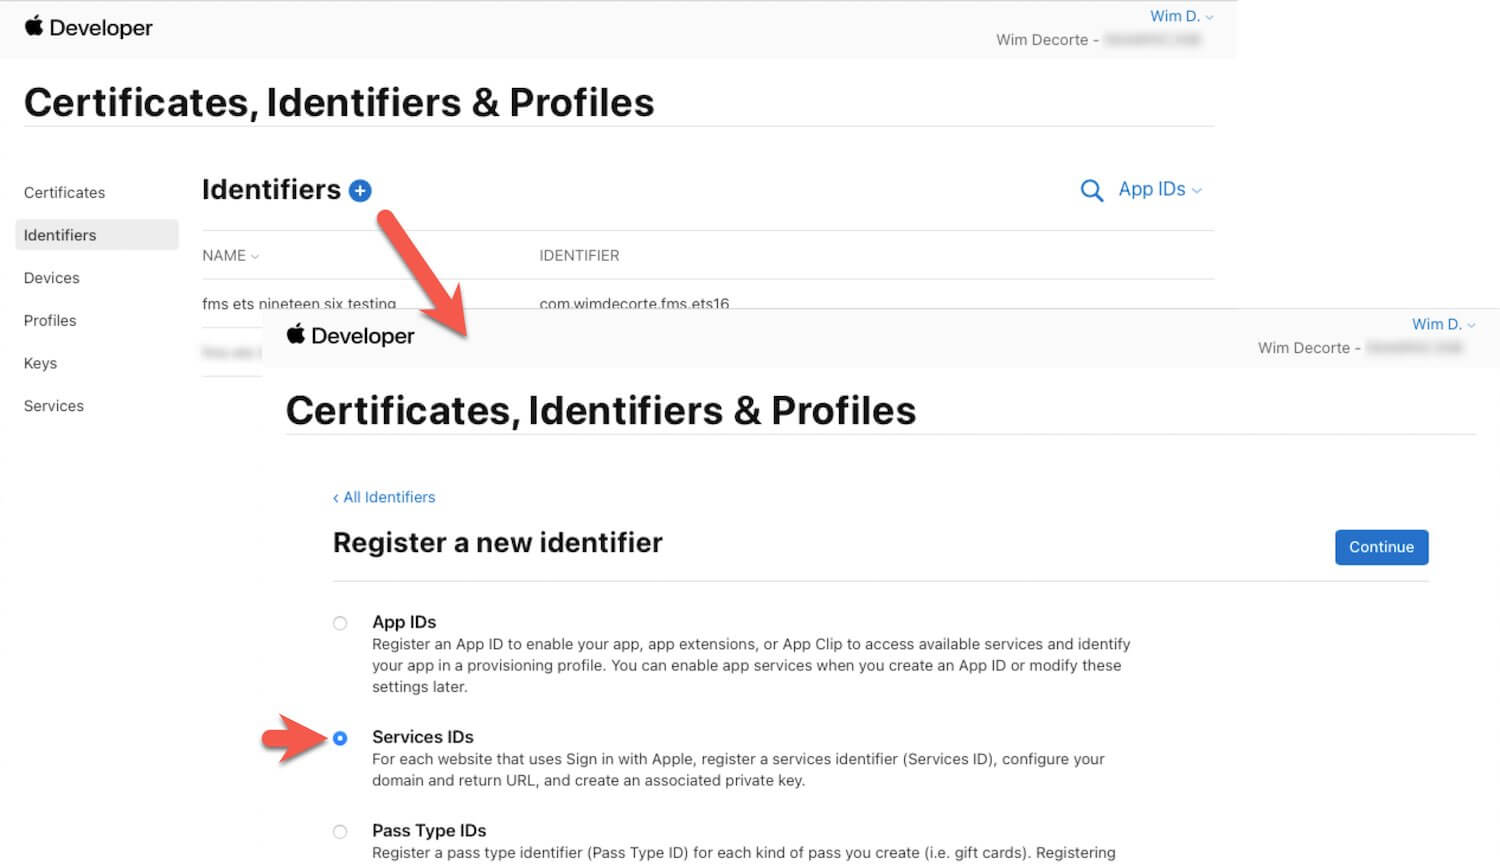
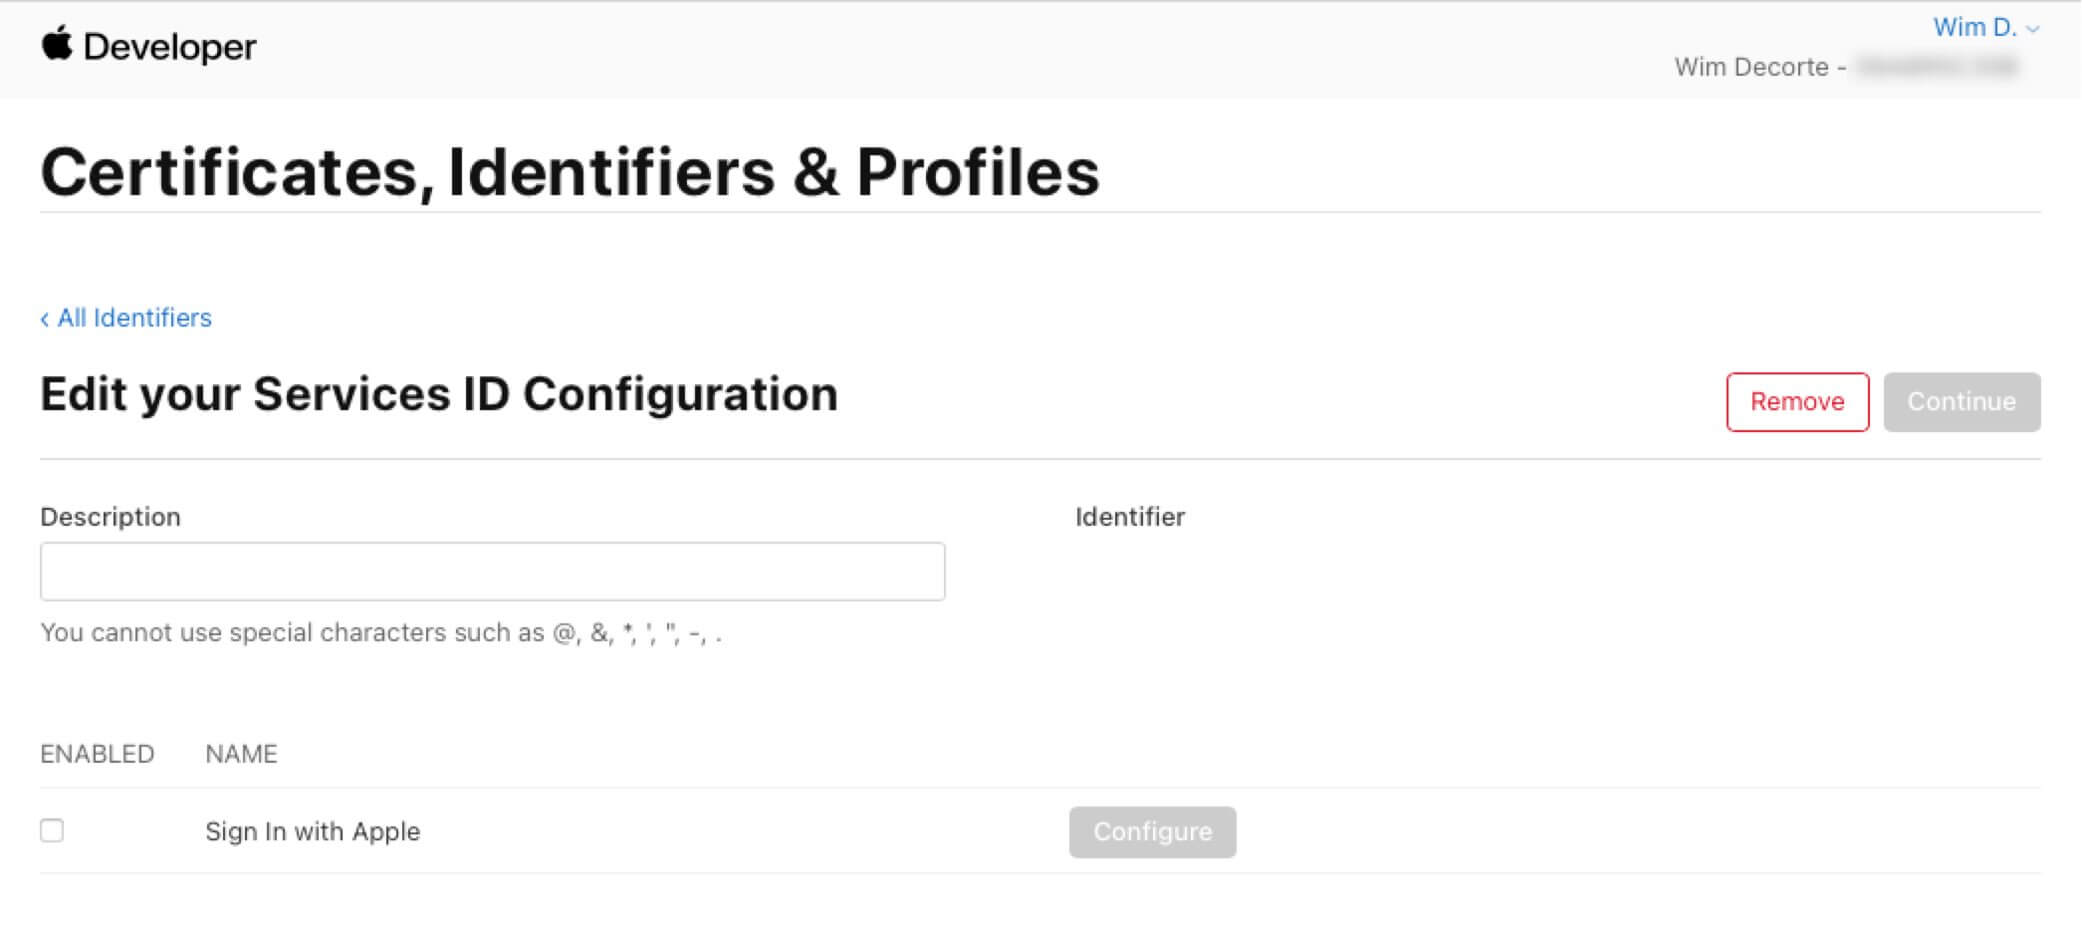
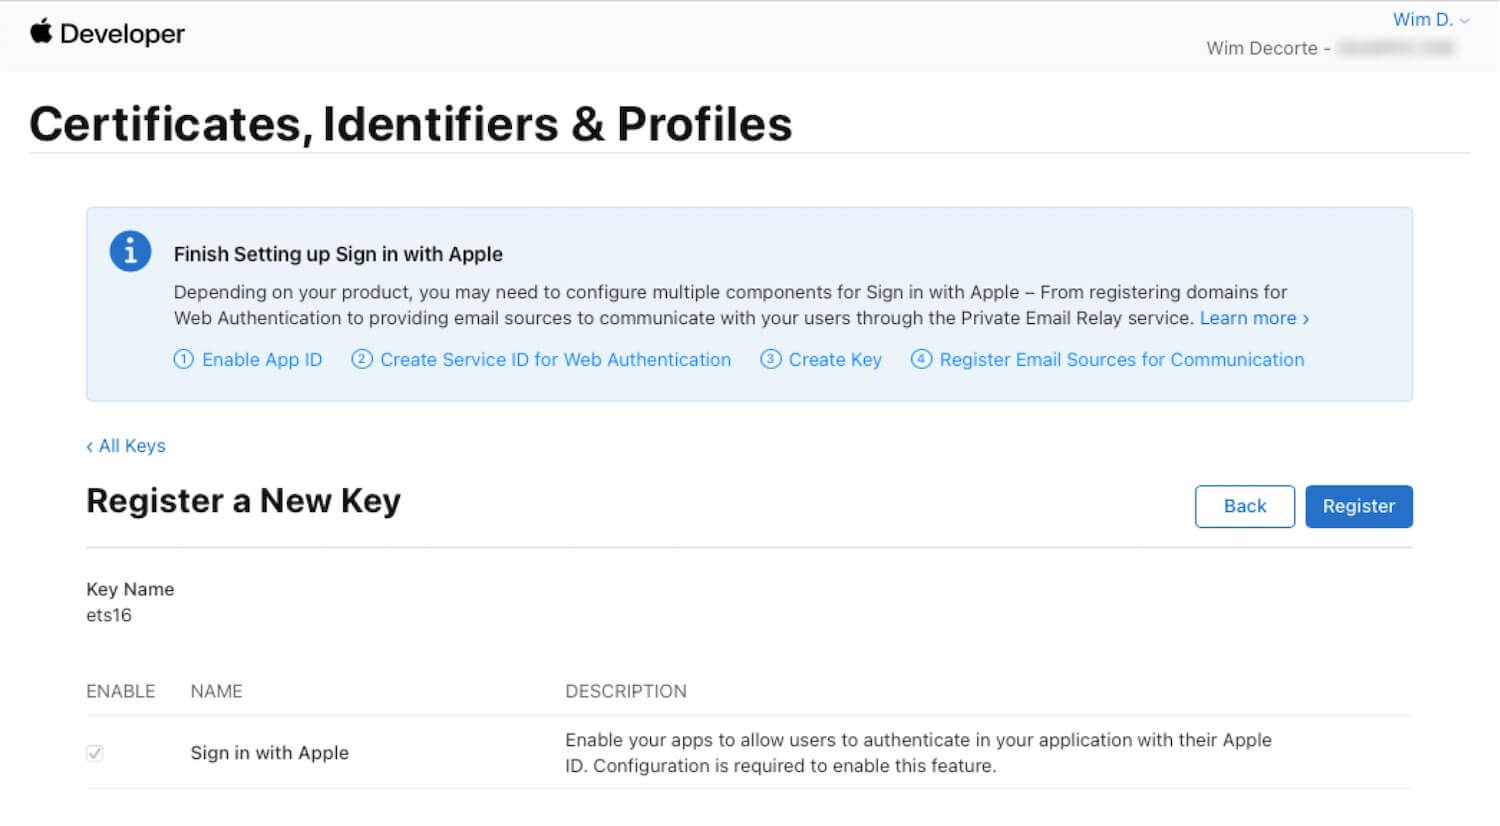
This land you back on the Identifiers screen. Select the + button once more, and this time select Service IDs:
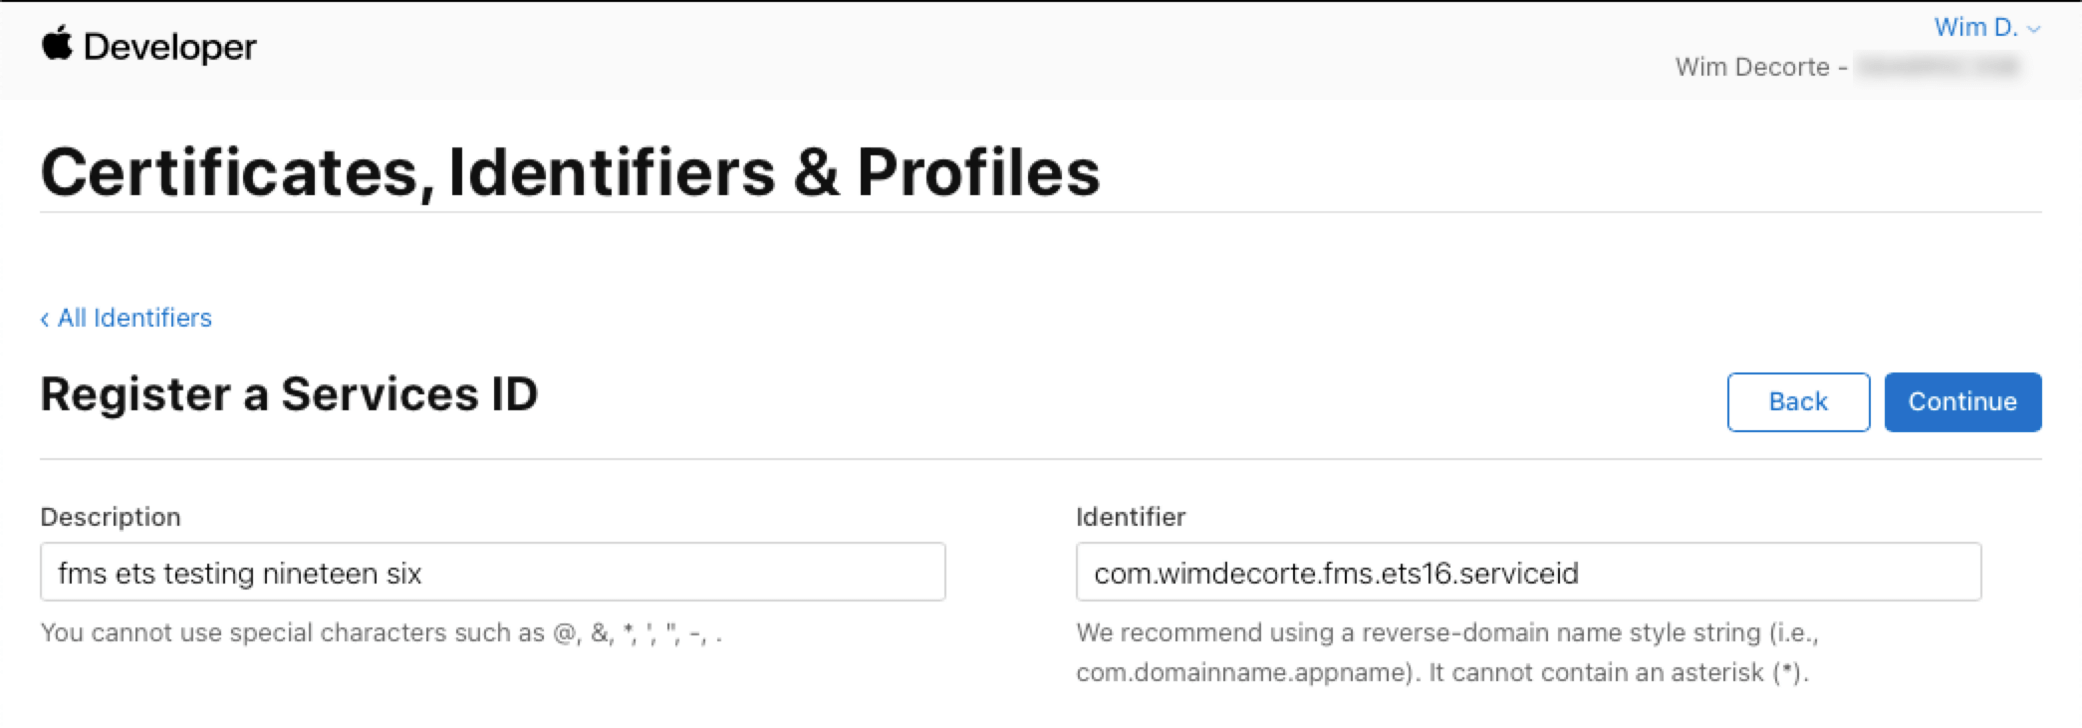
Name it in the normal reverse domain name fashion (the example uses the same as the App ID but with .serviceid added to it).
Click Continue and then Register to save it.
Then select your new service id from the list to configure it:
Enable Sign in with Apple, and in the popover window, select your App ID at the top. Fill in the DNS name of your FileMaker server and the full OAuth redirect URL for your FileMaker Server:
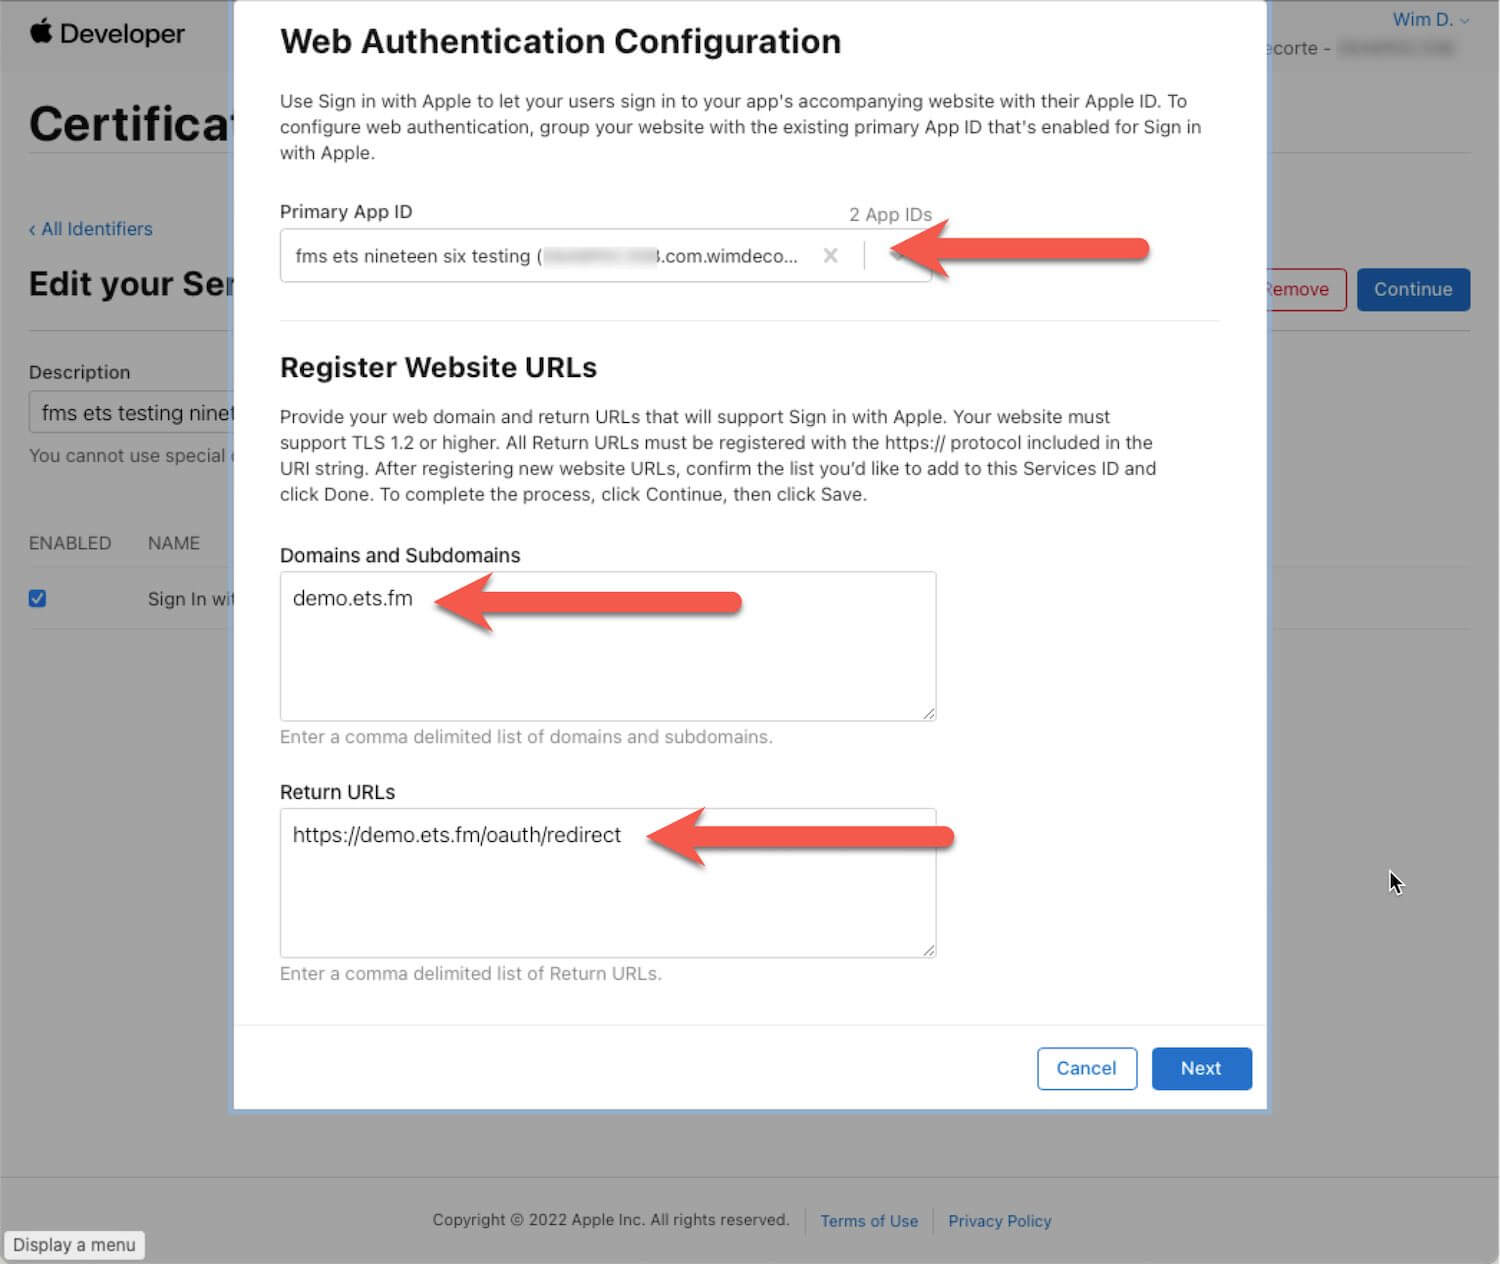
Select Next and then Done to navigate back to the Service ID.

And Continue to save it.
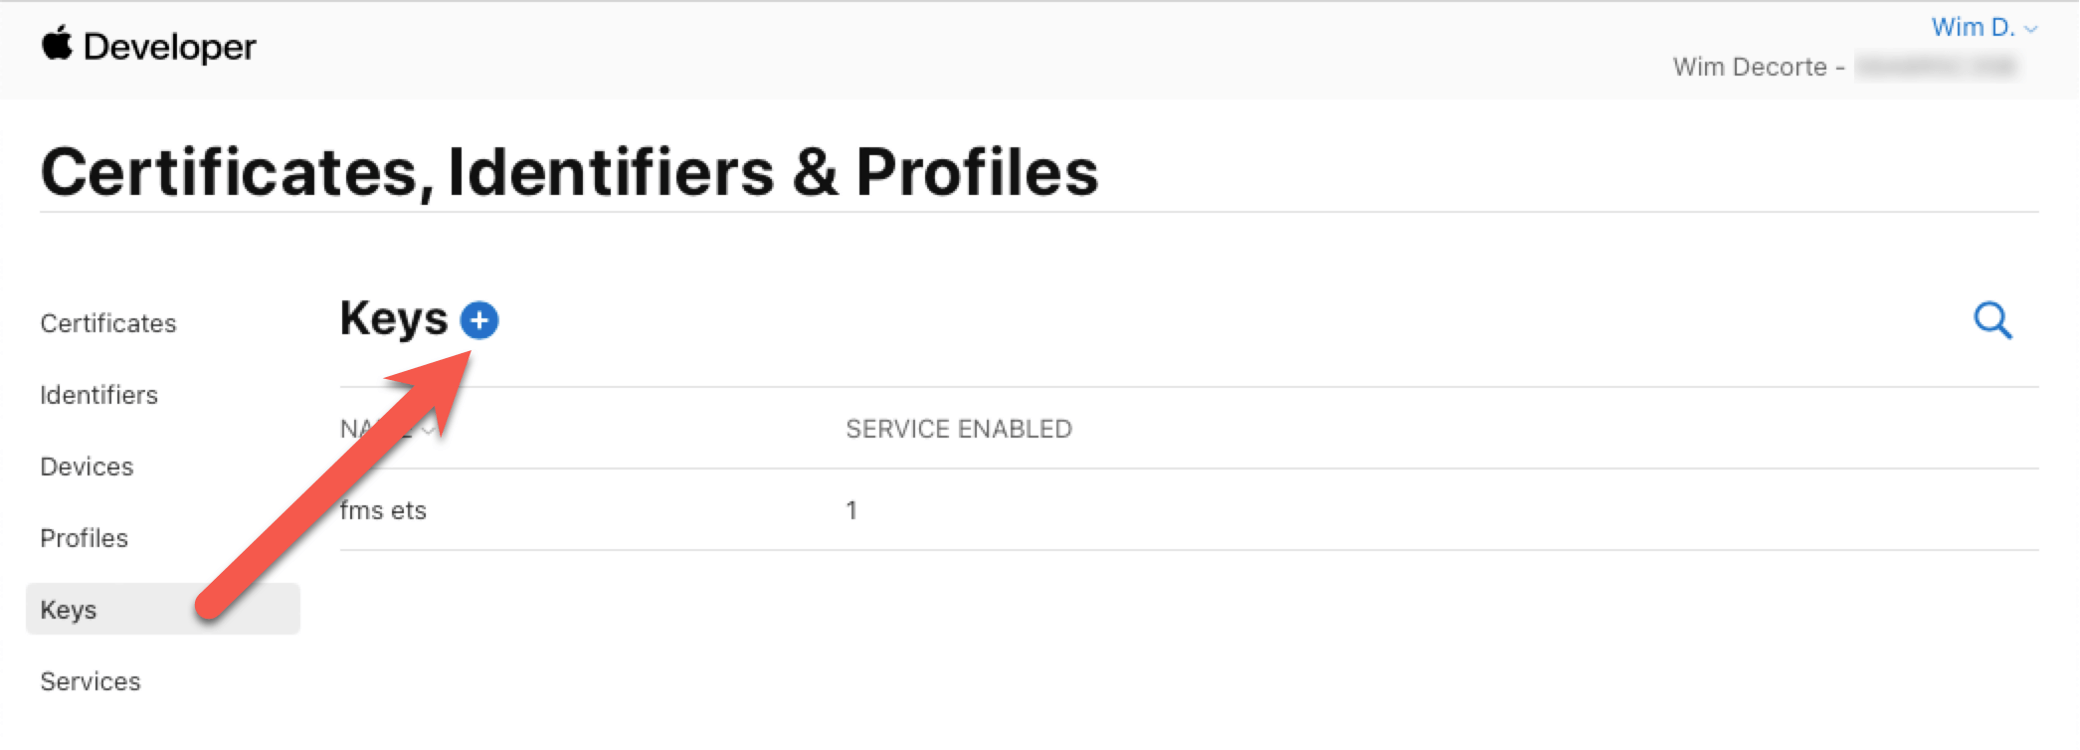
Creating Your Client Secret
In OAuth terminology, the Service ID serves as the client ID. The next steps are about creating a client secret to go with that.
From the menu on the right, select Keys and click the + button to create a new key.
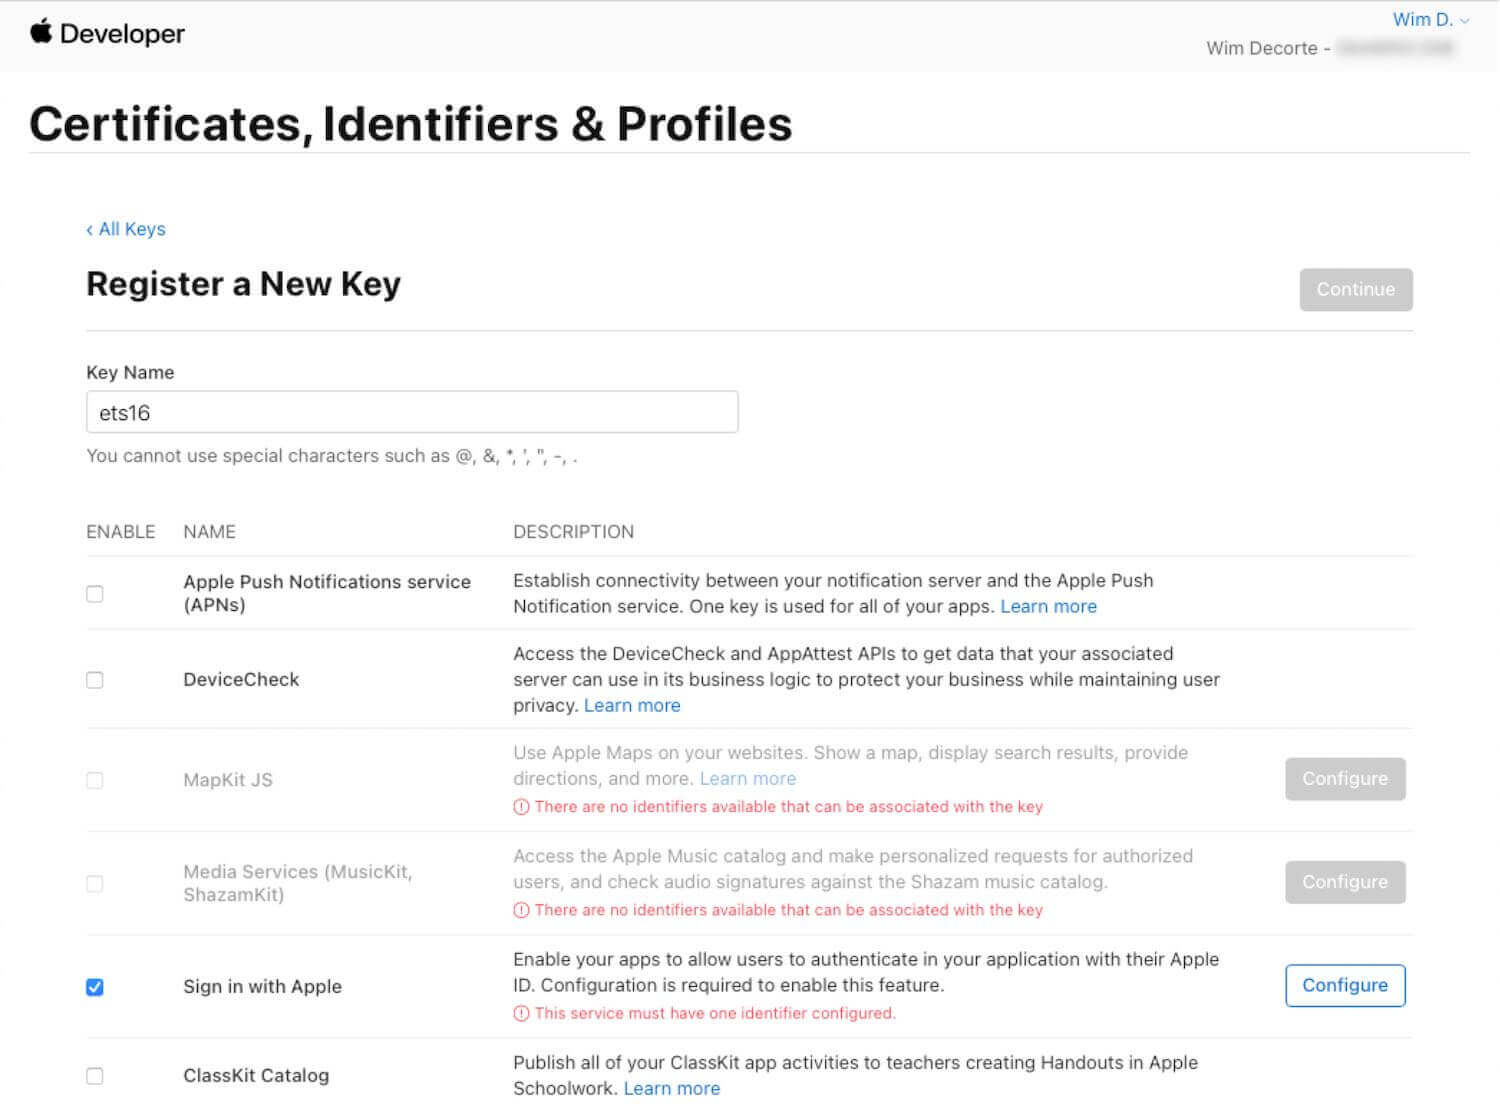
Click Configure and select your App ID:

Save the settings and continue to where you can Register your key:
Take note of your Key ID, and download the private key that Apple has generated; it will be a file with a .p8 extension. Keep that one secured as one does with private keys.
With this private key, you can generate the client secret that will go here:
The instructions provided by Claris tell you to create a Ruby script at this point to generate that client secret.
You do not need to install Ruby on your FileMaker Server for this. If you are a macOS user, then you already use Ruby, but if you are a Windows user, you can consider using a different approach.
Using JavaScript Instead of Ruby
One such approach is our open-source project on GitHub that uses JavaScript instead of Ruby. It is implemented as an API that you call with the relevant pieces of data, and it will return the JWT that is your client secret. The required JSON is described in the readme and consists of the contents of the p8 private key, your Apple Developer Team ID, the client ID (aka Service ID), and the name of the key (Key ID).
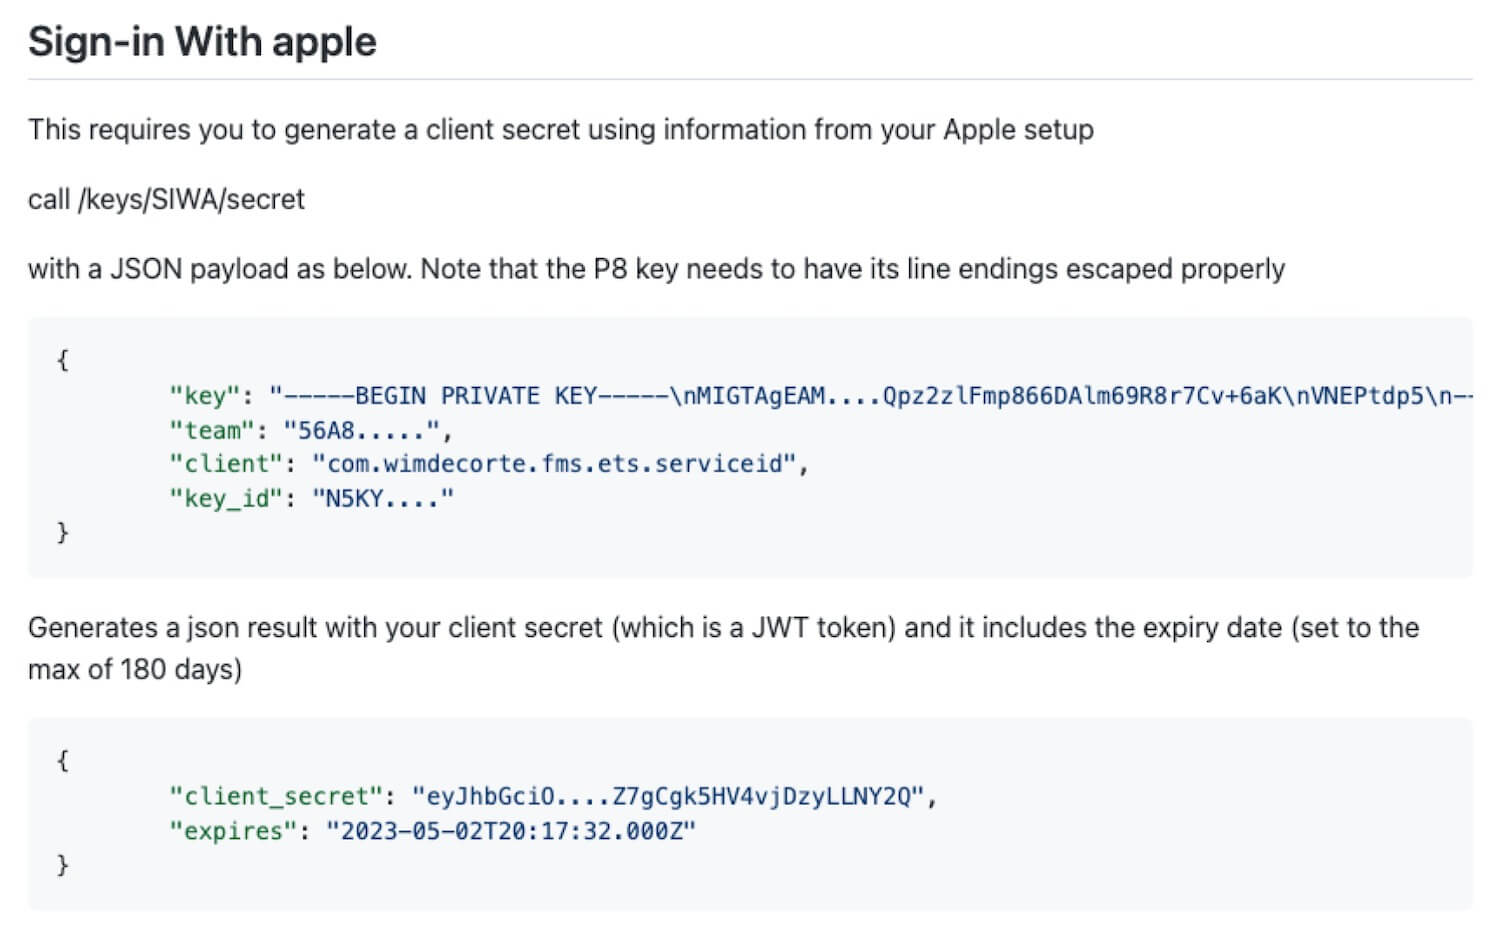
Note that the client secret has a maximum validity of 180 days. So you will have to regenerate a secret before your current one expires.
Configuring FileMaker Server
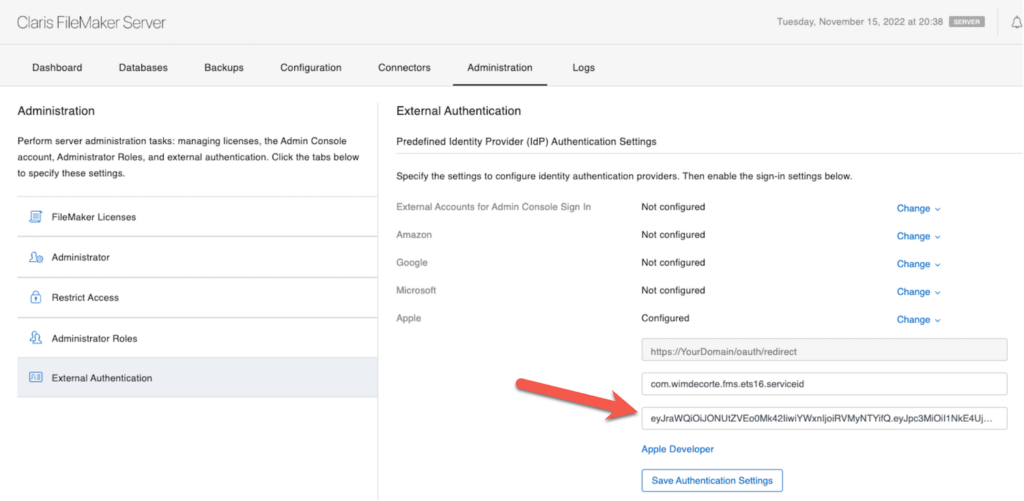
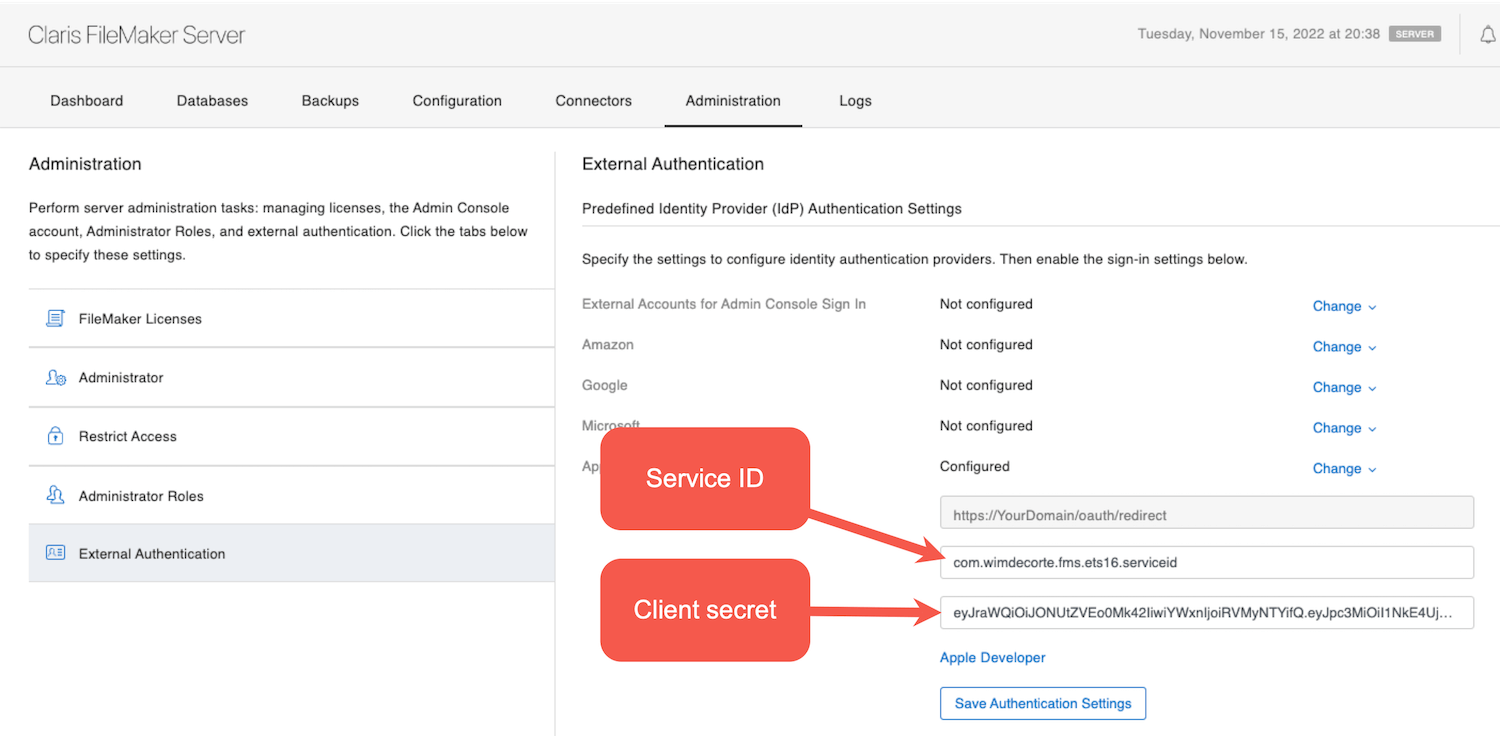
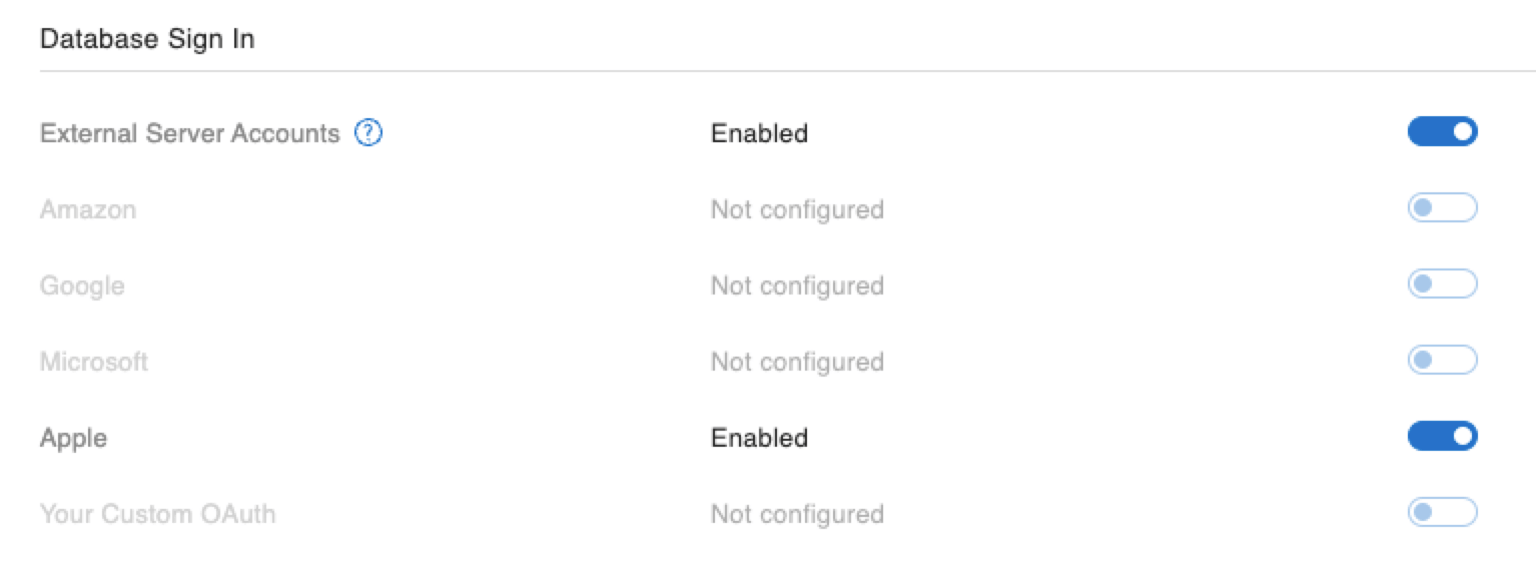
The External Authentication Section
Expand the Apple area under External Authentication and add the Service ID (aka client id) and the client secret you have generated:
Save the settings, and in the bottom part of the screen, don’t forget to enable External Server Accounts and enable Apple:
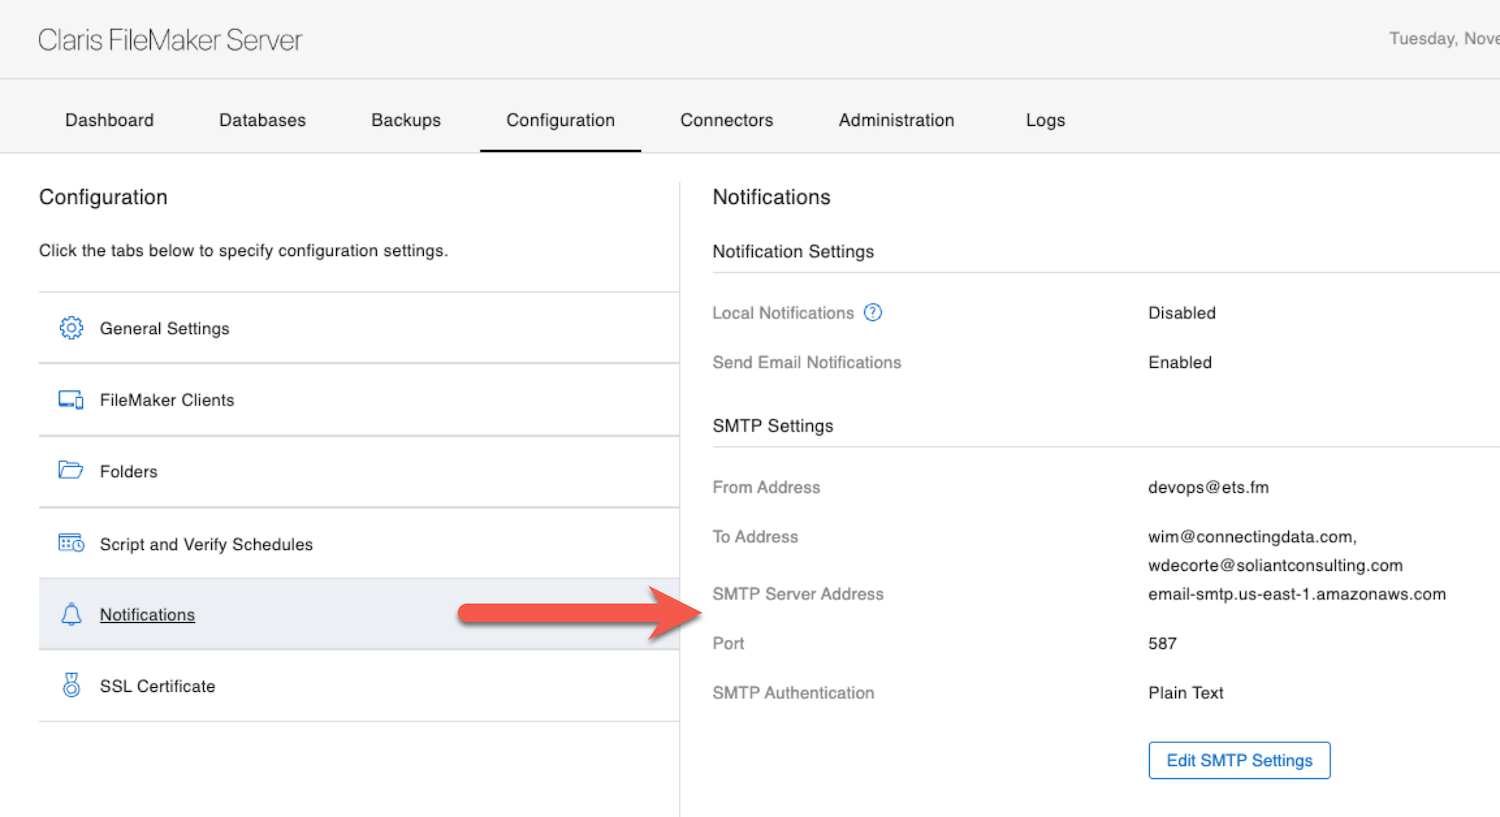
The Notifications Section
For most external identity providers, that is all that you need to do. But for Sign in with Apple, you also need to enable the SMTP configuration. When a user first logs into your solution with SIWA, they will be sent an email with a one-time code.
You will need a valid SMTP setup in this section.
The Login Experience
For the user, logging in starts as usual by clicking the identity provider button on the login dialog:
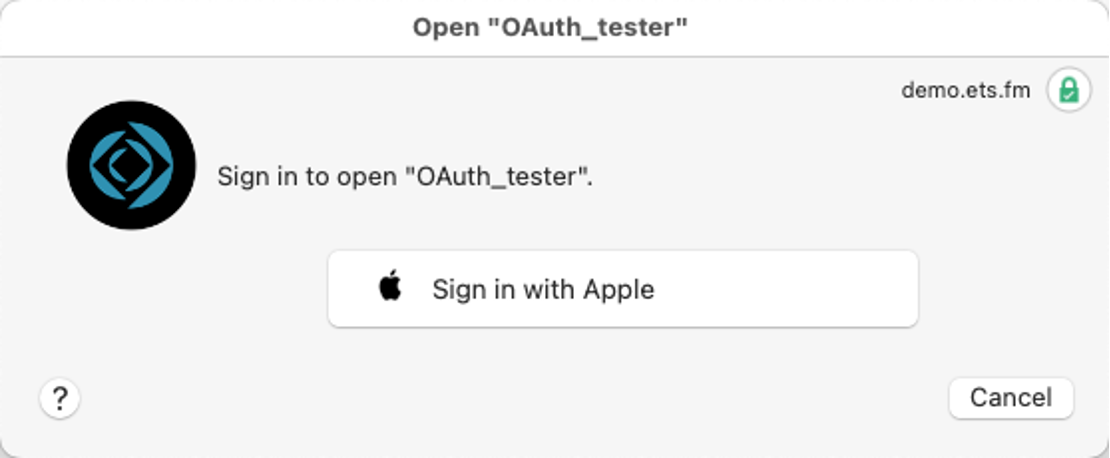
This will trigger an authentication through the user’s Apple ID, and that may take different forms depending on their machine’s OS and what preferences the user has set for her- or himself.
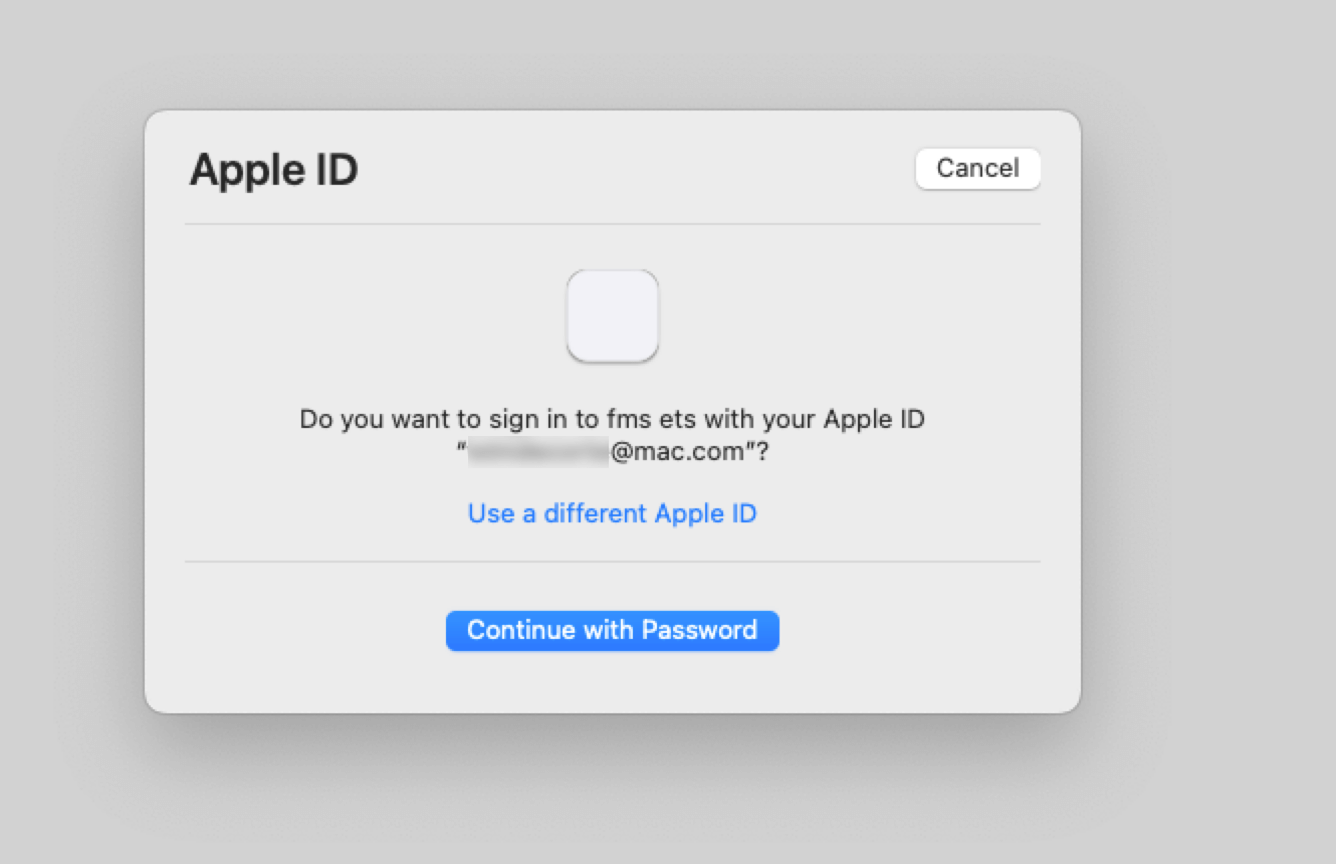
Once Apple is satisfied that you are who you say you are, control is passed back to FileMaker, and FileMaker will ask the user for an email address to send a code to:
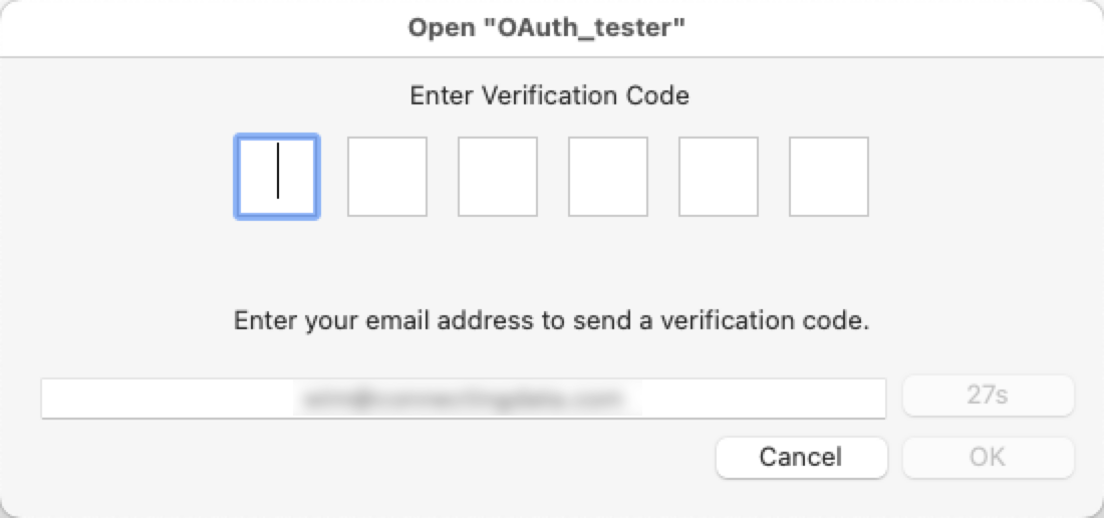
This is where your FileMaker Server SMTP settings come into play. FileMaker Server sends out the email with the one-time code, and the user has 5 minutes to enter it:
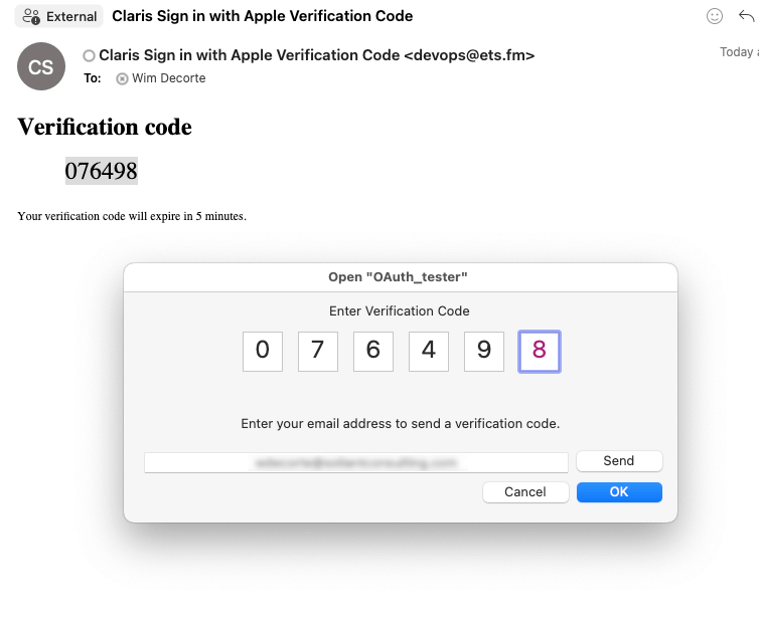
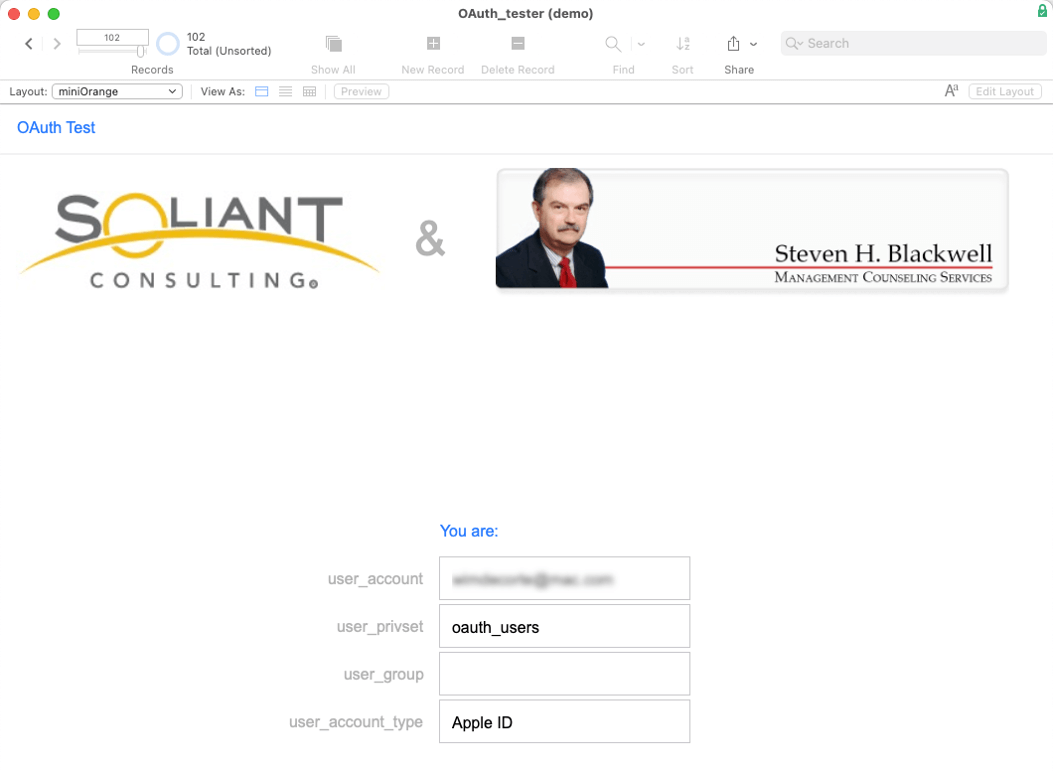
If the code is accepted, the user is let into the solution. The Get(AccountType) will say Apple ID, and their account name will be their Apple ID email.
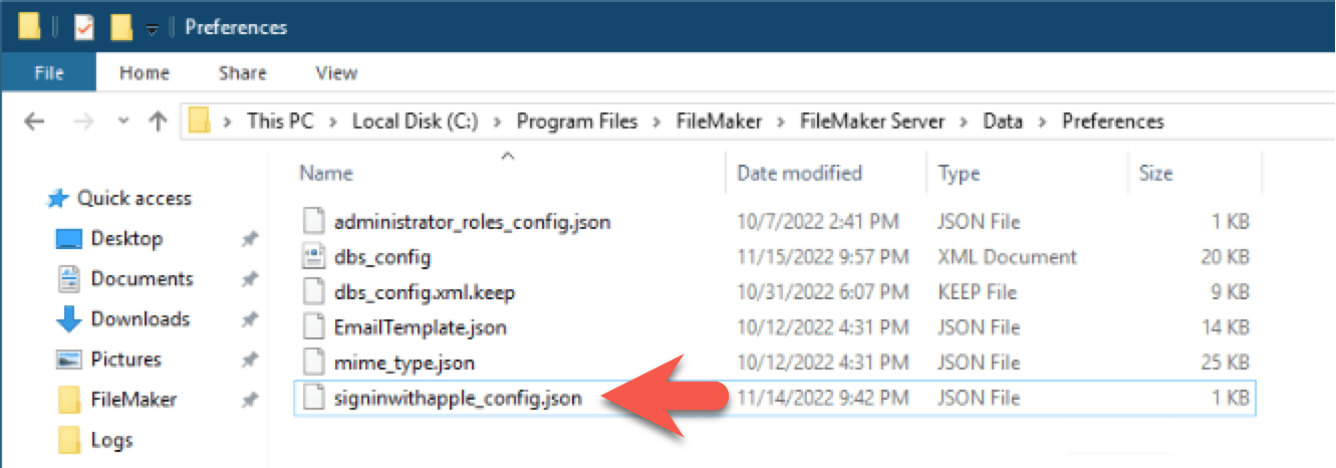
The next time the user logs into your solution, they will not need to use the one-time code method. FileMaker Server adds their account to an encrypted config file kept in the FileMaker Server preferences:
Hide My Email
One of the prominent features of Sign in with Apple is that it allows you to give out a randomized email address instead of your actual Apple ID email address.
Typically, this is done as part of the workflow when you sign up for a new service. FileMaker’s security scheme does not have a self-service sign-up process, so you will need to know what the user’s fake email address is ahead of time so that you can add it to the solution. Once you have done that, then the user can sign into your solution with that fake email address.
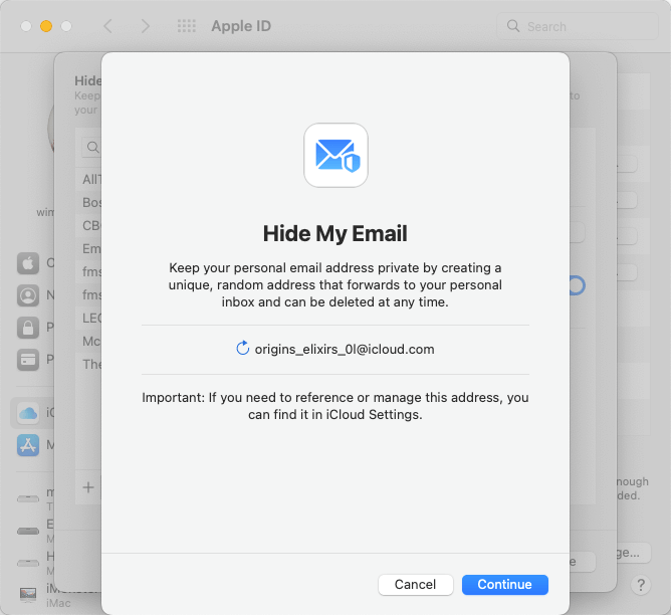
There are a few different ways that a user can generate such a fake email. If they are on macOS, they can go to System Preferences and select Apple ID and go into the Hide My Email options.
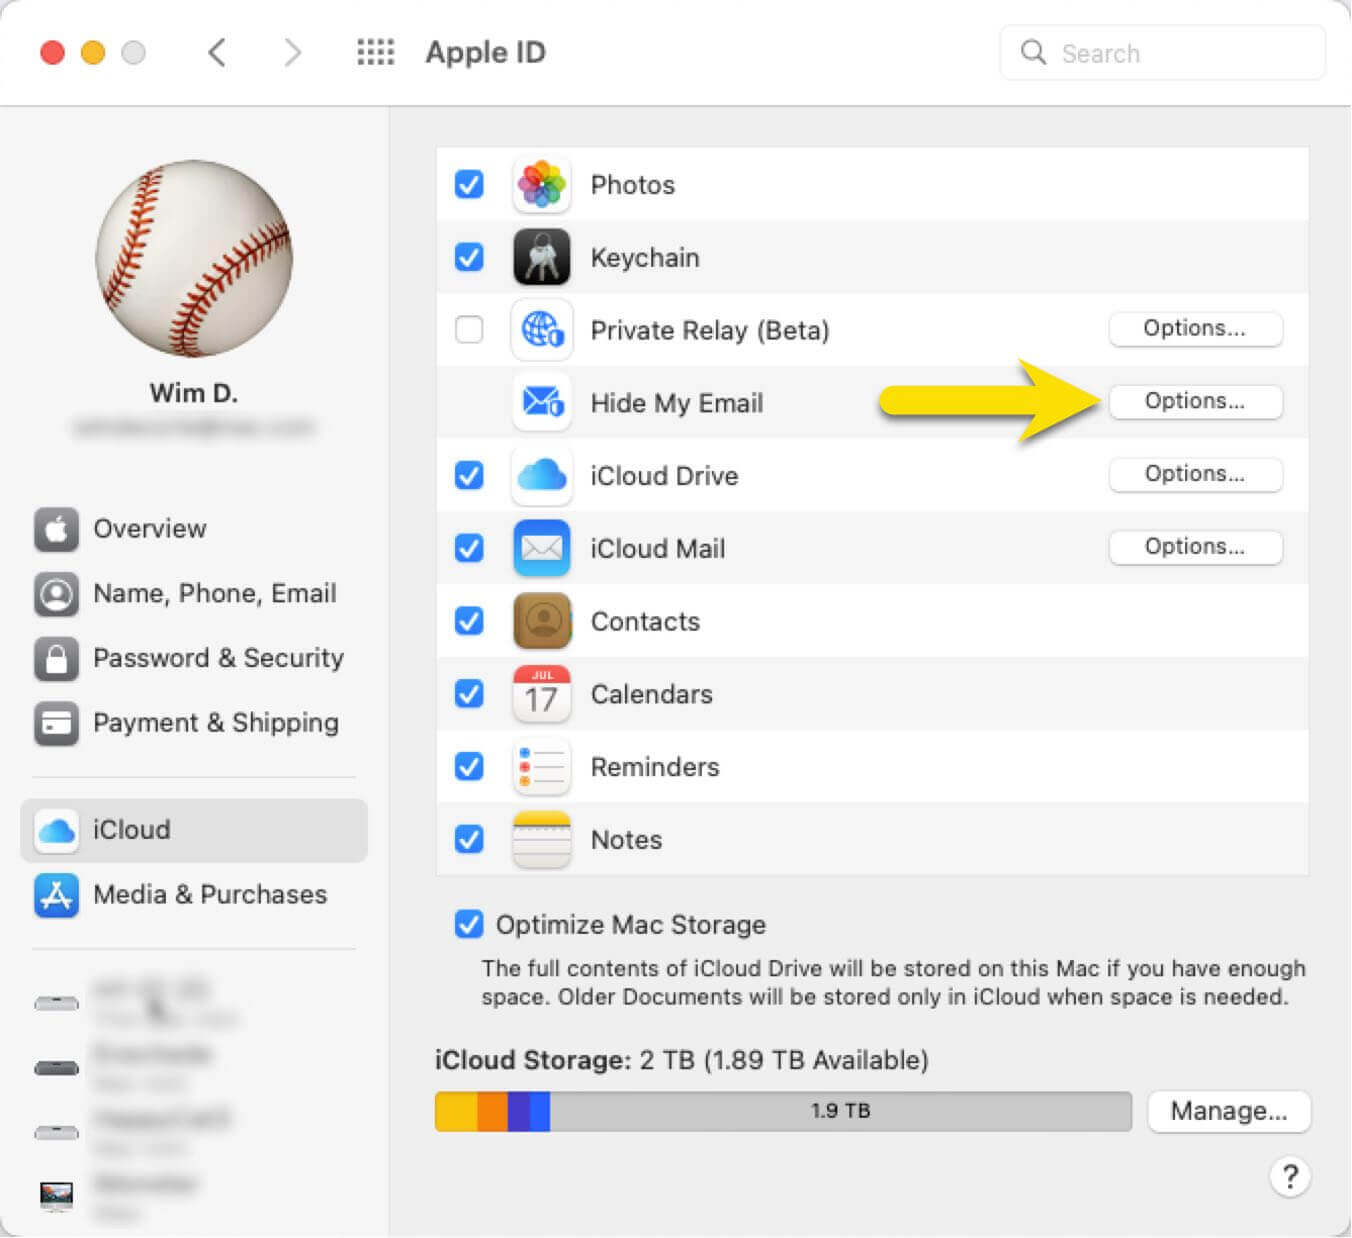
There they can add a new randomized fake email that will be linked to their Apple ID:
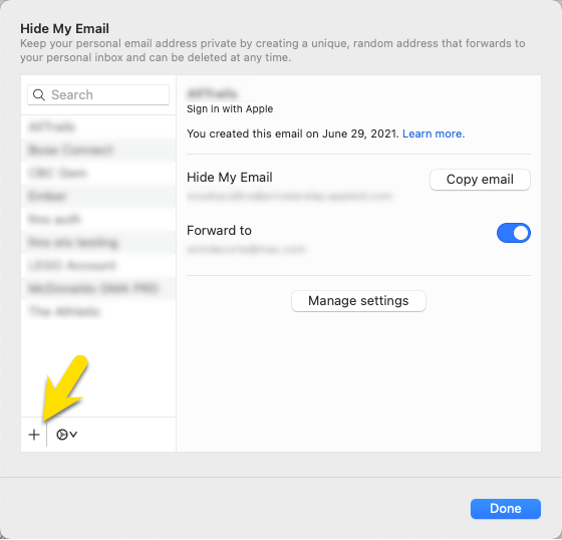
You can then add that email address to your accounts in the FileMaker solution:
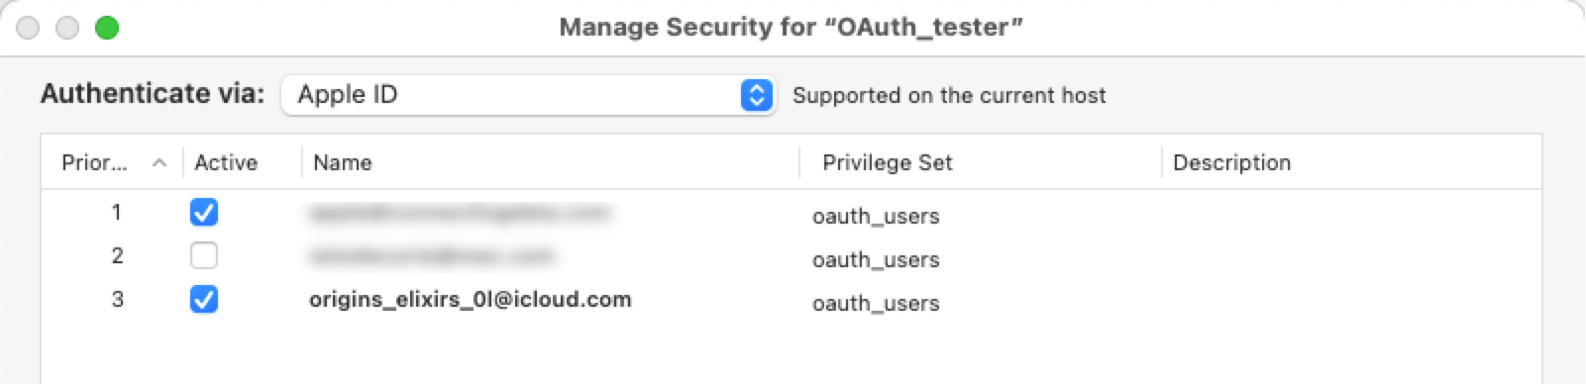
The user can then log into the solution by authenticating at Apple with their normal Apple ID credentials, but they will be known to your solution only as their alias.
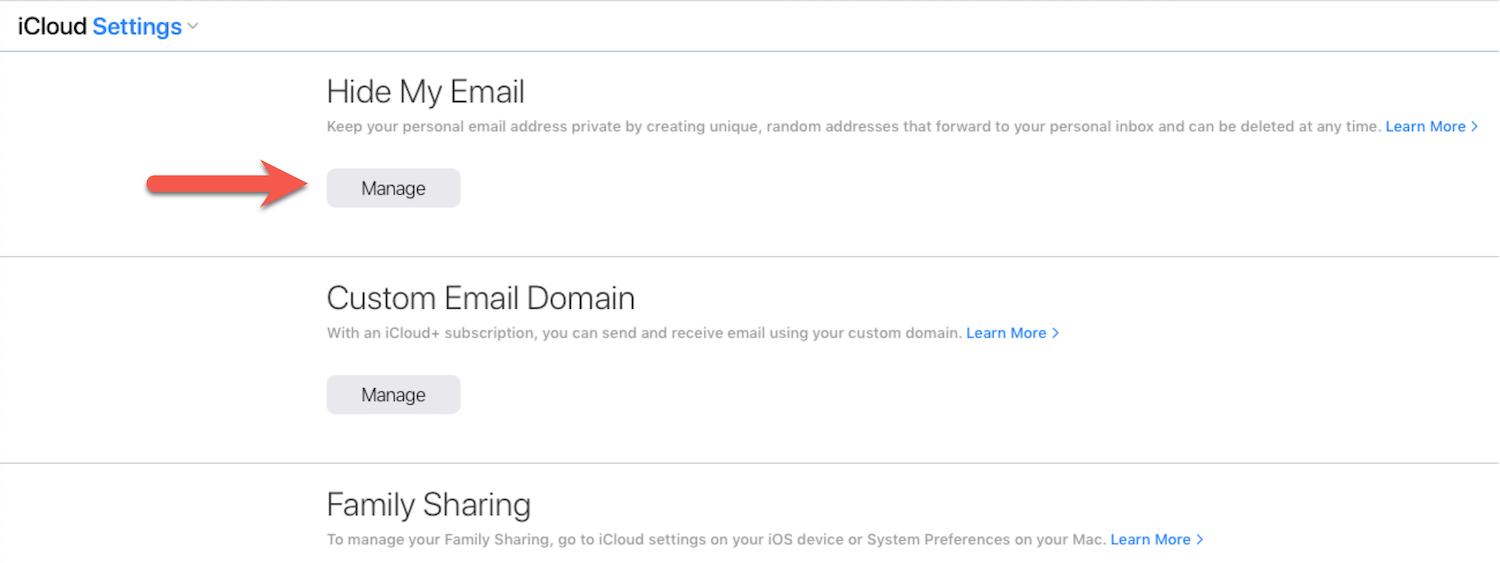
Users can also generate an alias email online in their iCloud settings:
Caveats
As mentioned earlier, you will need to set your FileMaker Server up with access to an SMTP account. If you do not want that, you can still use Sign in with Apple by adding it as a custom OAuth provider following the white paper linked earlier in this blog post. 
While it may be obvious, it is worth repeating: Apple IDs are individual accounts and need to be added as such to your FileMaker solution. There is no concept of groups, which can make account management a chore. If you need group-based privilege management in your solution, you can consider using an identity provider that allows the brokerage to SIWA.
Conclusion
While not exactly new, using Sign in with Apple now has a dedicated config area in FileMaker Server, which makes it easier to set up Apple ID as an authentication method.
If you are interested in what is possible with various OAuth-based identity providers and your FileMaker solutions, then you will find a whole series of blog posts here.
I’m lost at creating a client secret. there’s no link to Claris’ documentation regarding ruby, and the link to the GitHub code is broken… can you point me in the right direction?
Otherwise this article was really well laid out.
Hi Chris,
We still had the GitHub repo set to private; try the link again now and it should work.
Best regards,
Wim
Does Apple Business Manager with a verified domain now get around your caveat about no group-based privilege management for FileMaker?
No, I don’t believe so. ABM is not an OAuth/OIDC identity provider. However you can use a supported IdP such as Google Workspace or Entra for your ABM users and FM login alike, since ABM does support federation (letting another identity provider handle the authentication).